Tutorial for VCCFA Editors
This page will explain how to update the website content with WordPress and Divi builder.
1. Introduction
1.1. How to log in WordPress
1.2. WordPress Dashboard Overview
2. How to Make Posts
(News, President Letter, Initiatives)
3. How to Update Events
4. How to Update Files
4.1. Upload a File to Divi Library
4.2. Update a File on a Page
4.2.1. Collective Agreement
4.2.2. Seniority List
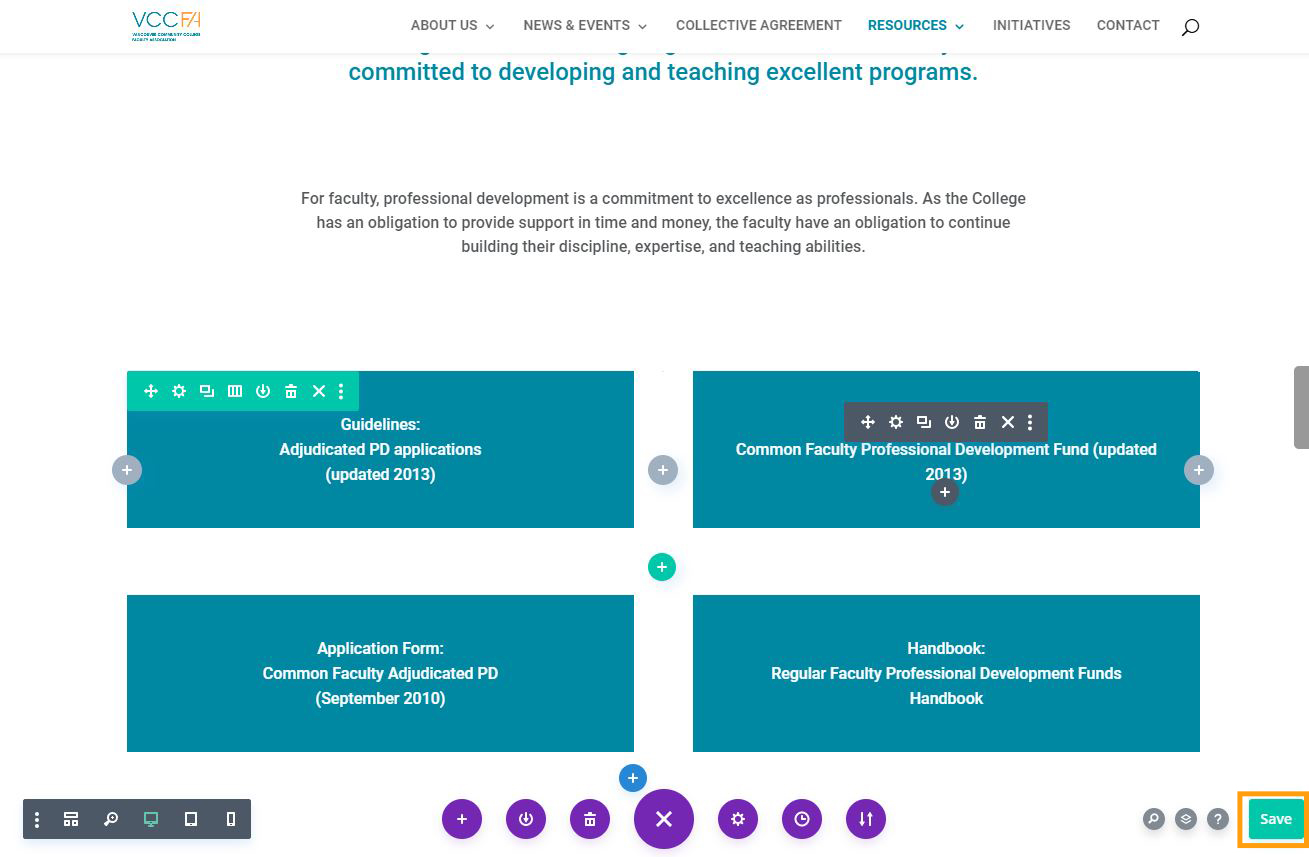
4.2.3. Professional Development
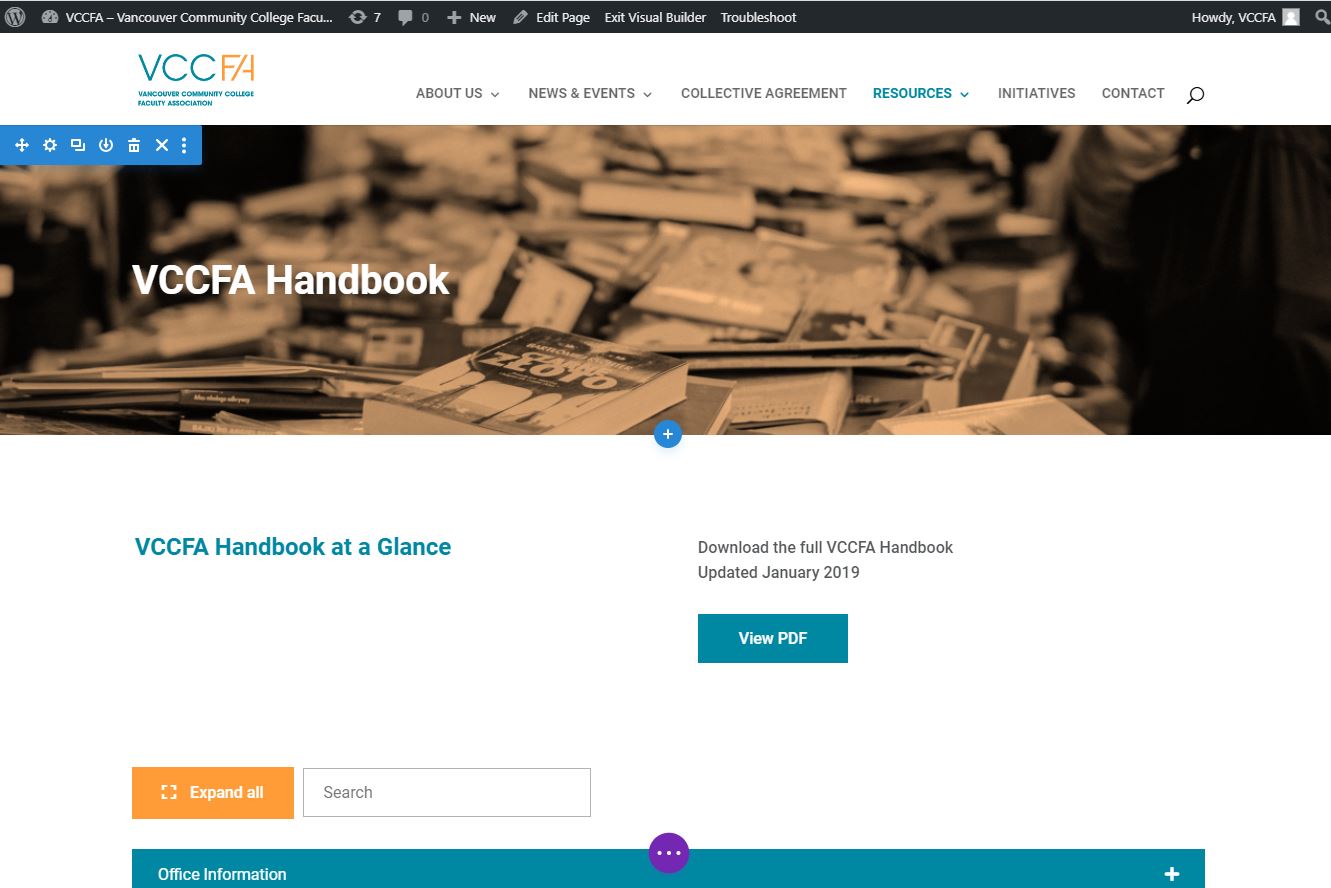
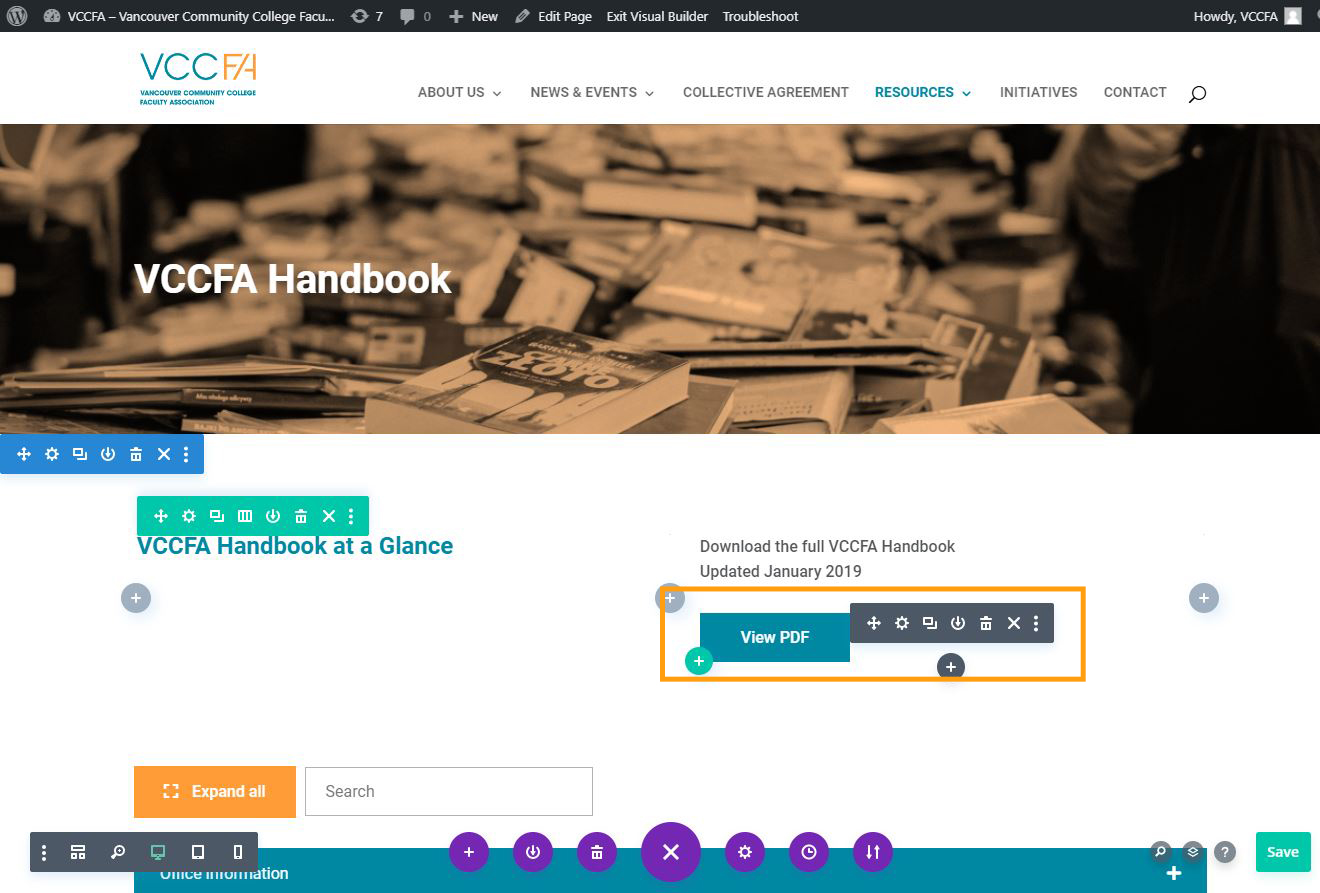
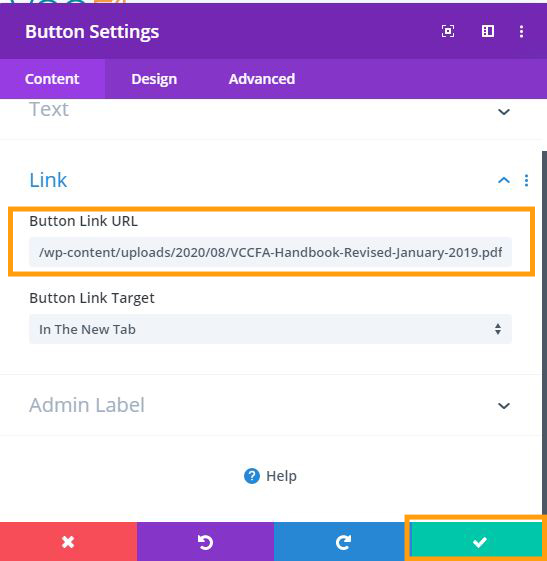
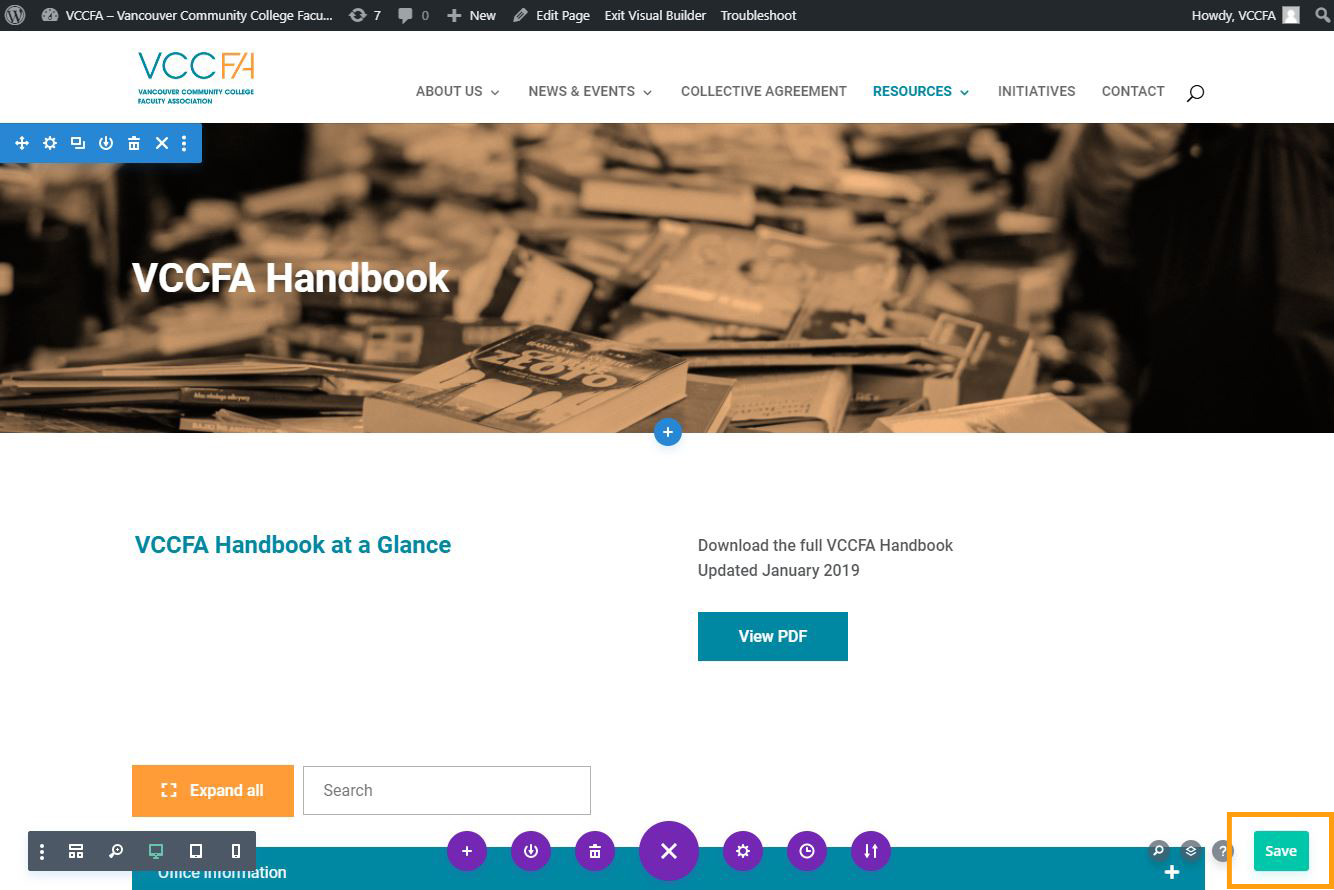
4.2.4. VCCFA Handbook
5. How to Update Accordions
5.1. About Accordions Menu
5.2. How to Update Accordion Contents
5.2.1. Edit the Header Title and Text
5.2.2. Edit a page link
5.2.3. Edit a PDF Link
5.3. How to Add a New Accordion
5.3.1. Add a New Title Inside an Accordion
5.3.2. Add a New Nested Accordion
6. How to Update Contact Information
7. How to Update Footer Contents
7.1. Edit Quick Links
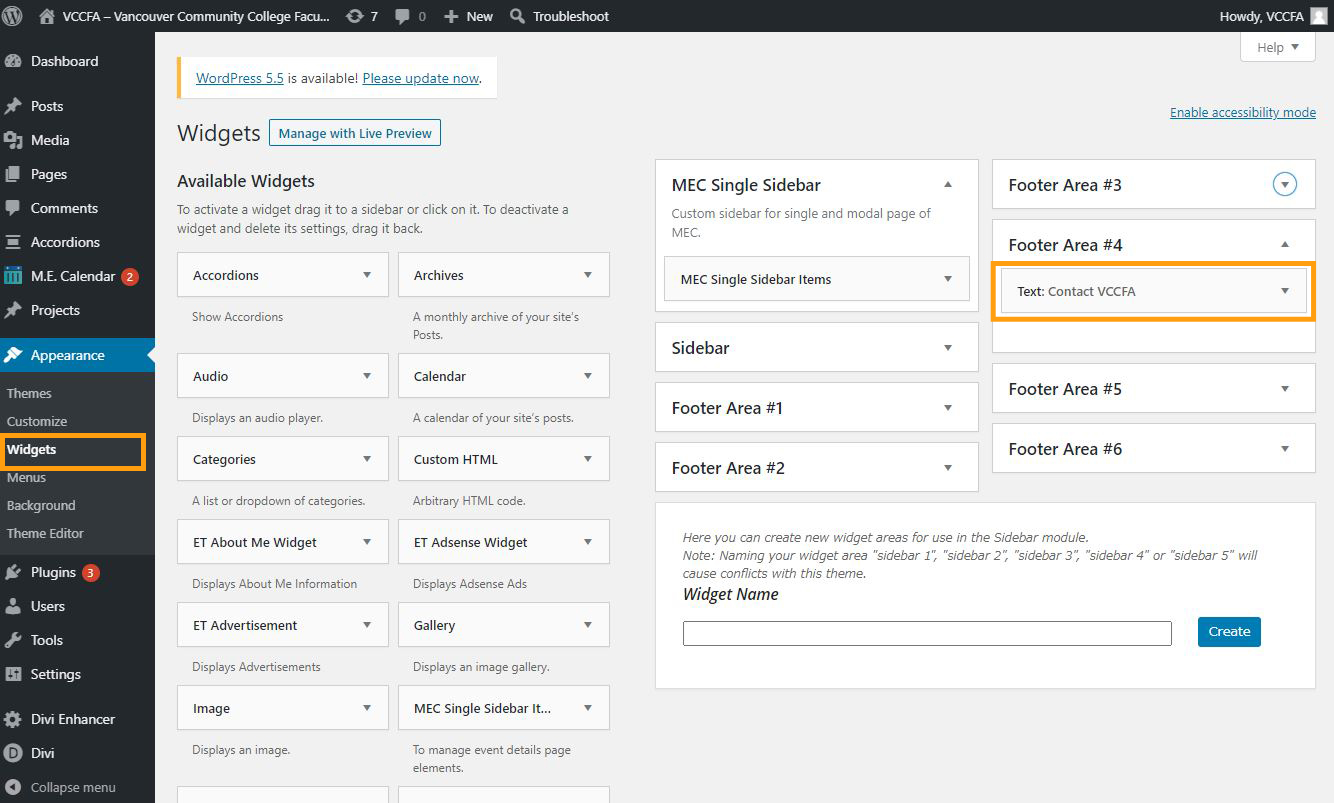
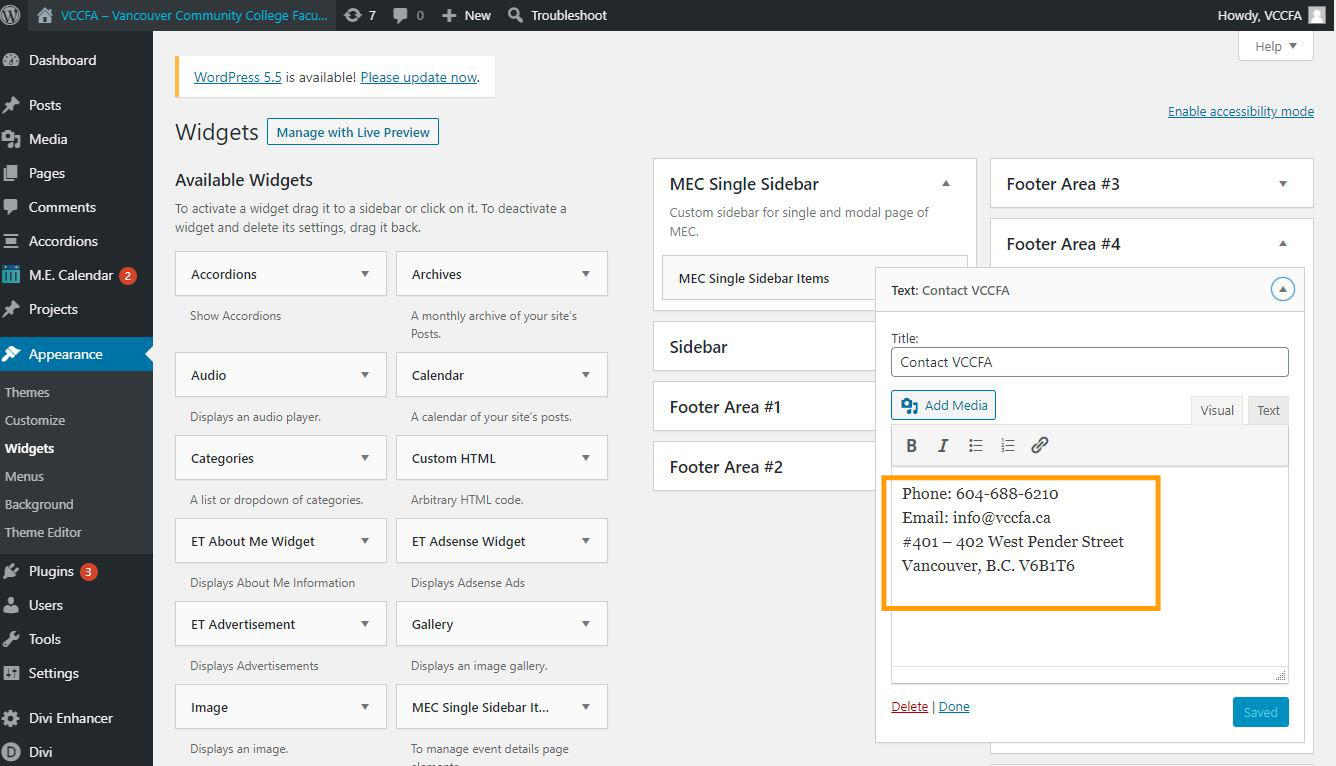
7.2. Edit Address
8. How to Restore a Page
1.1 How to log in WordPress
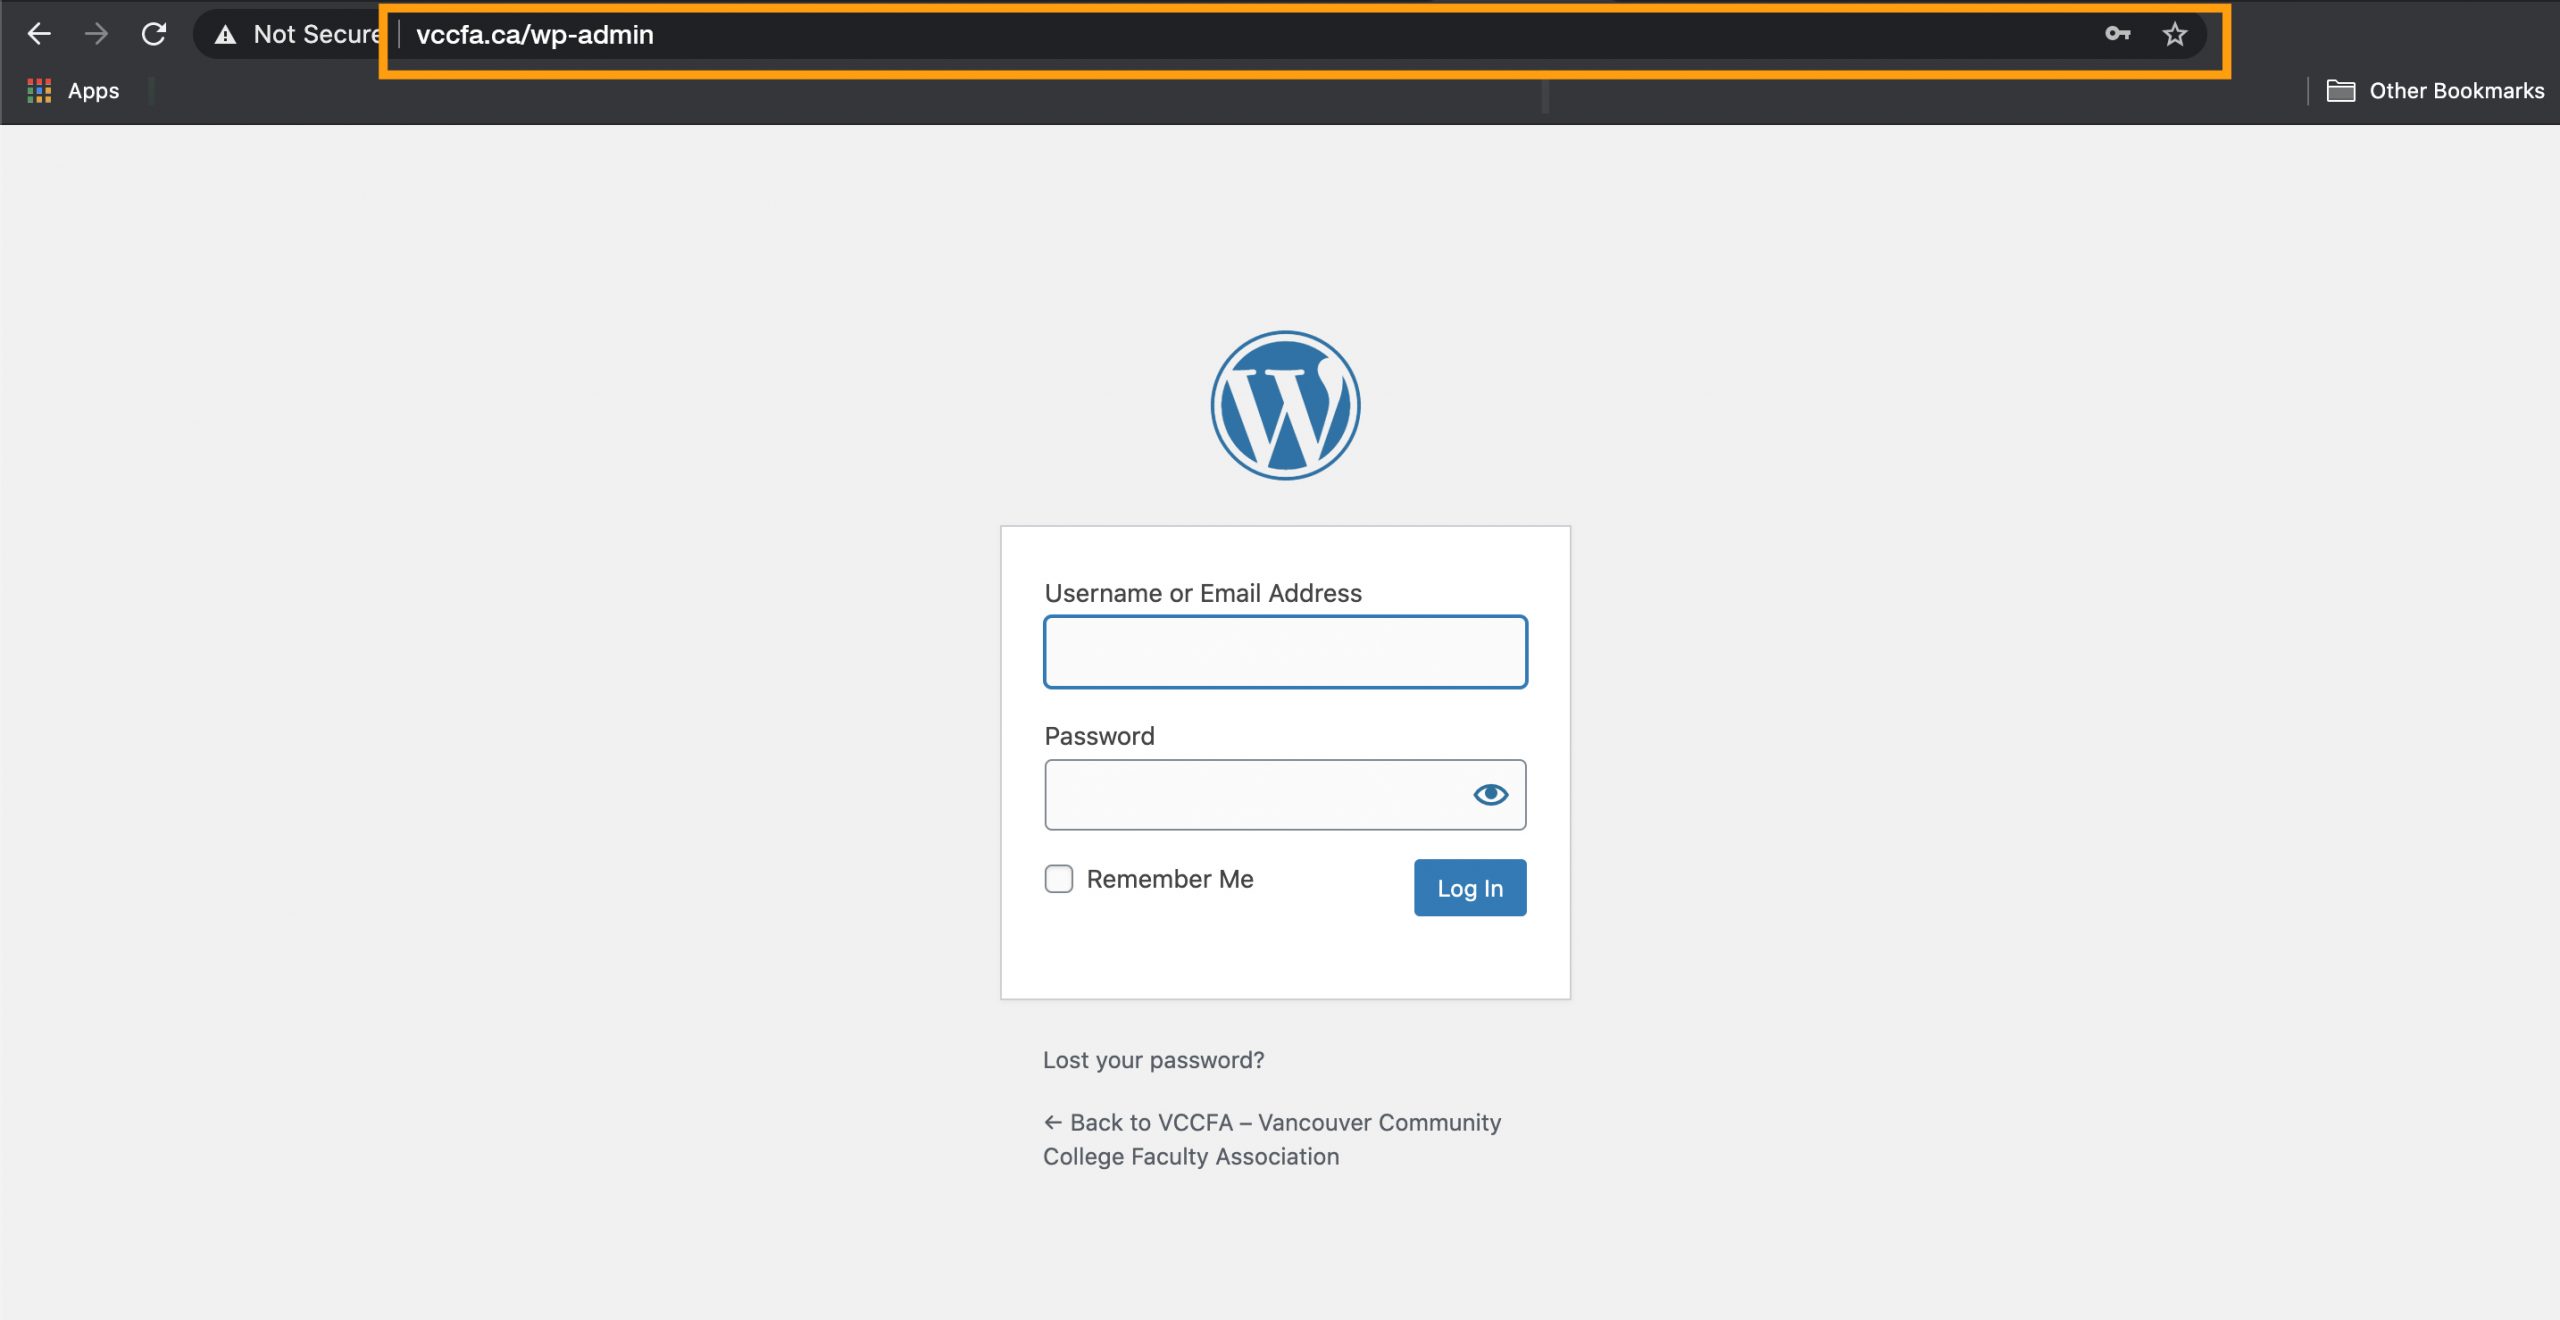
Username: TBC
Password: TBC
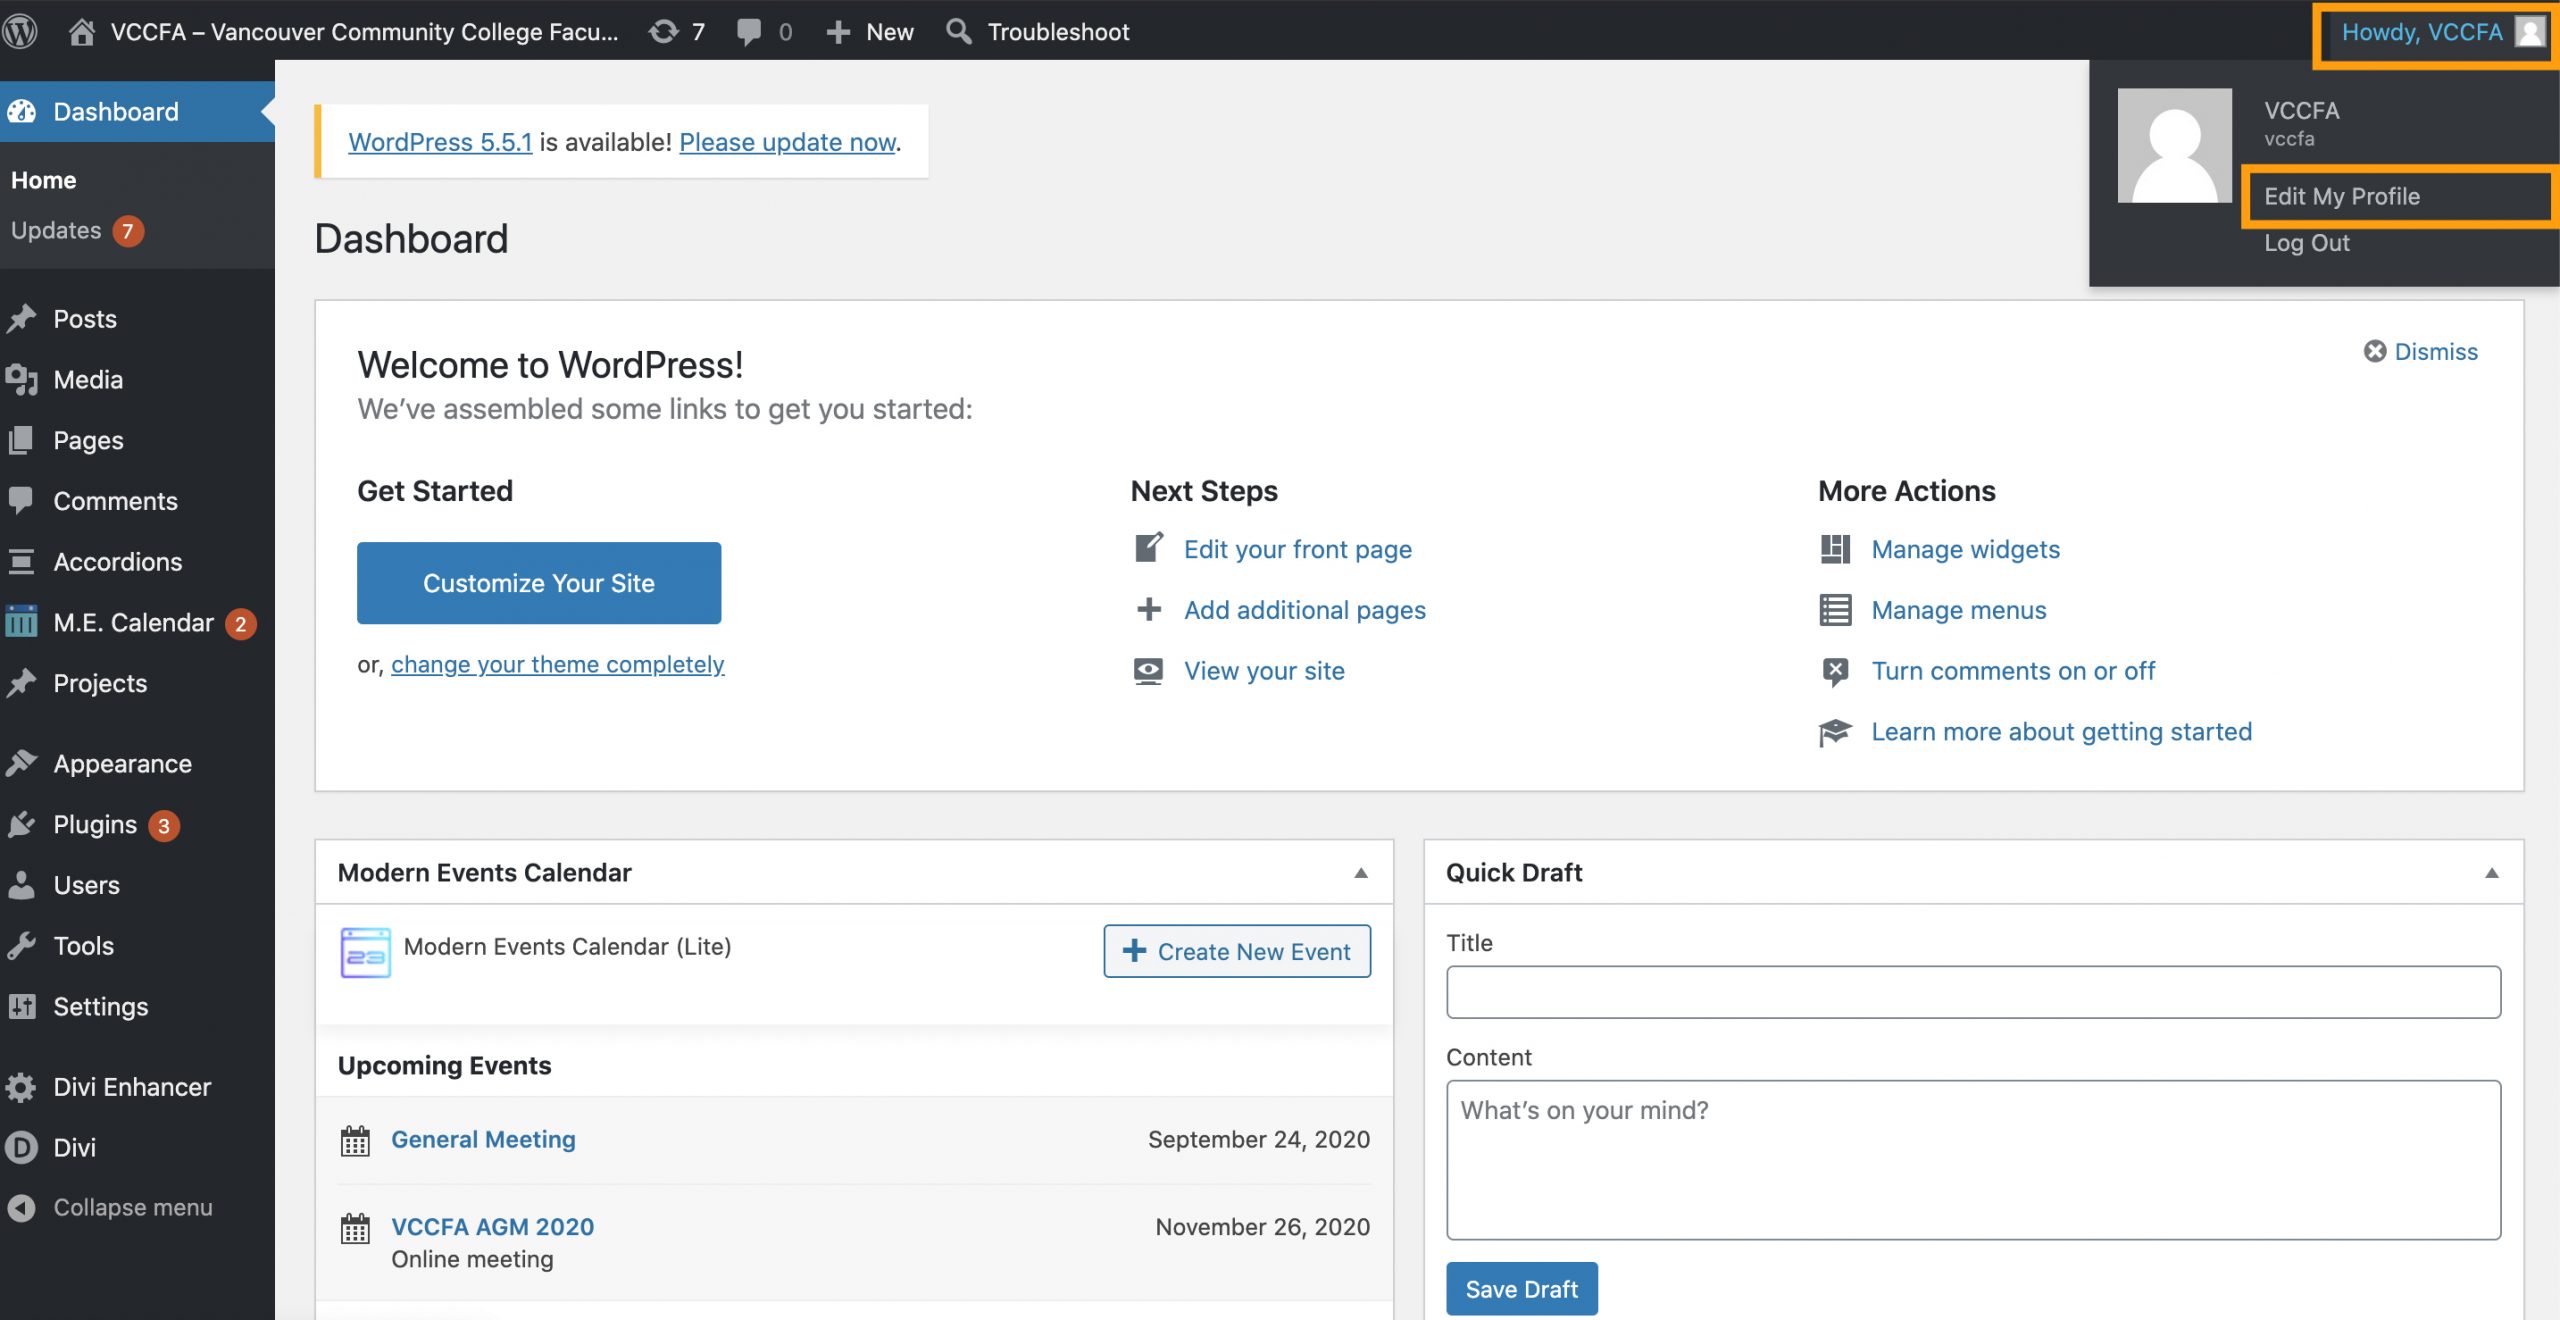
You can update the nickname, contact info, profile picture, and password.
1.2 WordPress Dashboard Overview
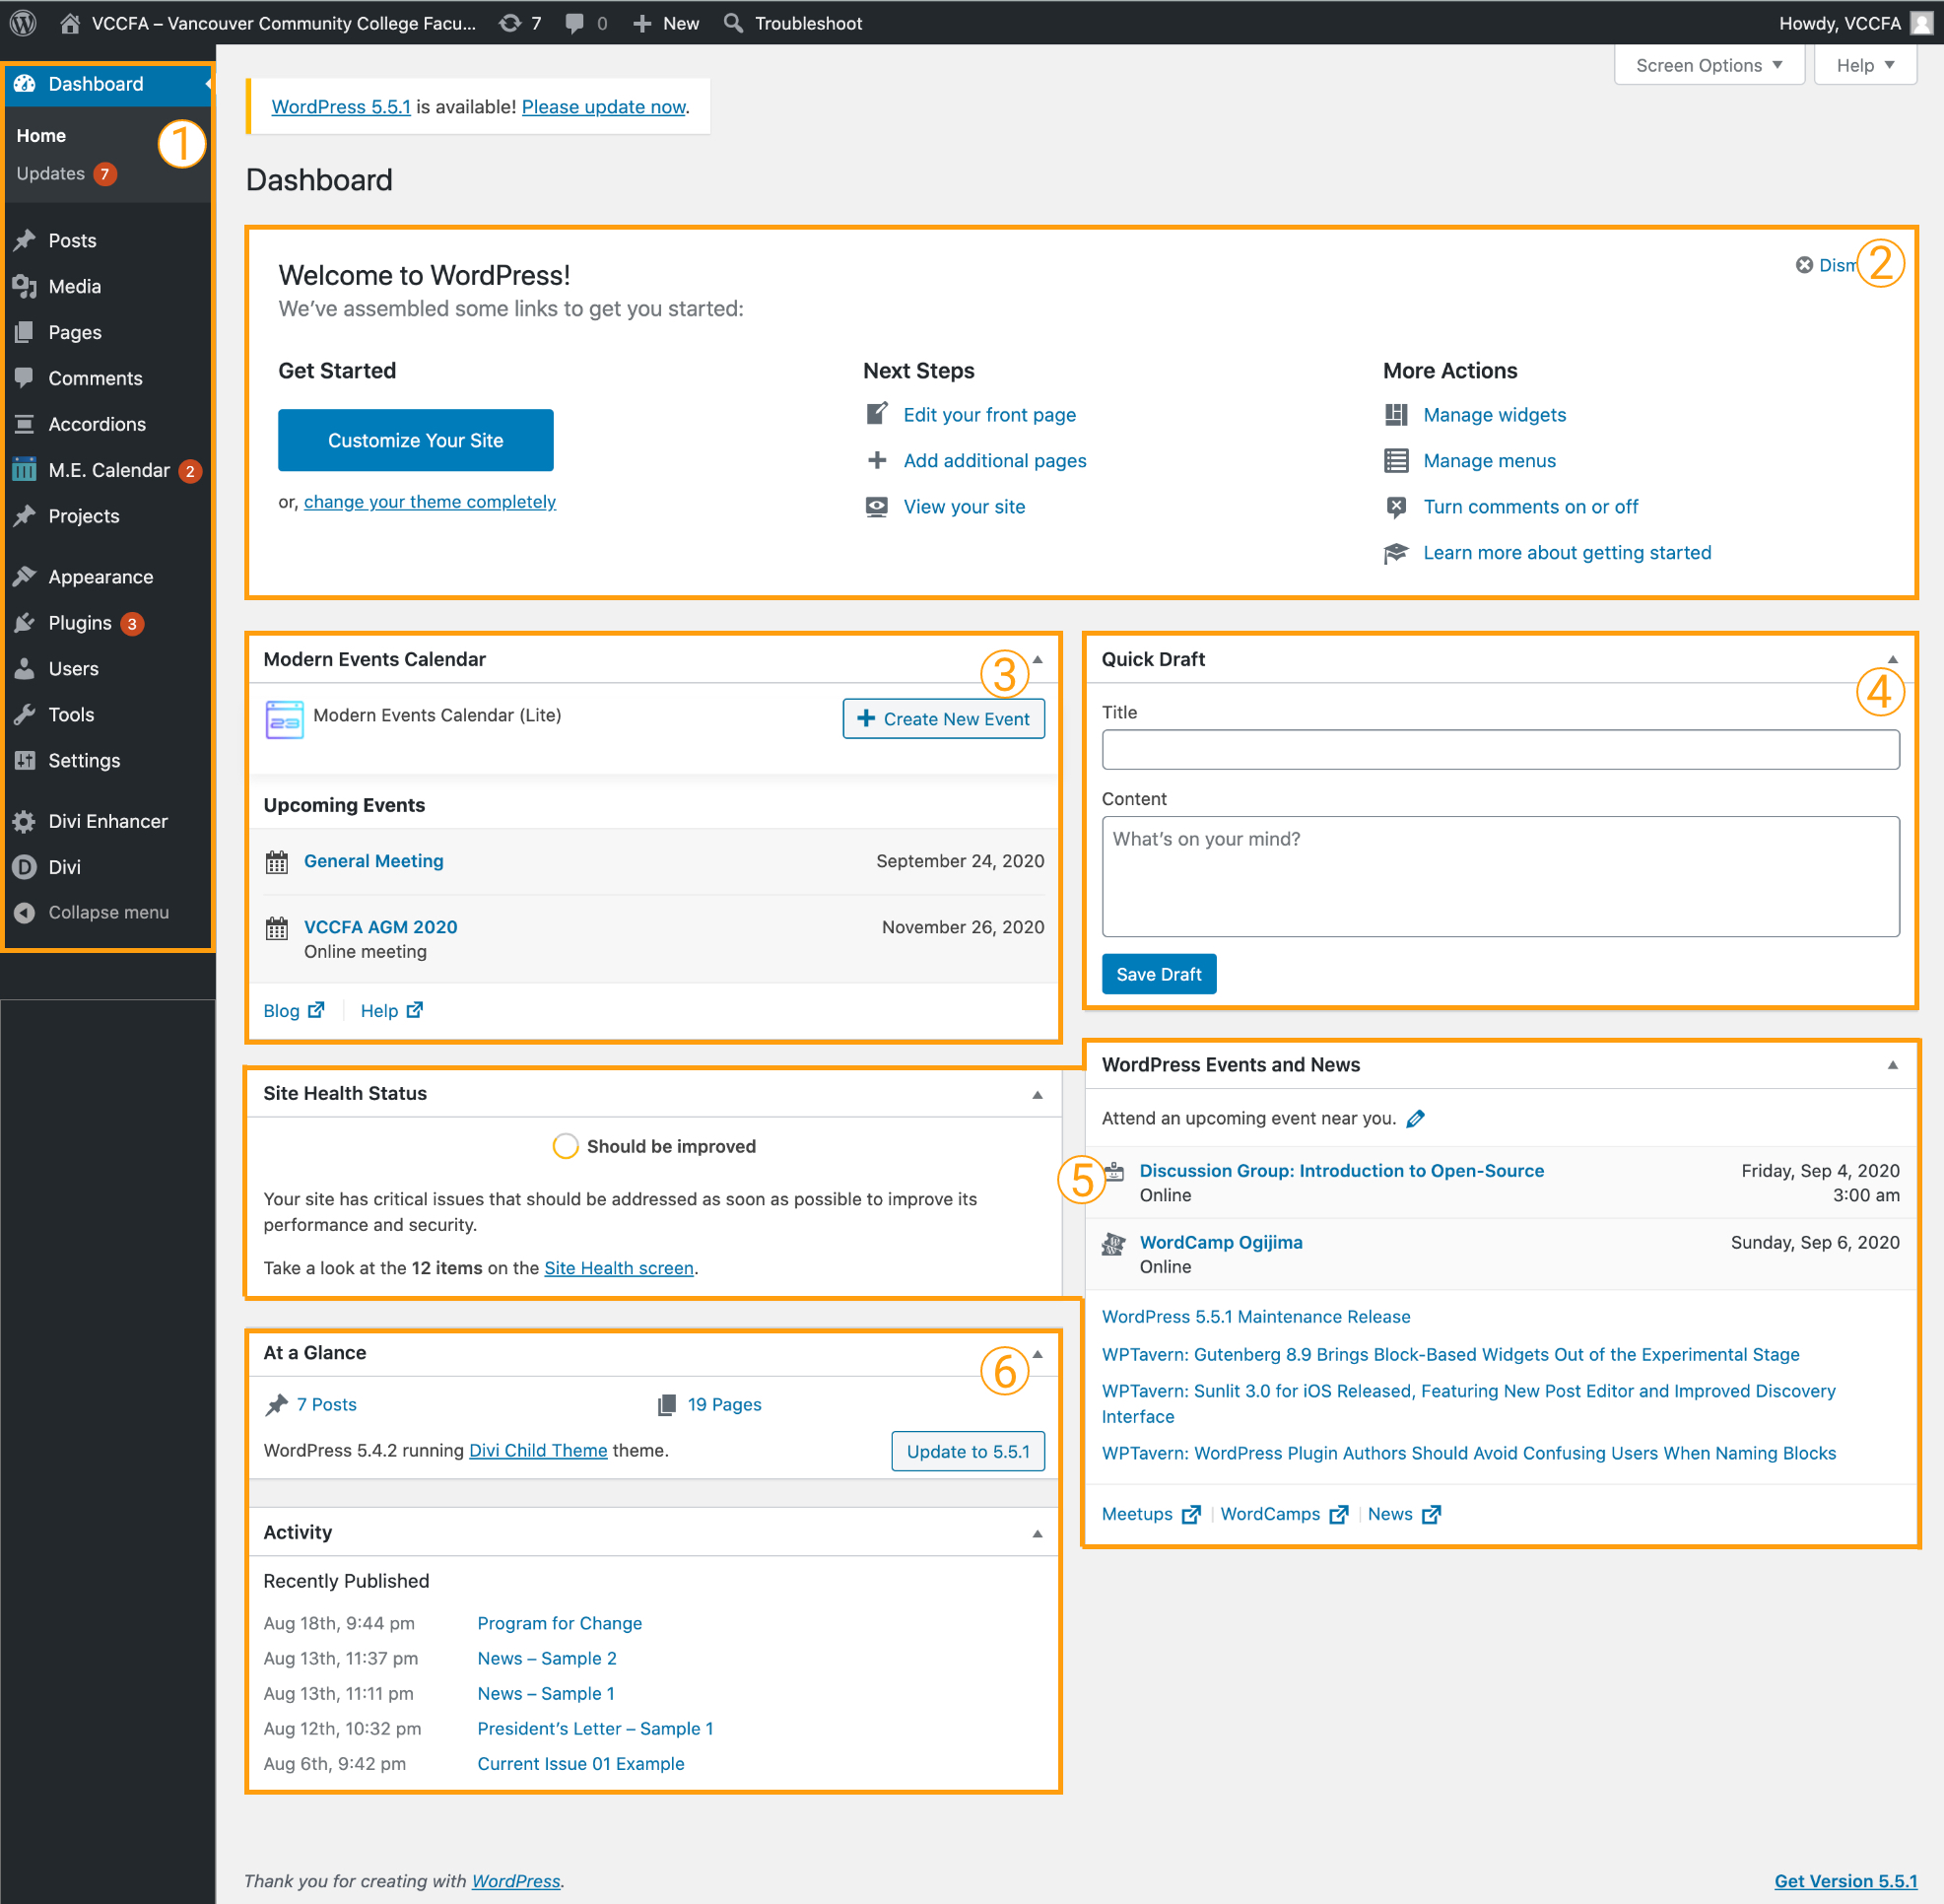
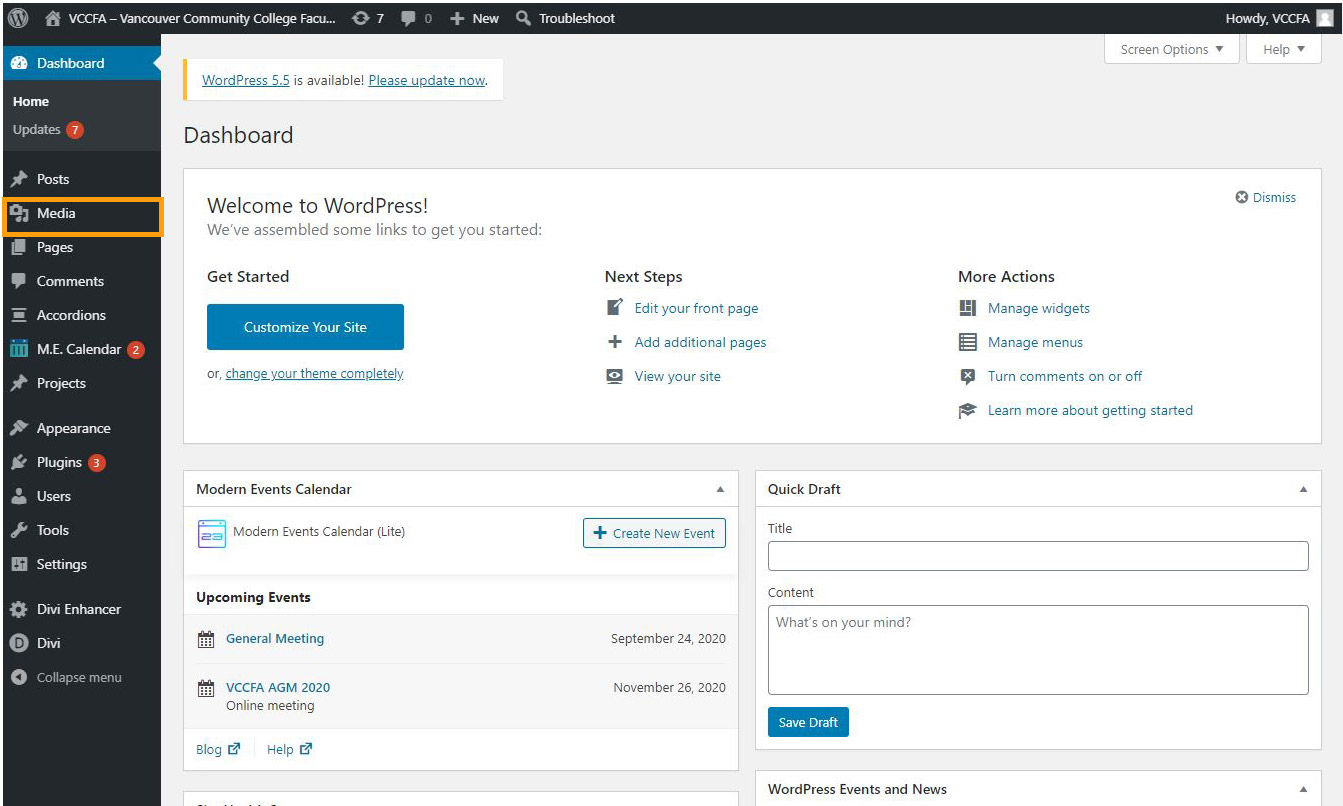
- Dashboard Menu: The WordPress Dashboard provides a navigation menu that contains some menu options such as posts, media library, pages, comments, appearance options, plugins, users, tools and settings on the left side.
- Welcome: Short links for customizing the site. Do not worry about this part.
- Events Calendar: This is where you can create events.
- Quick Draft: The Quick Draft is a mini post editor which allows writing, saving and publishing a post from the admin dashboard. It includes the title for the draft, some notes about the draft and save it as a Draft. For making new posts, such as President Letters, better create them in the Posts page.
- Site Health & WordPress events and news: Do not worry about this part.
- At a Glance: This section gives an overview of your blog’s posts, number of published posts and pages, and number of comments. When you click on these links, you will be taken to the respective screen. It displays the current version of running WordPress along with the currently running theme on the site.
2. How to Update Post
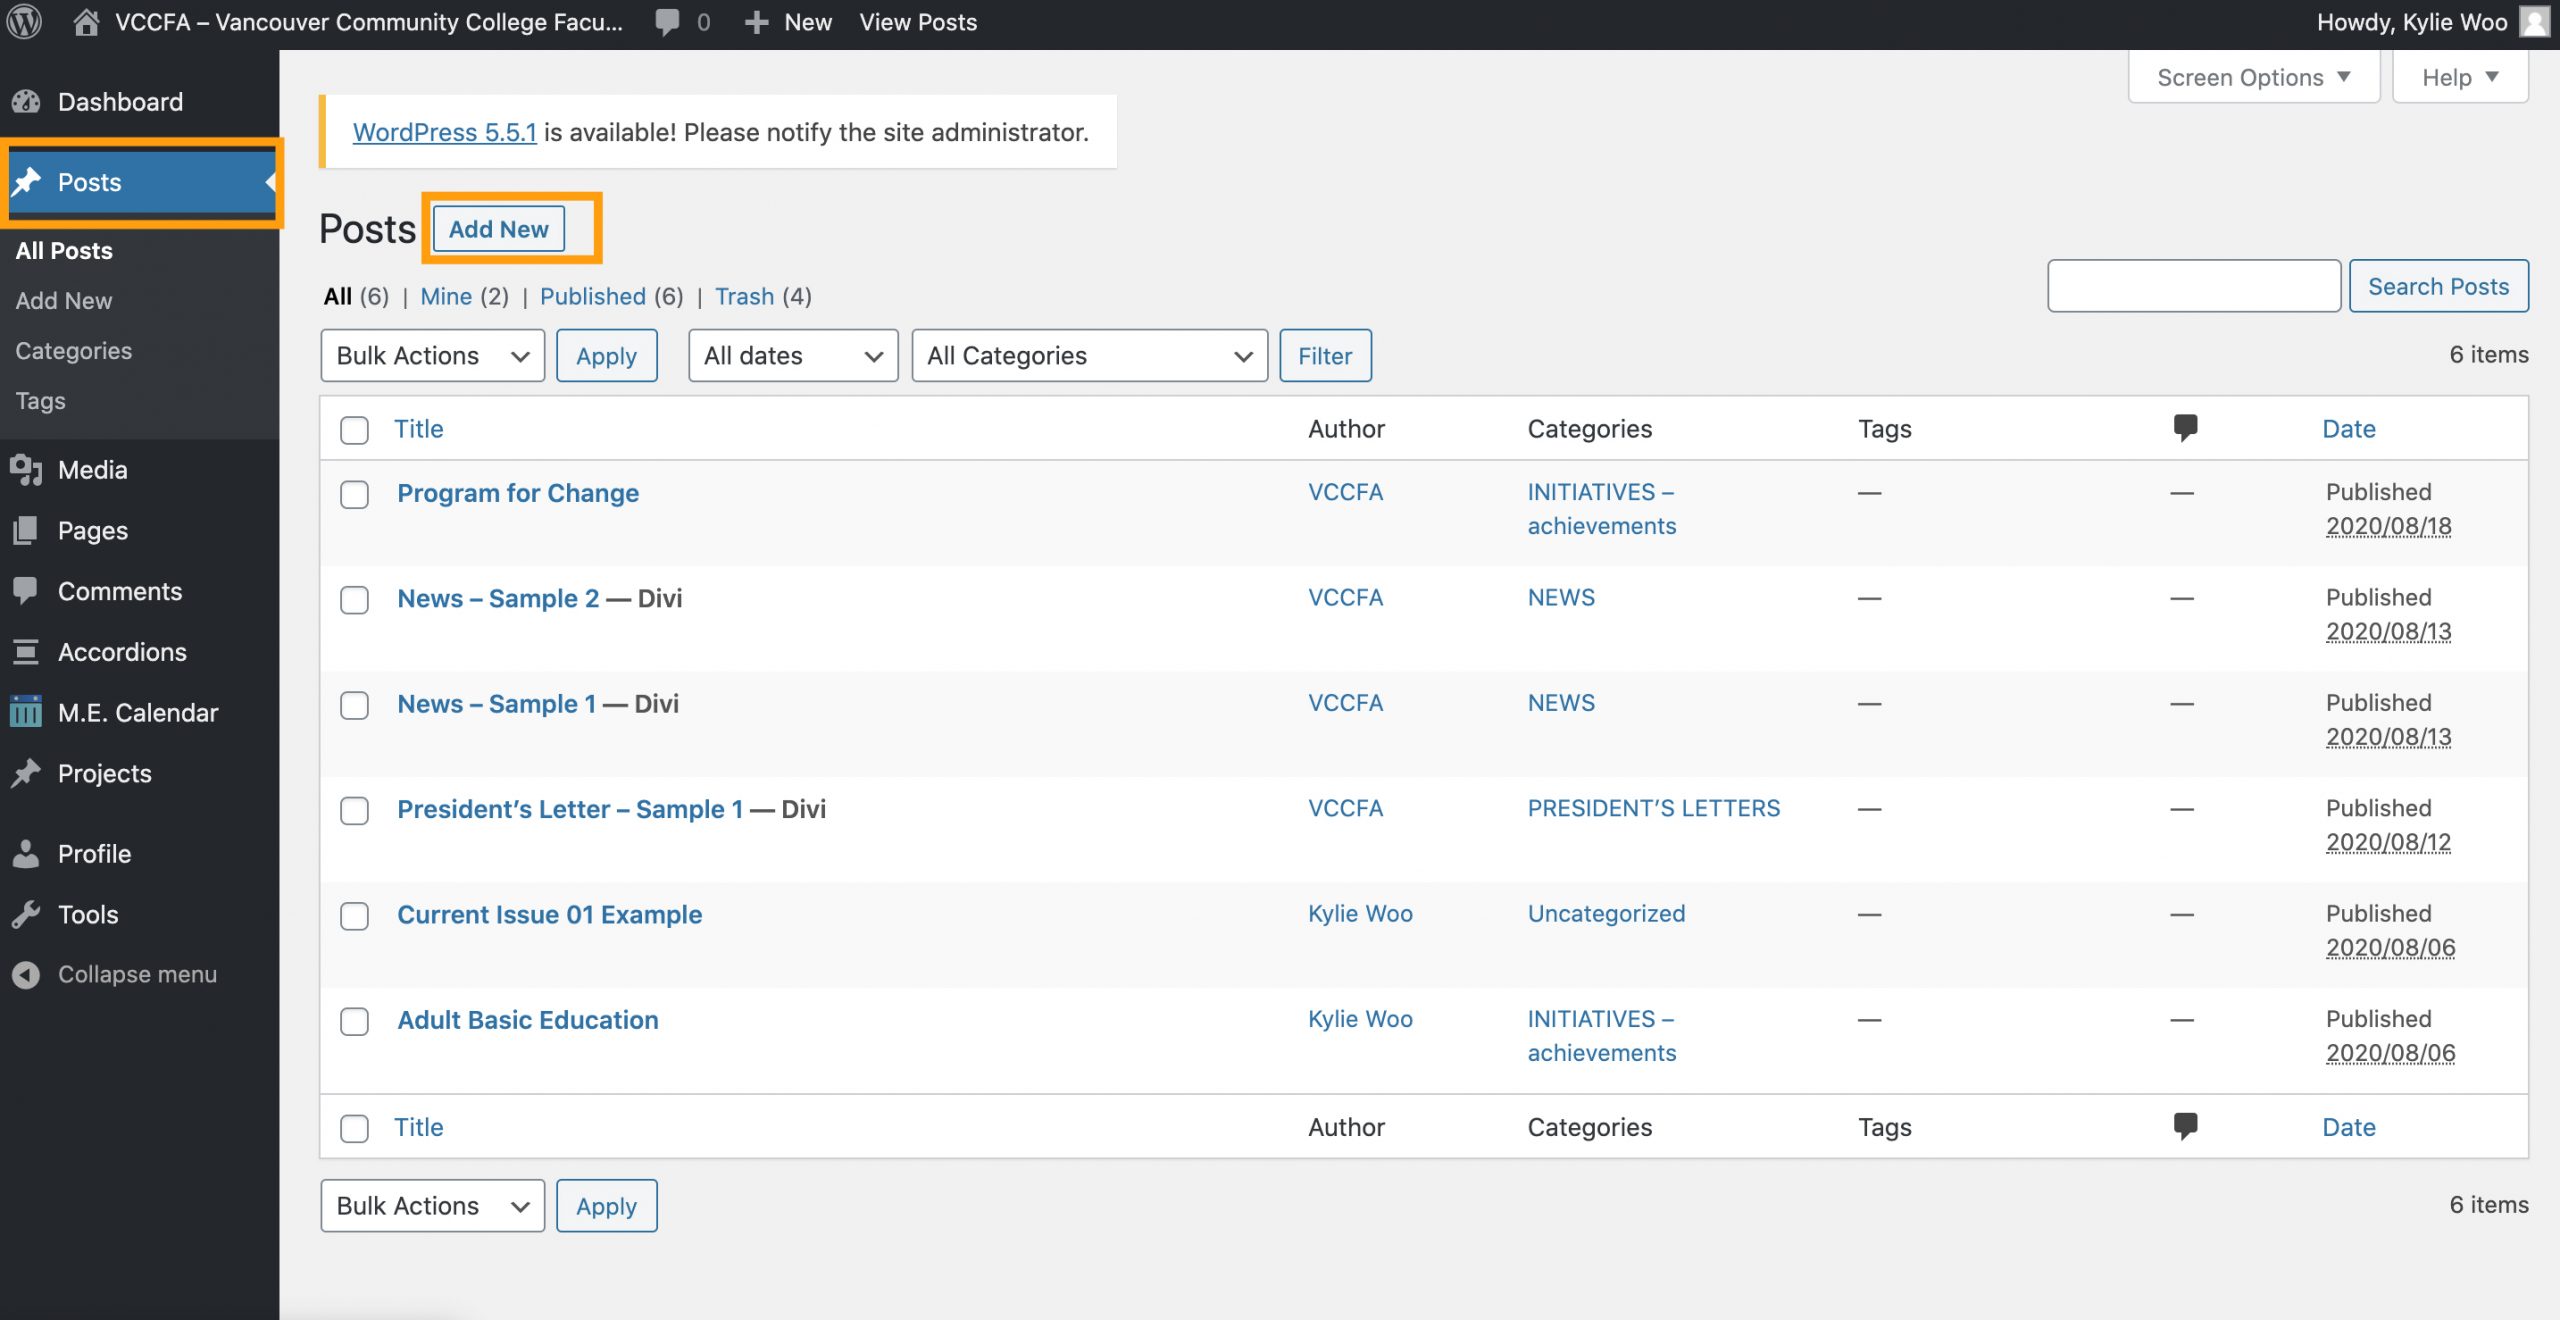
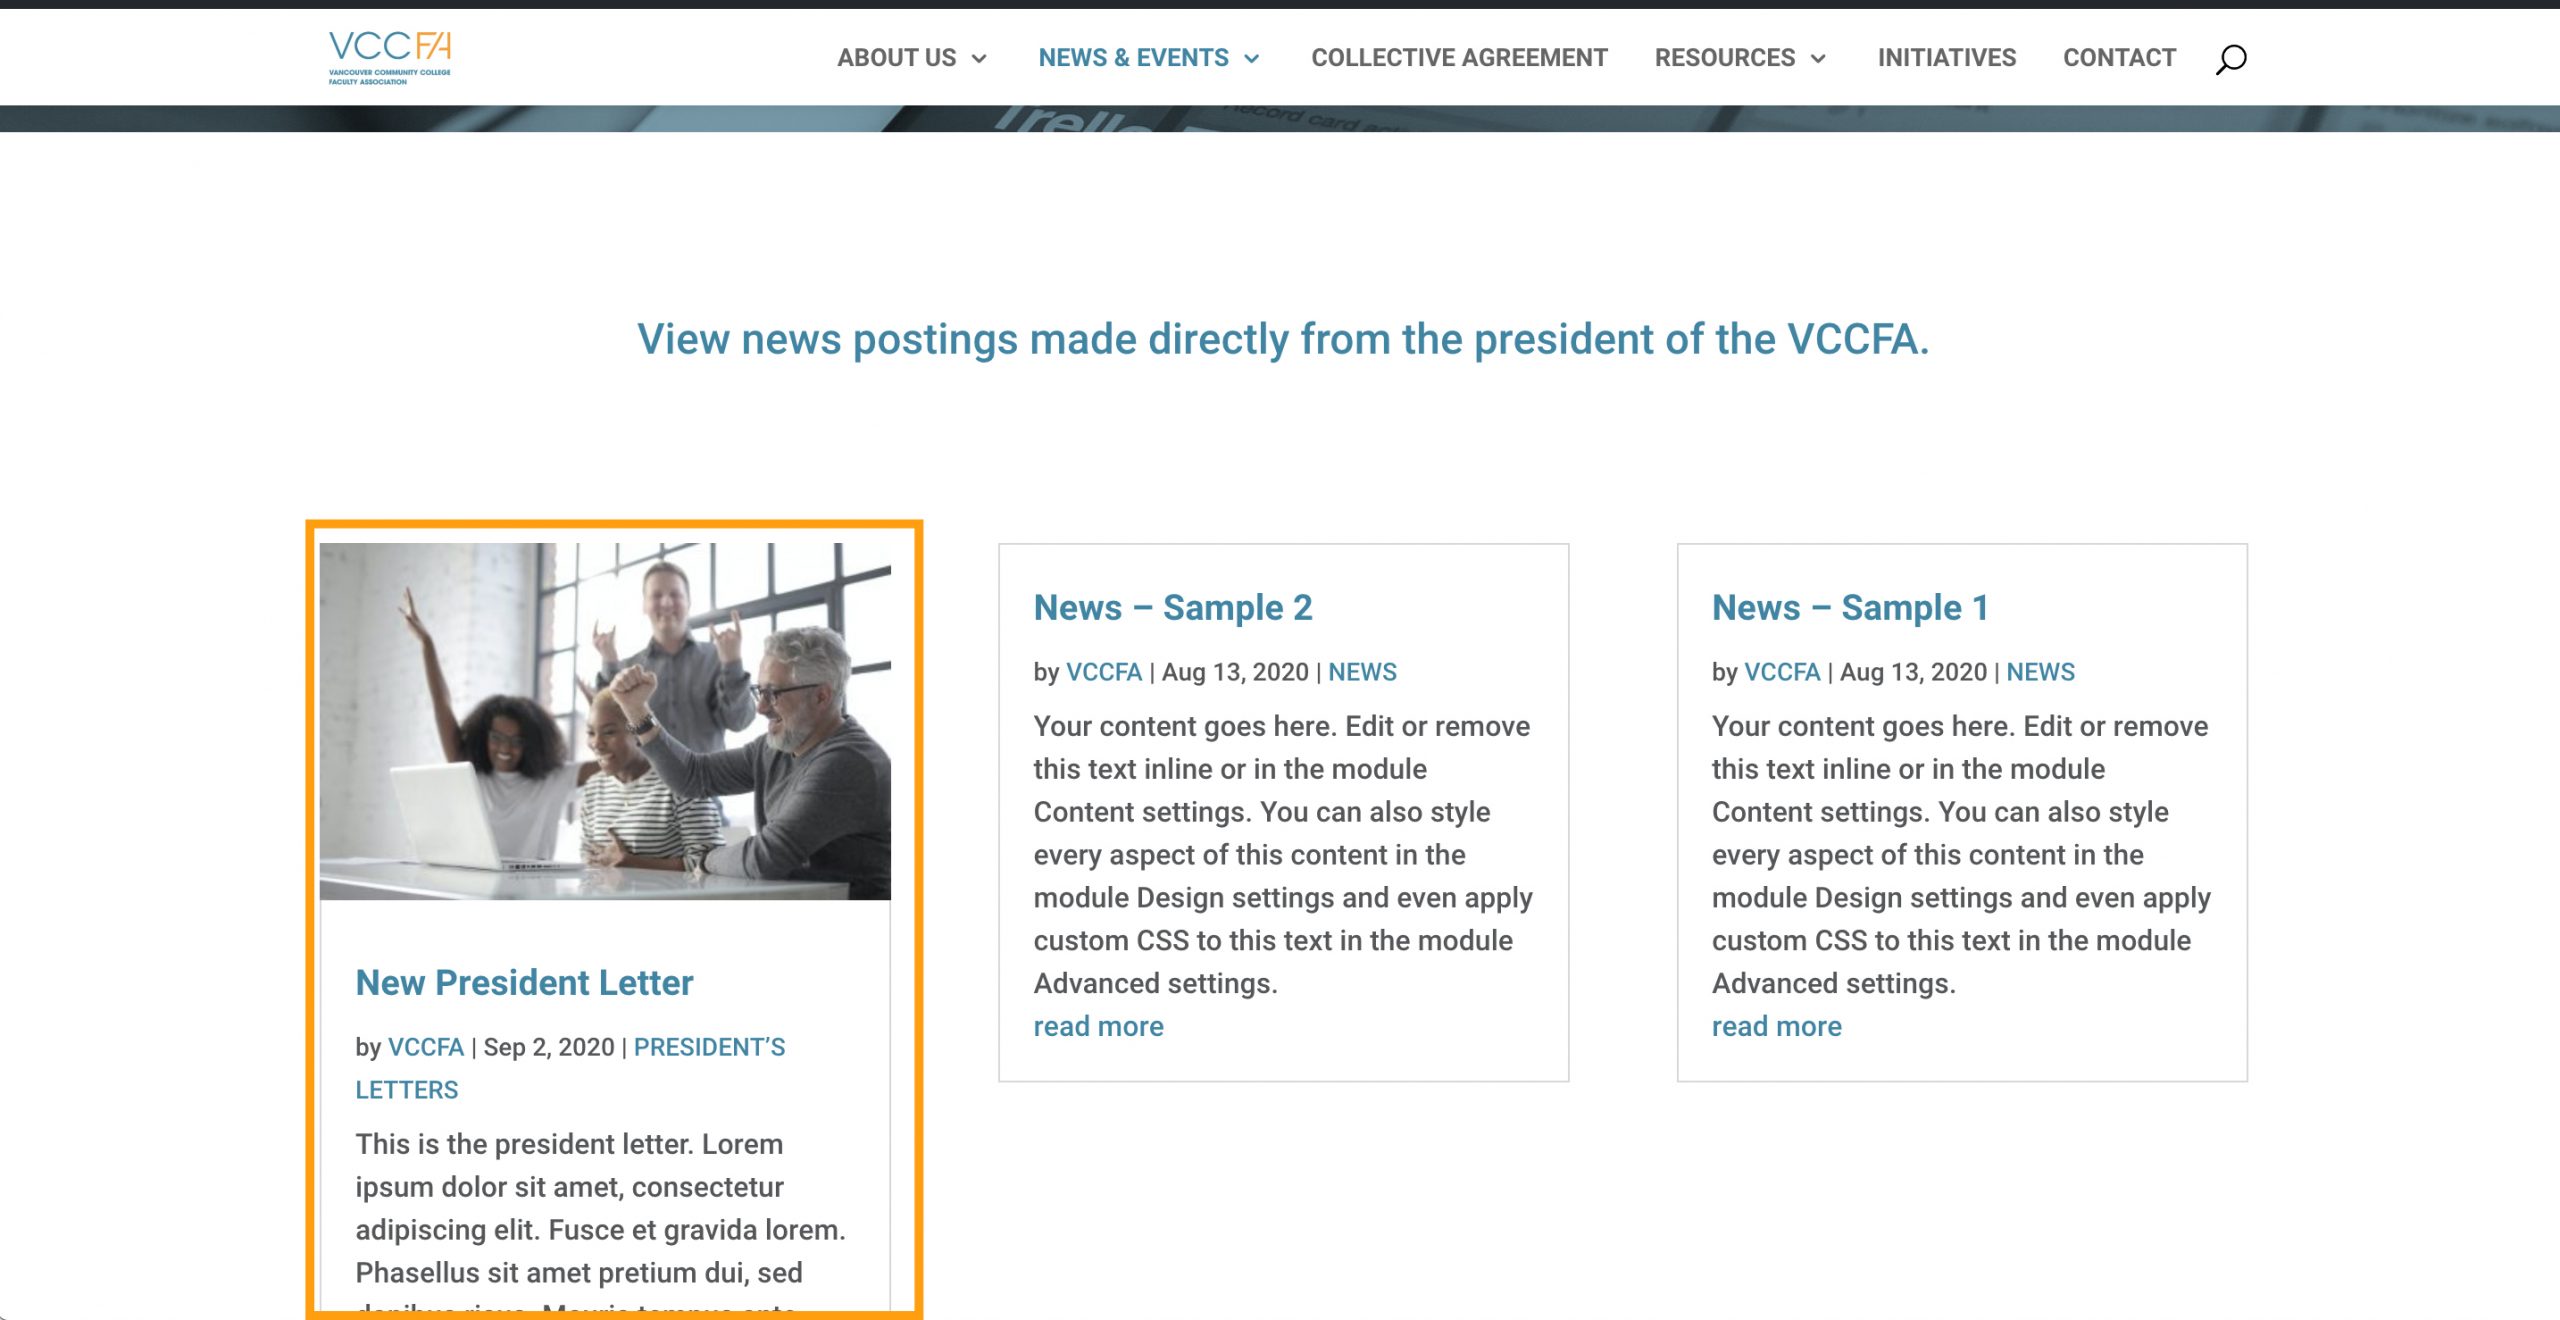
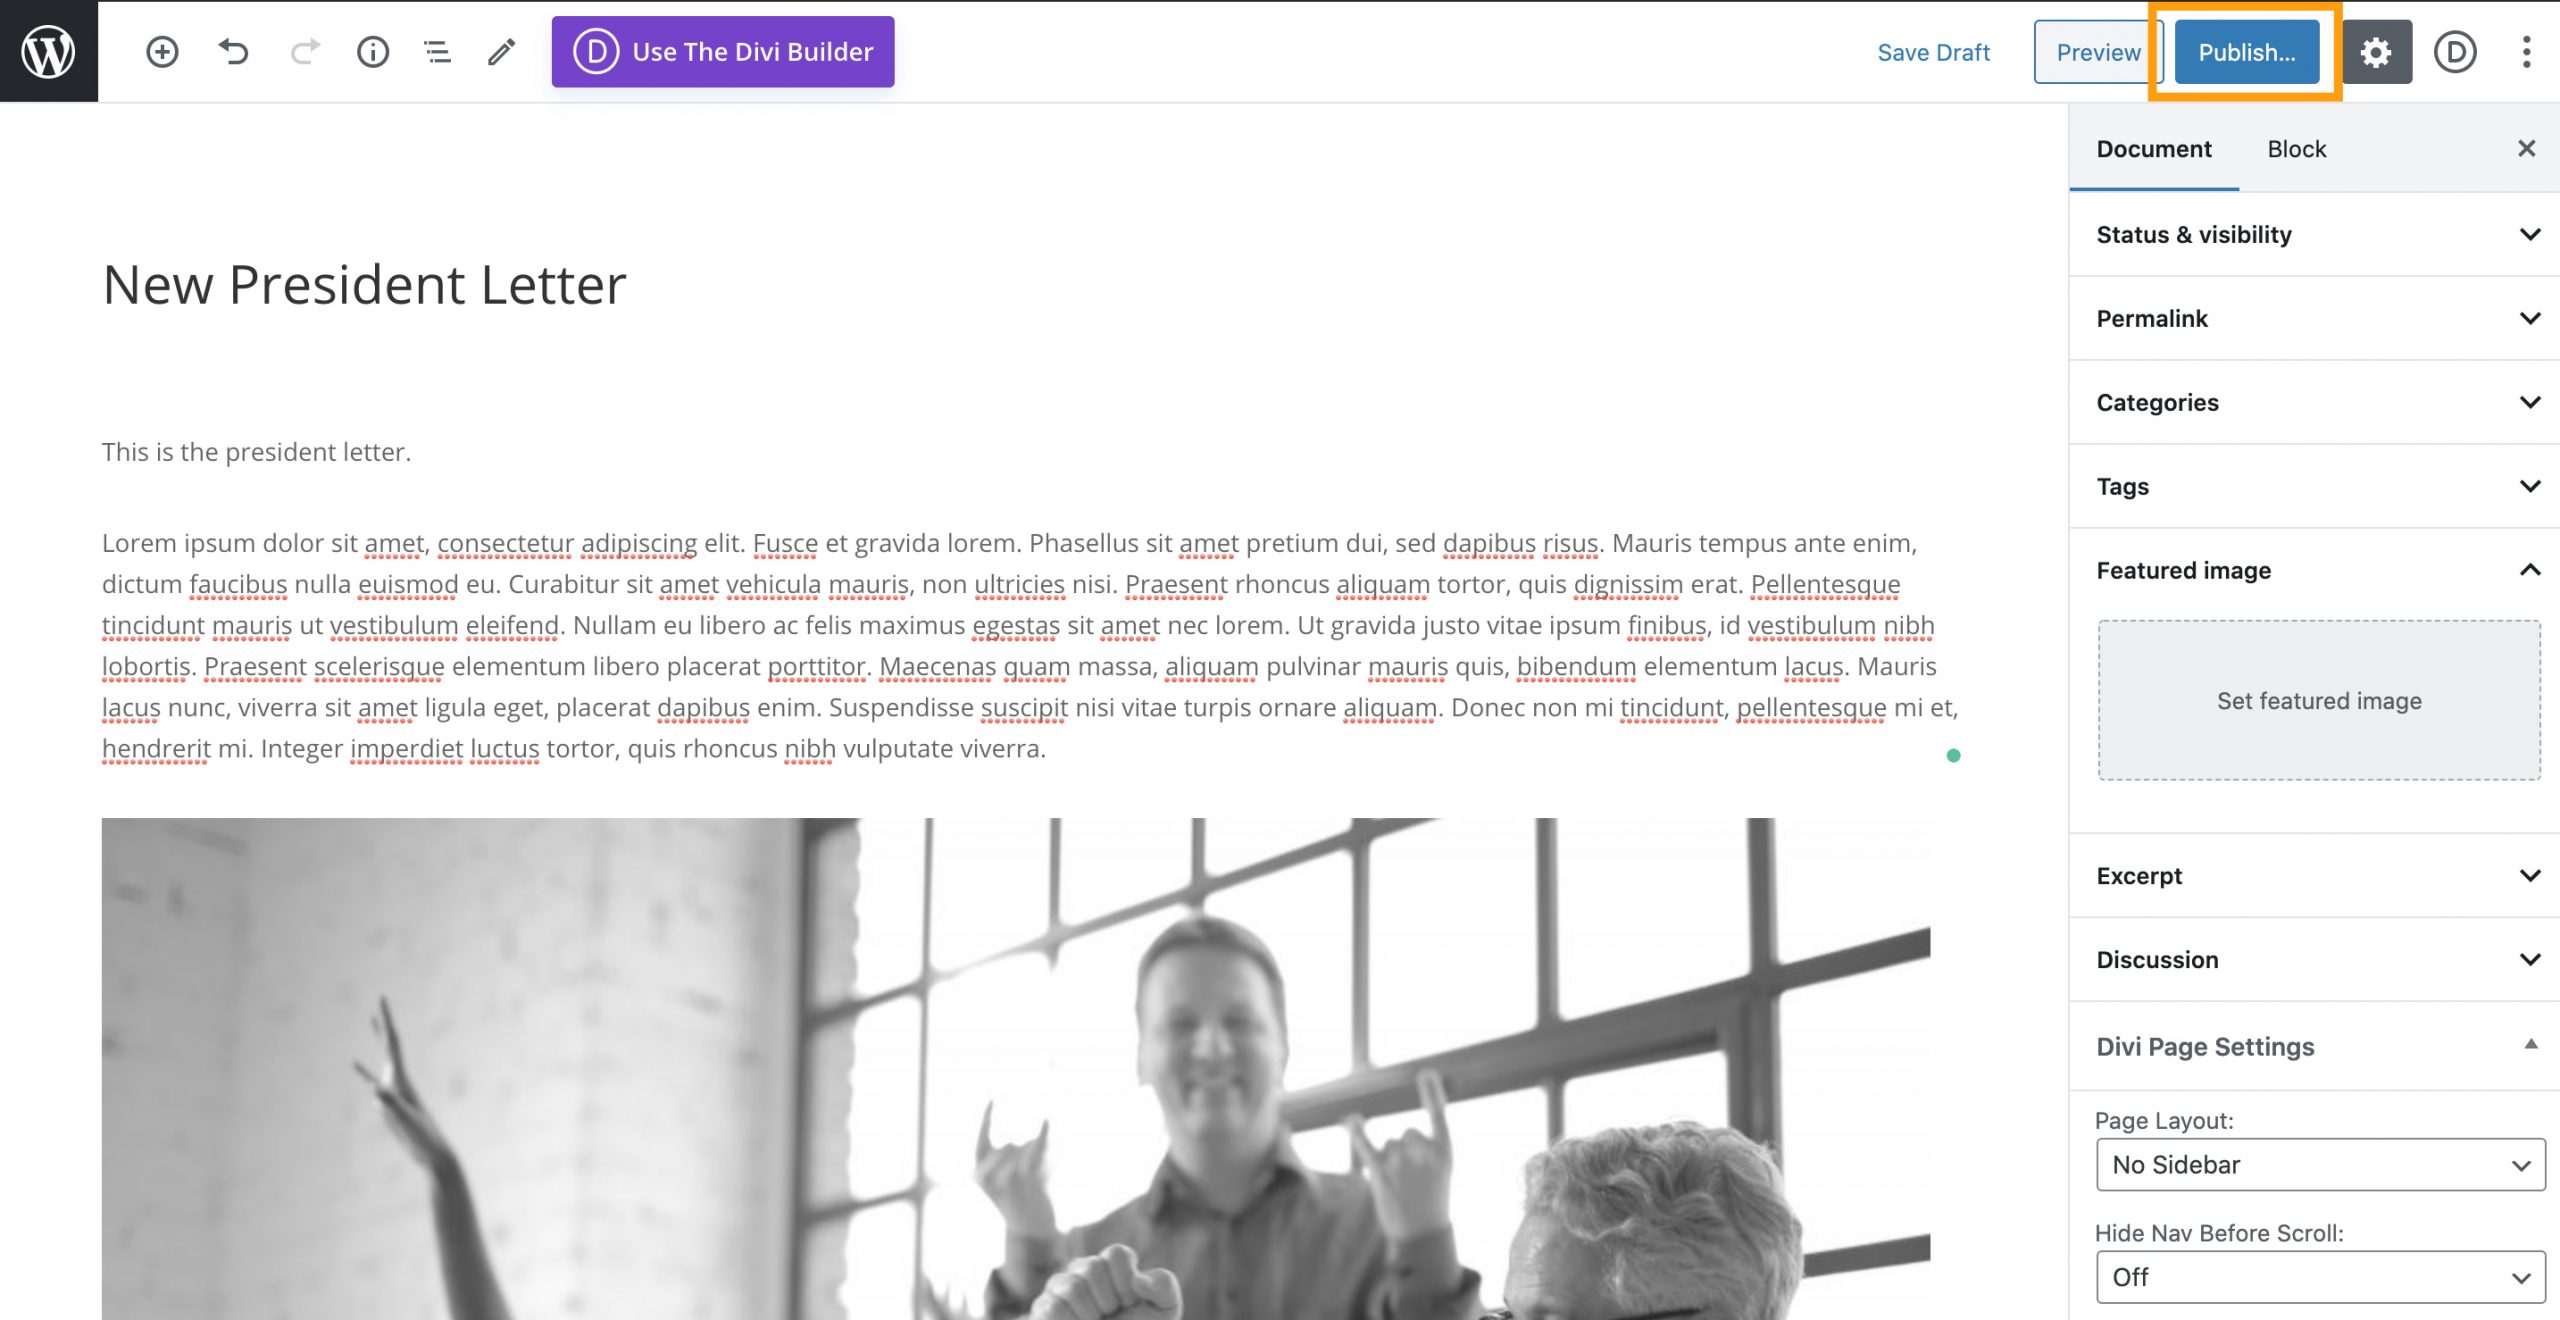
1) In the dashboard menu, click ‘Post’ tab, and click ‘Add New’ button to create a new president letter, news, or initiative post.
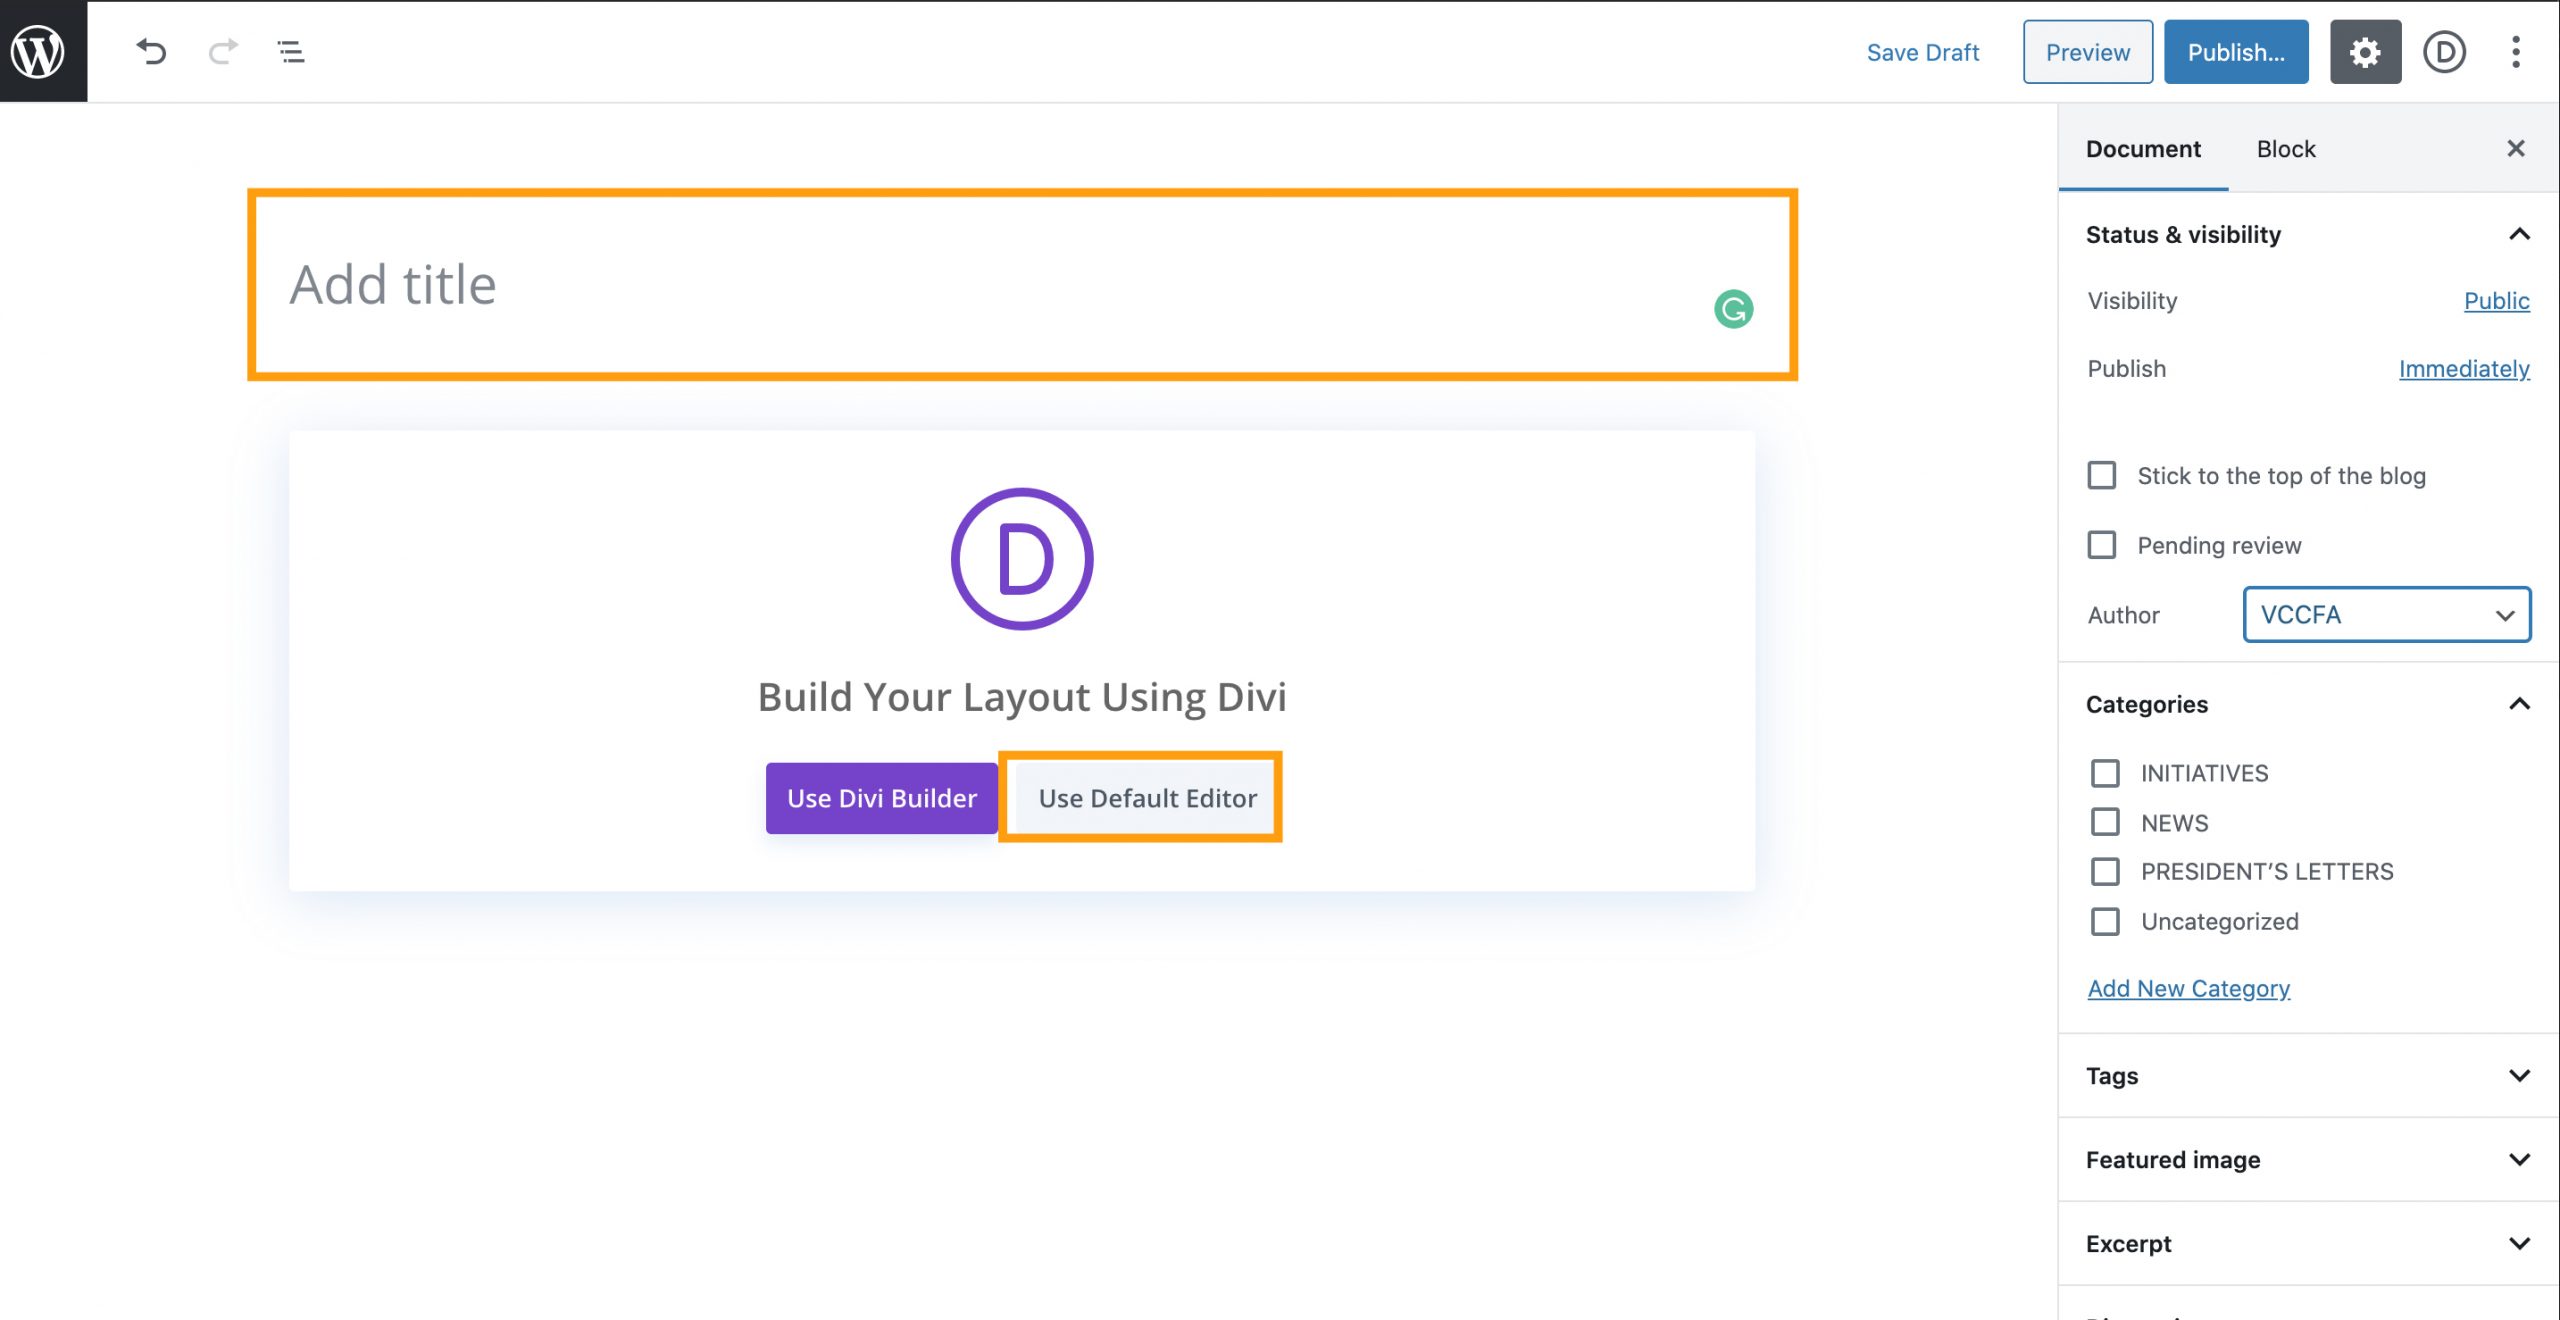
2) Add the title of the new post, and click ‘Use Default Editor’ to use the simple and easy WordPress default editor.
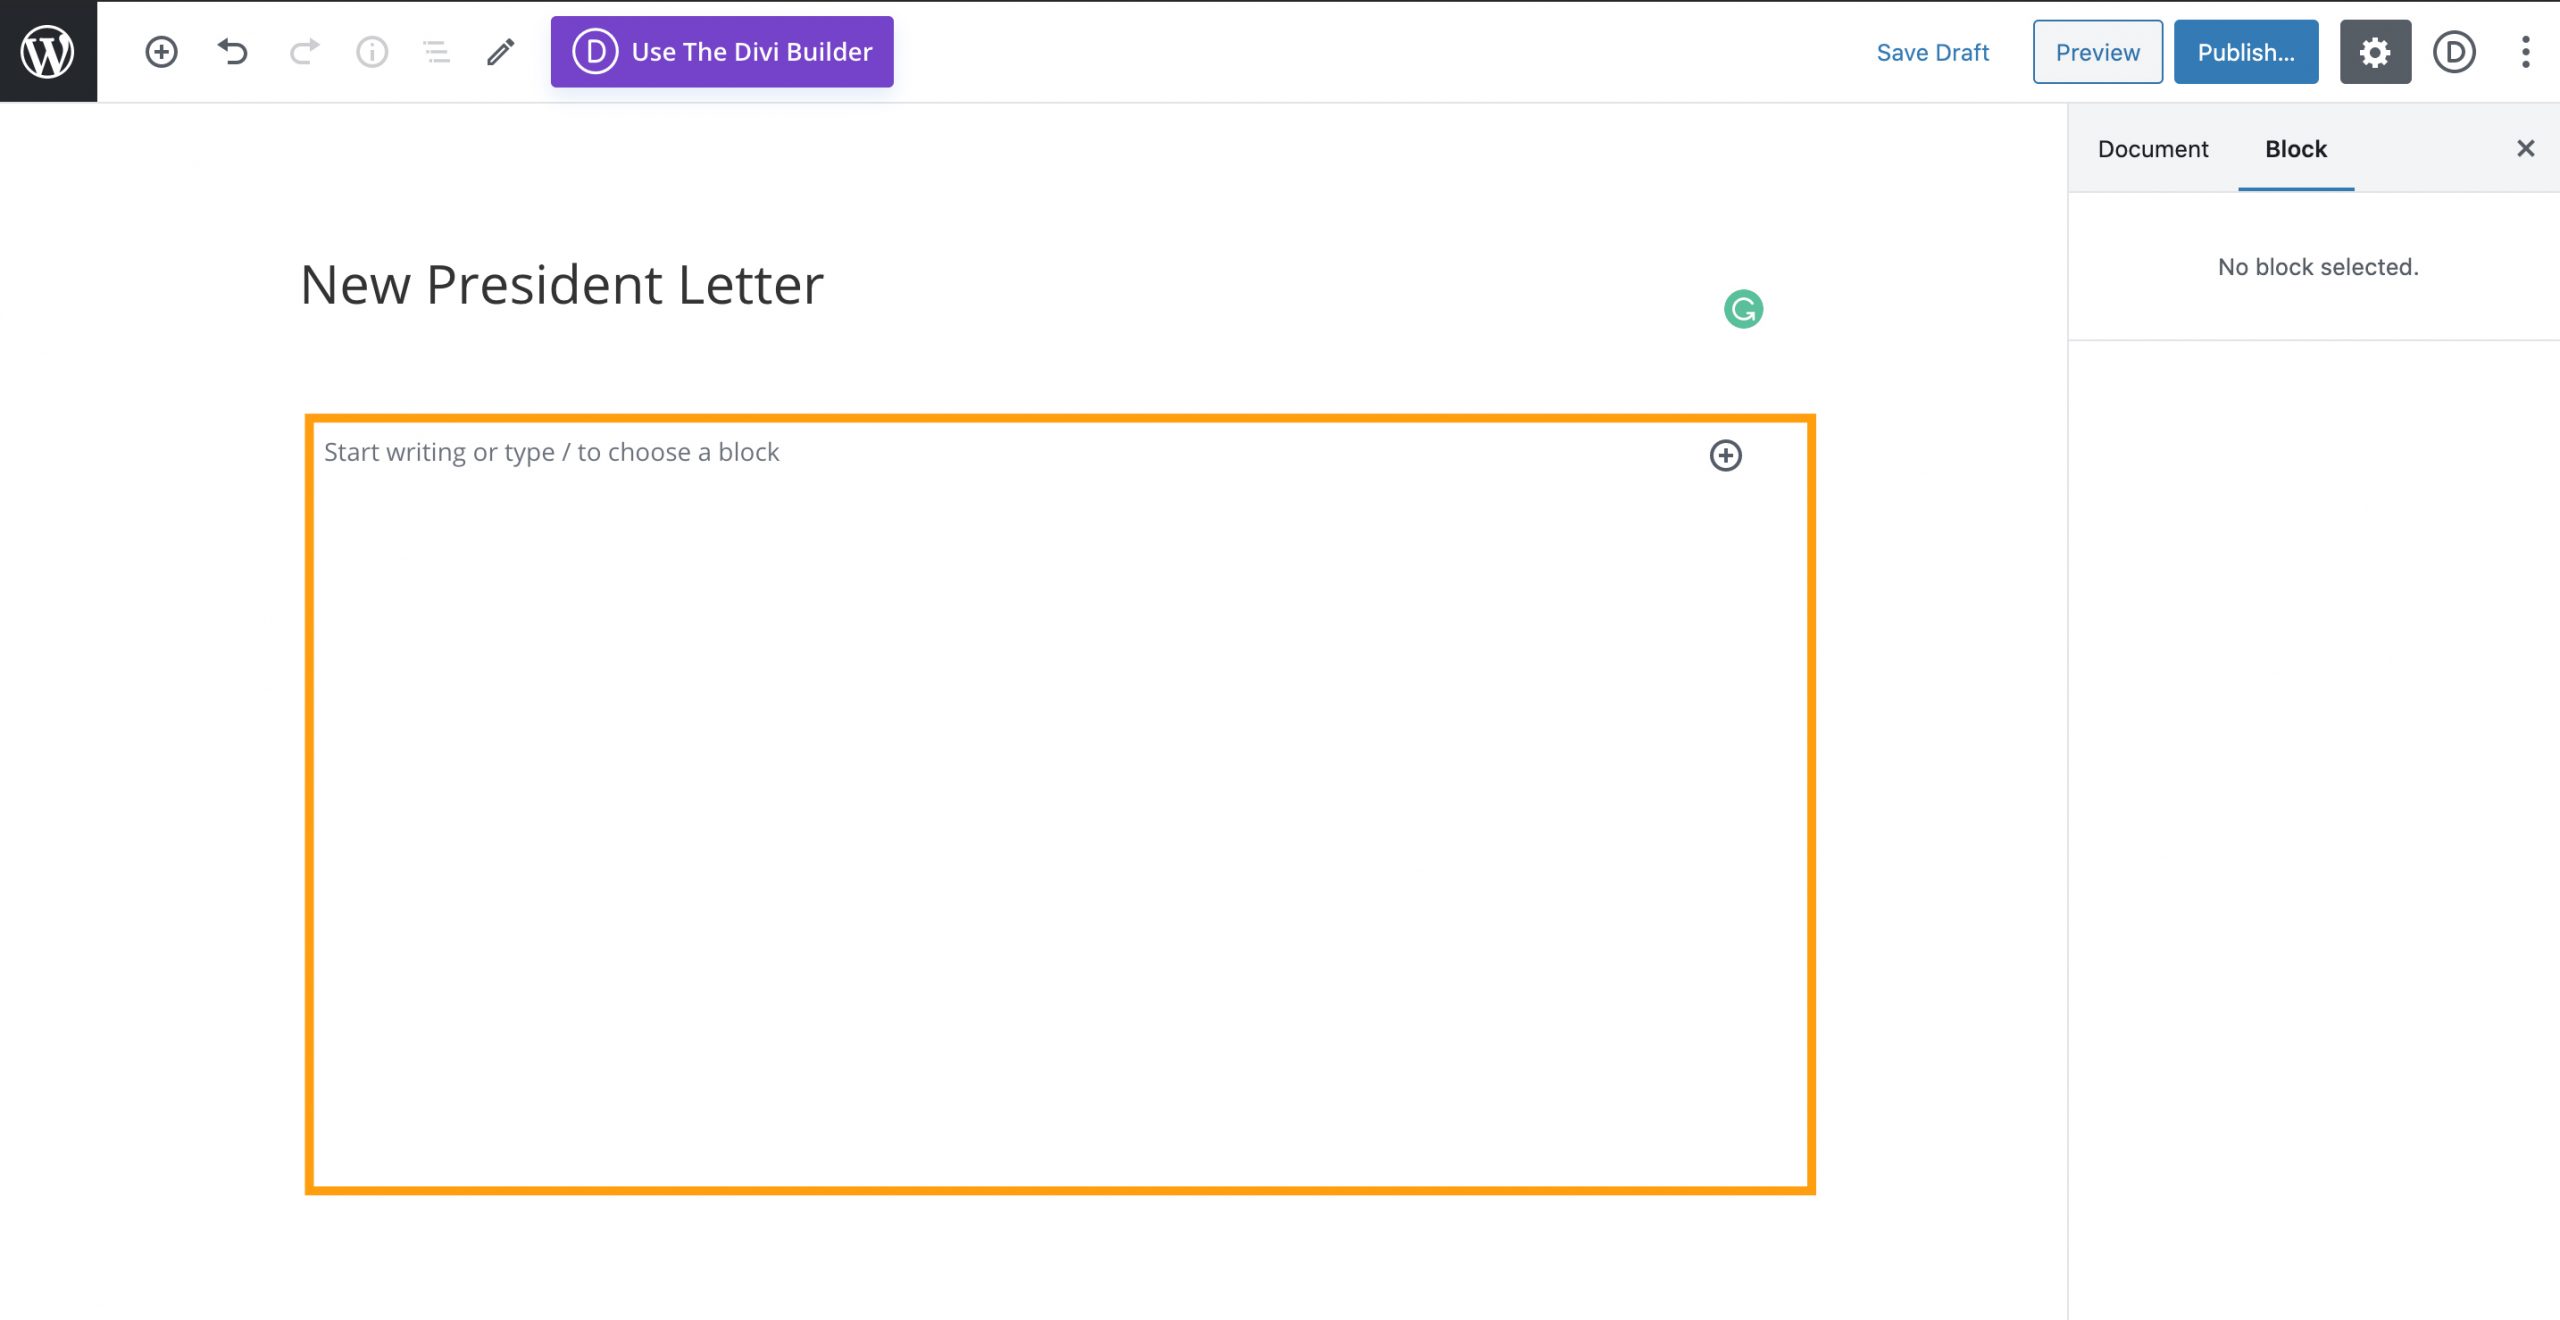
3) Write the contents by clicking the area under the title.
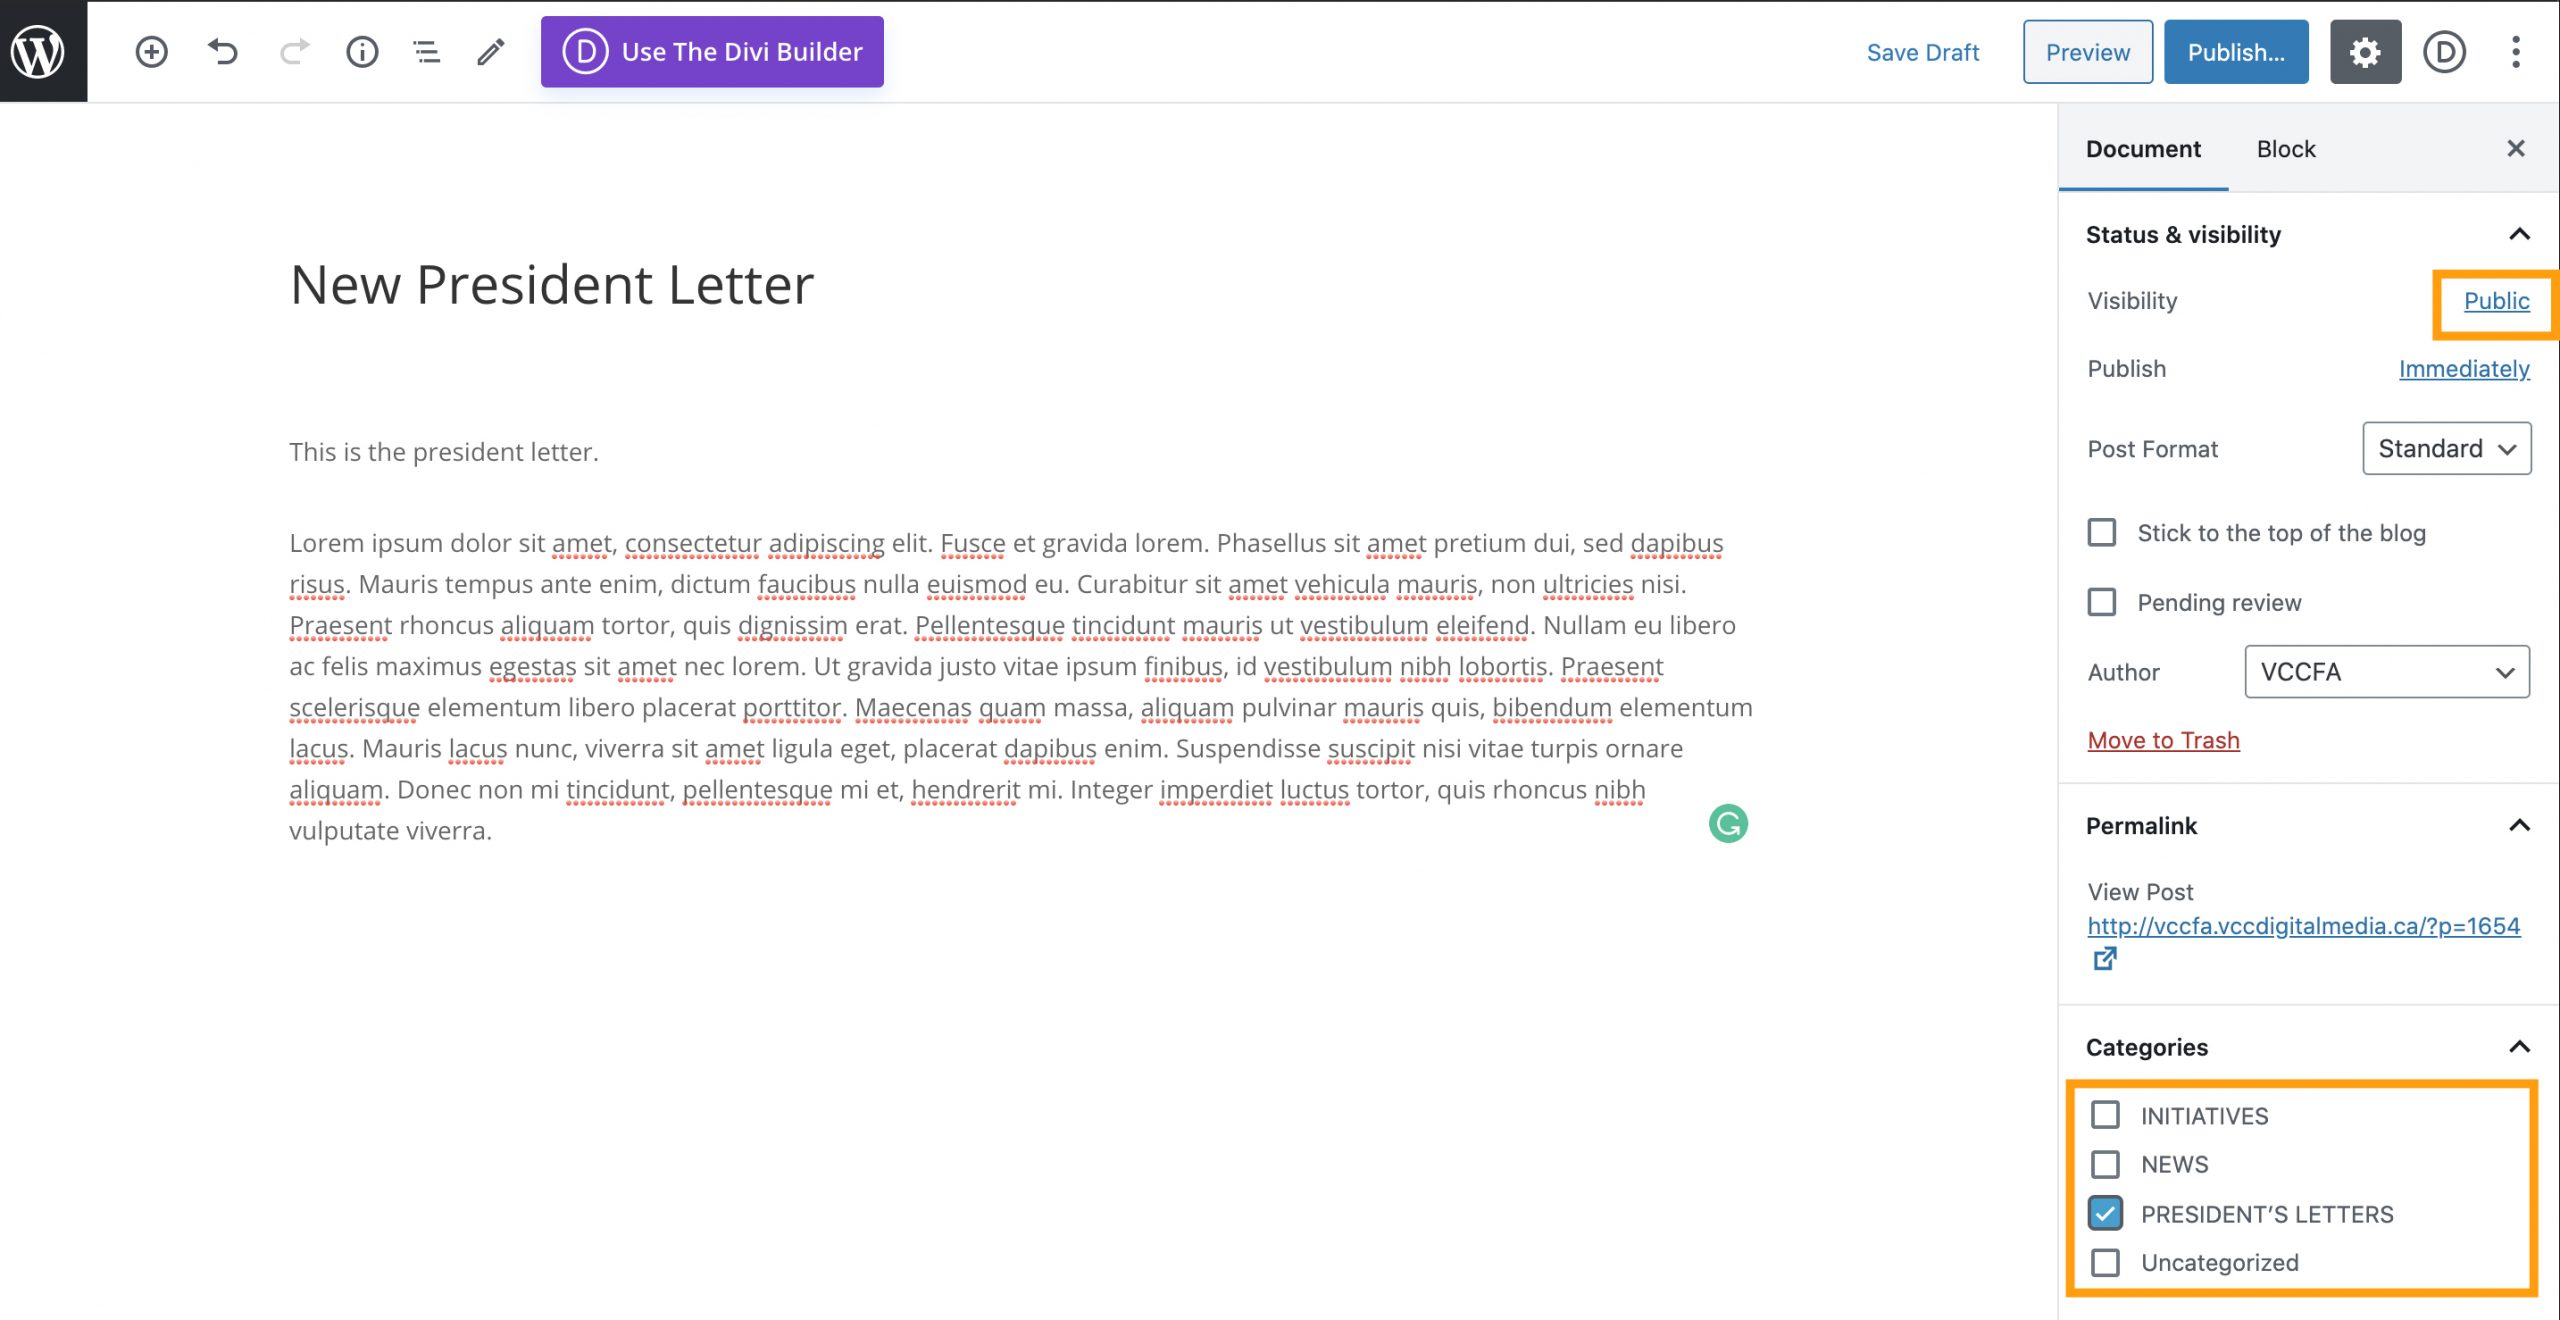
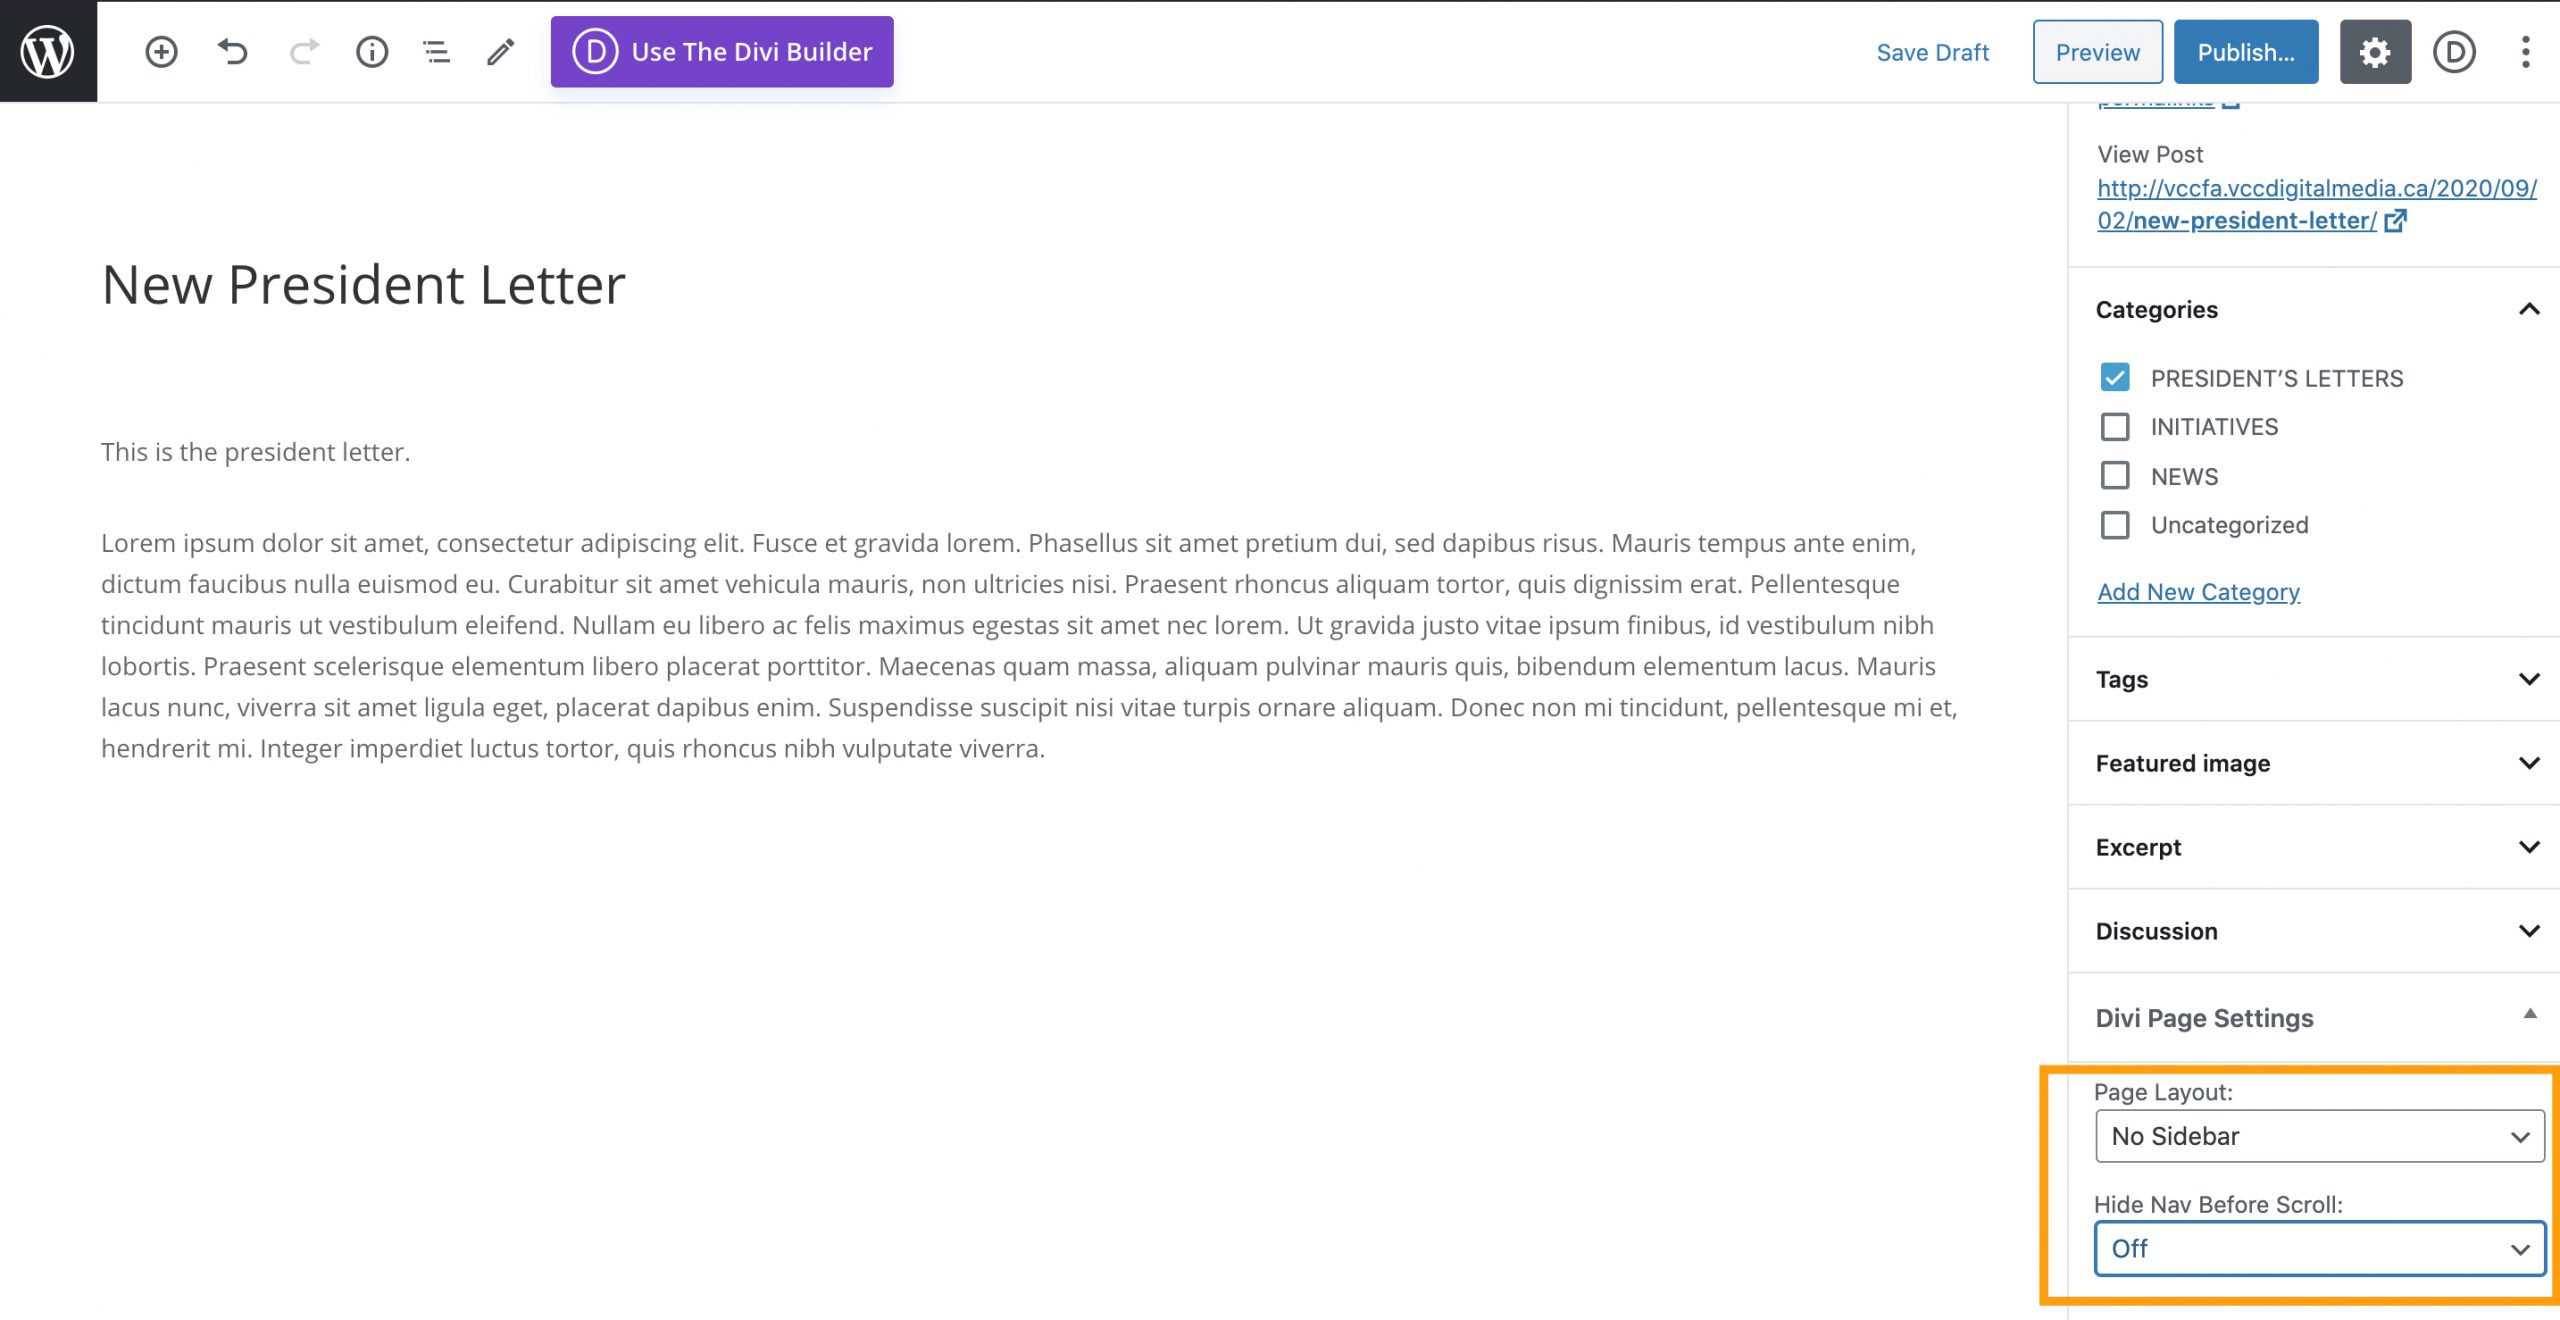
4) Make sure the visibility is set ‘public’.
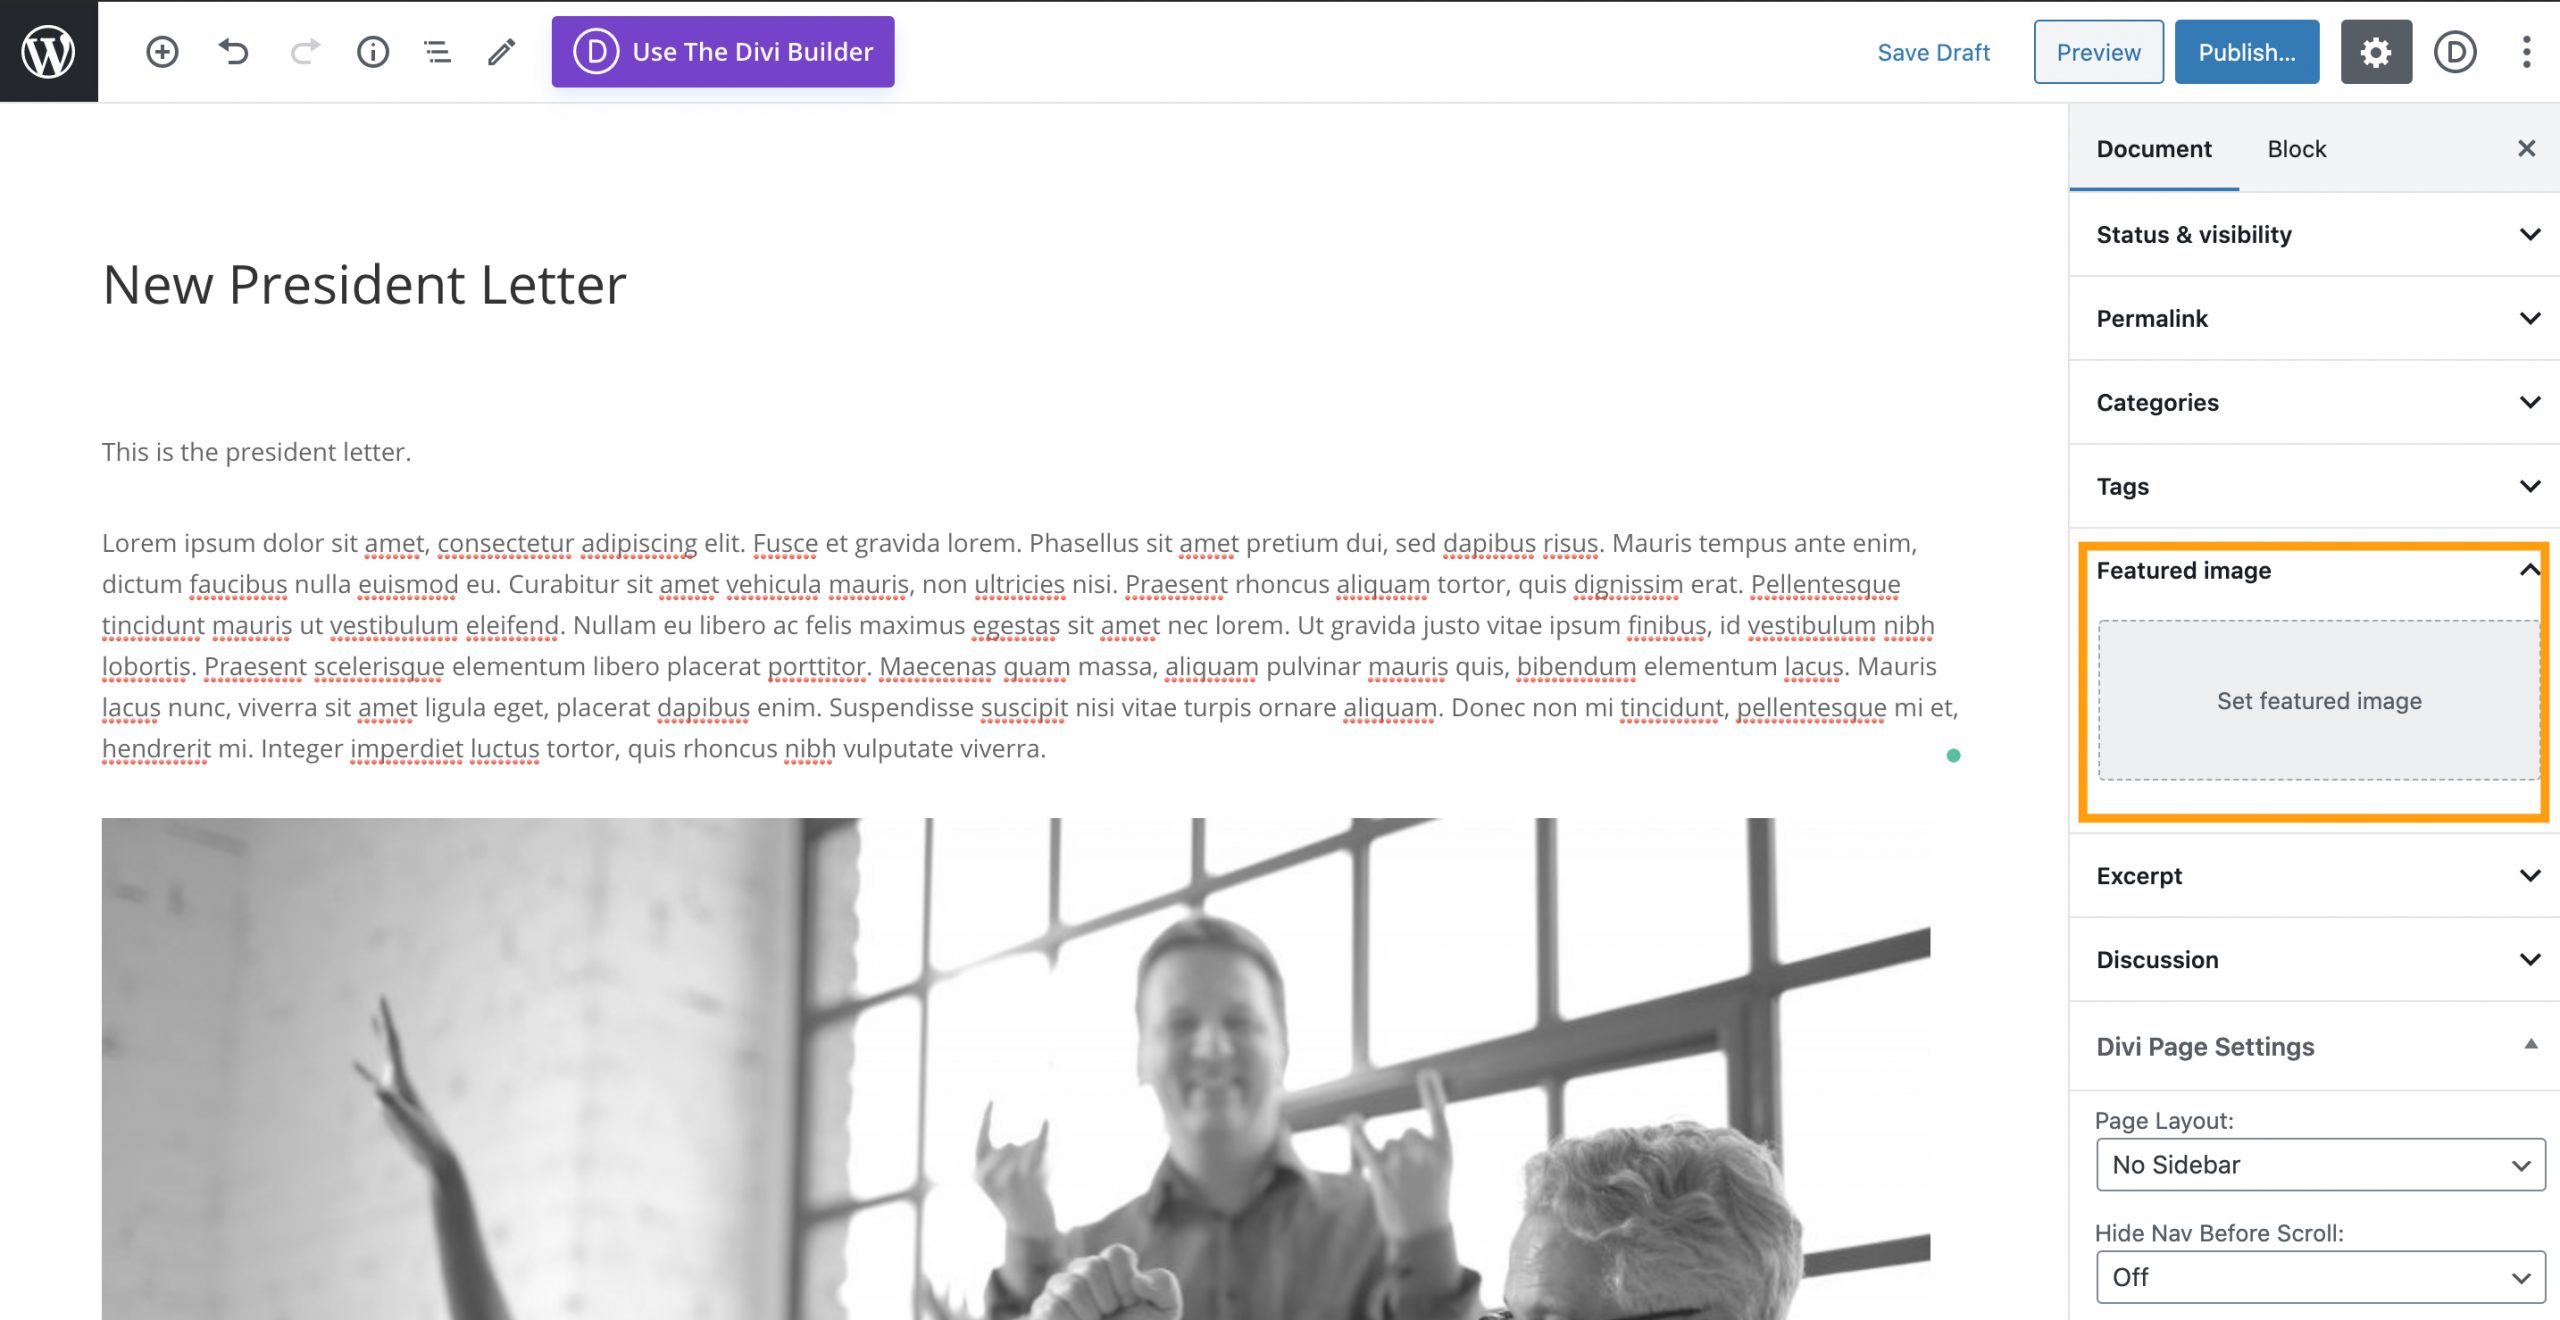
It is very important to check off the relevant category of the post. This category determines where this post will be shown on the website. *Please check off either one of the three categories ‘initiatives’, ‘news’, and ‘president letters’.
5) Make sure the page layout is set ‘no sidebar’.
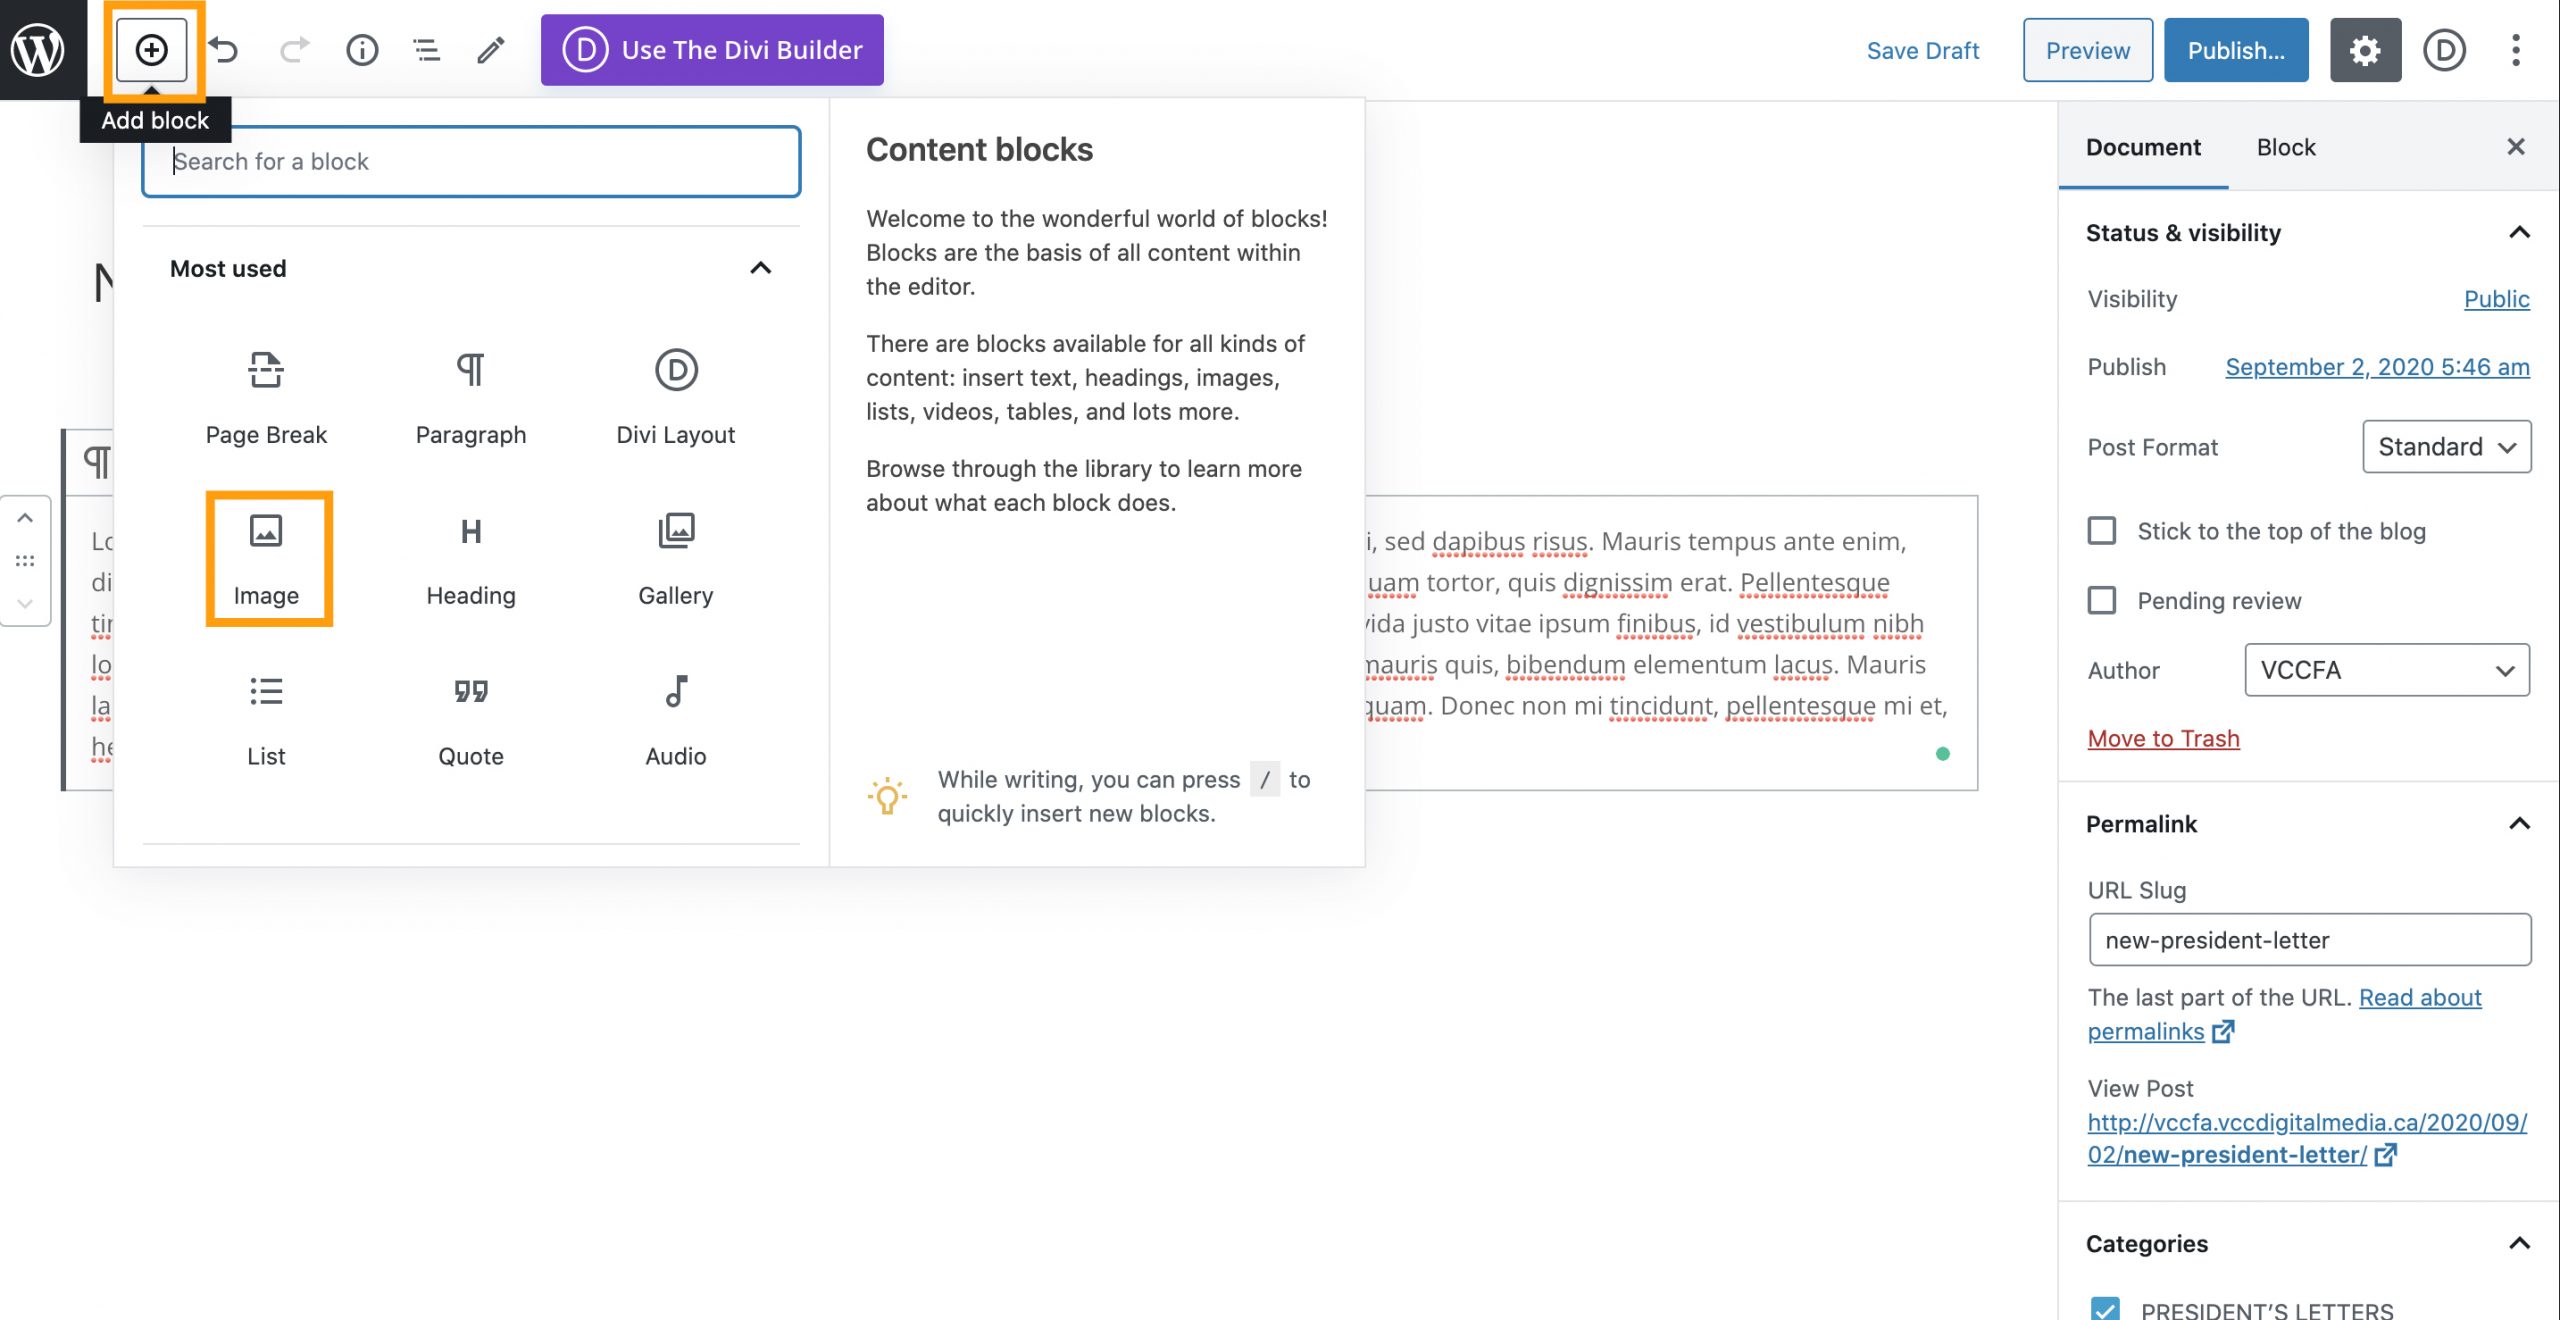
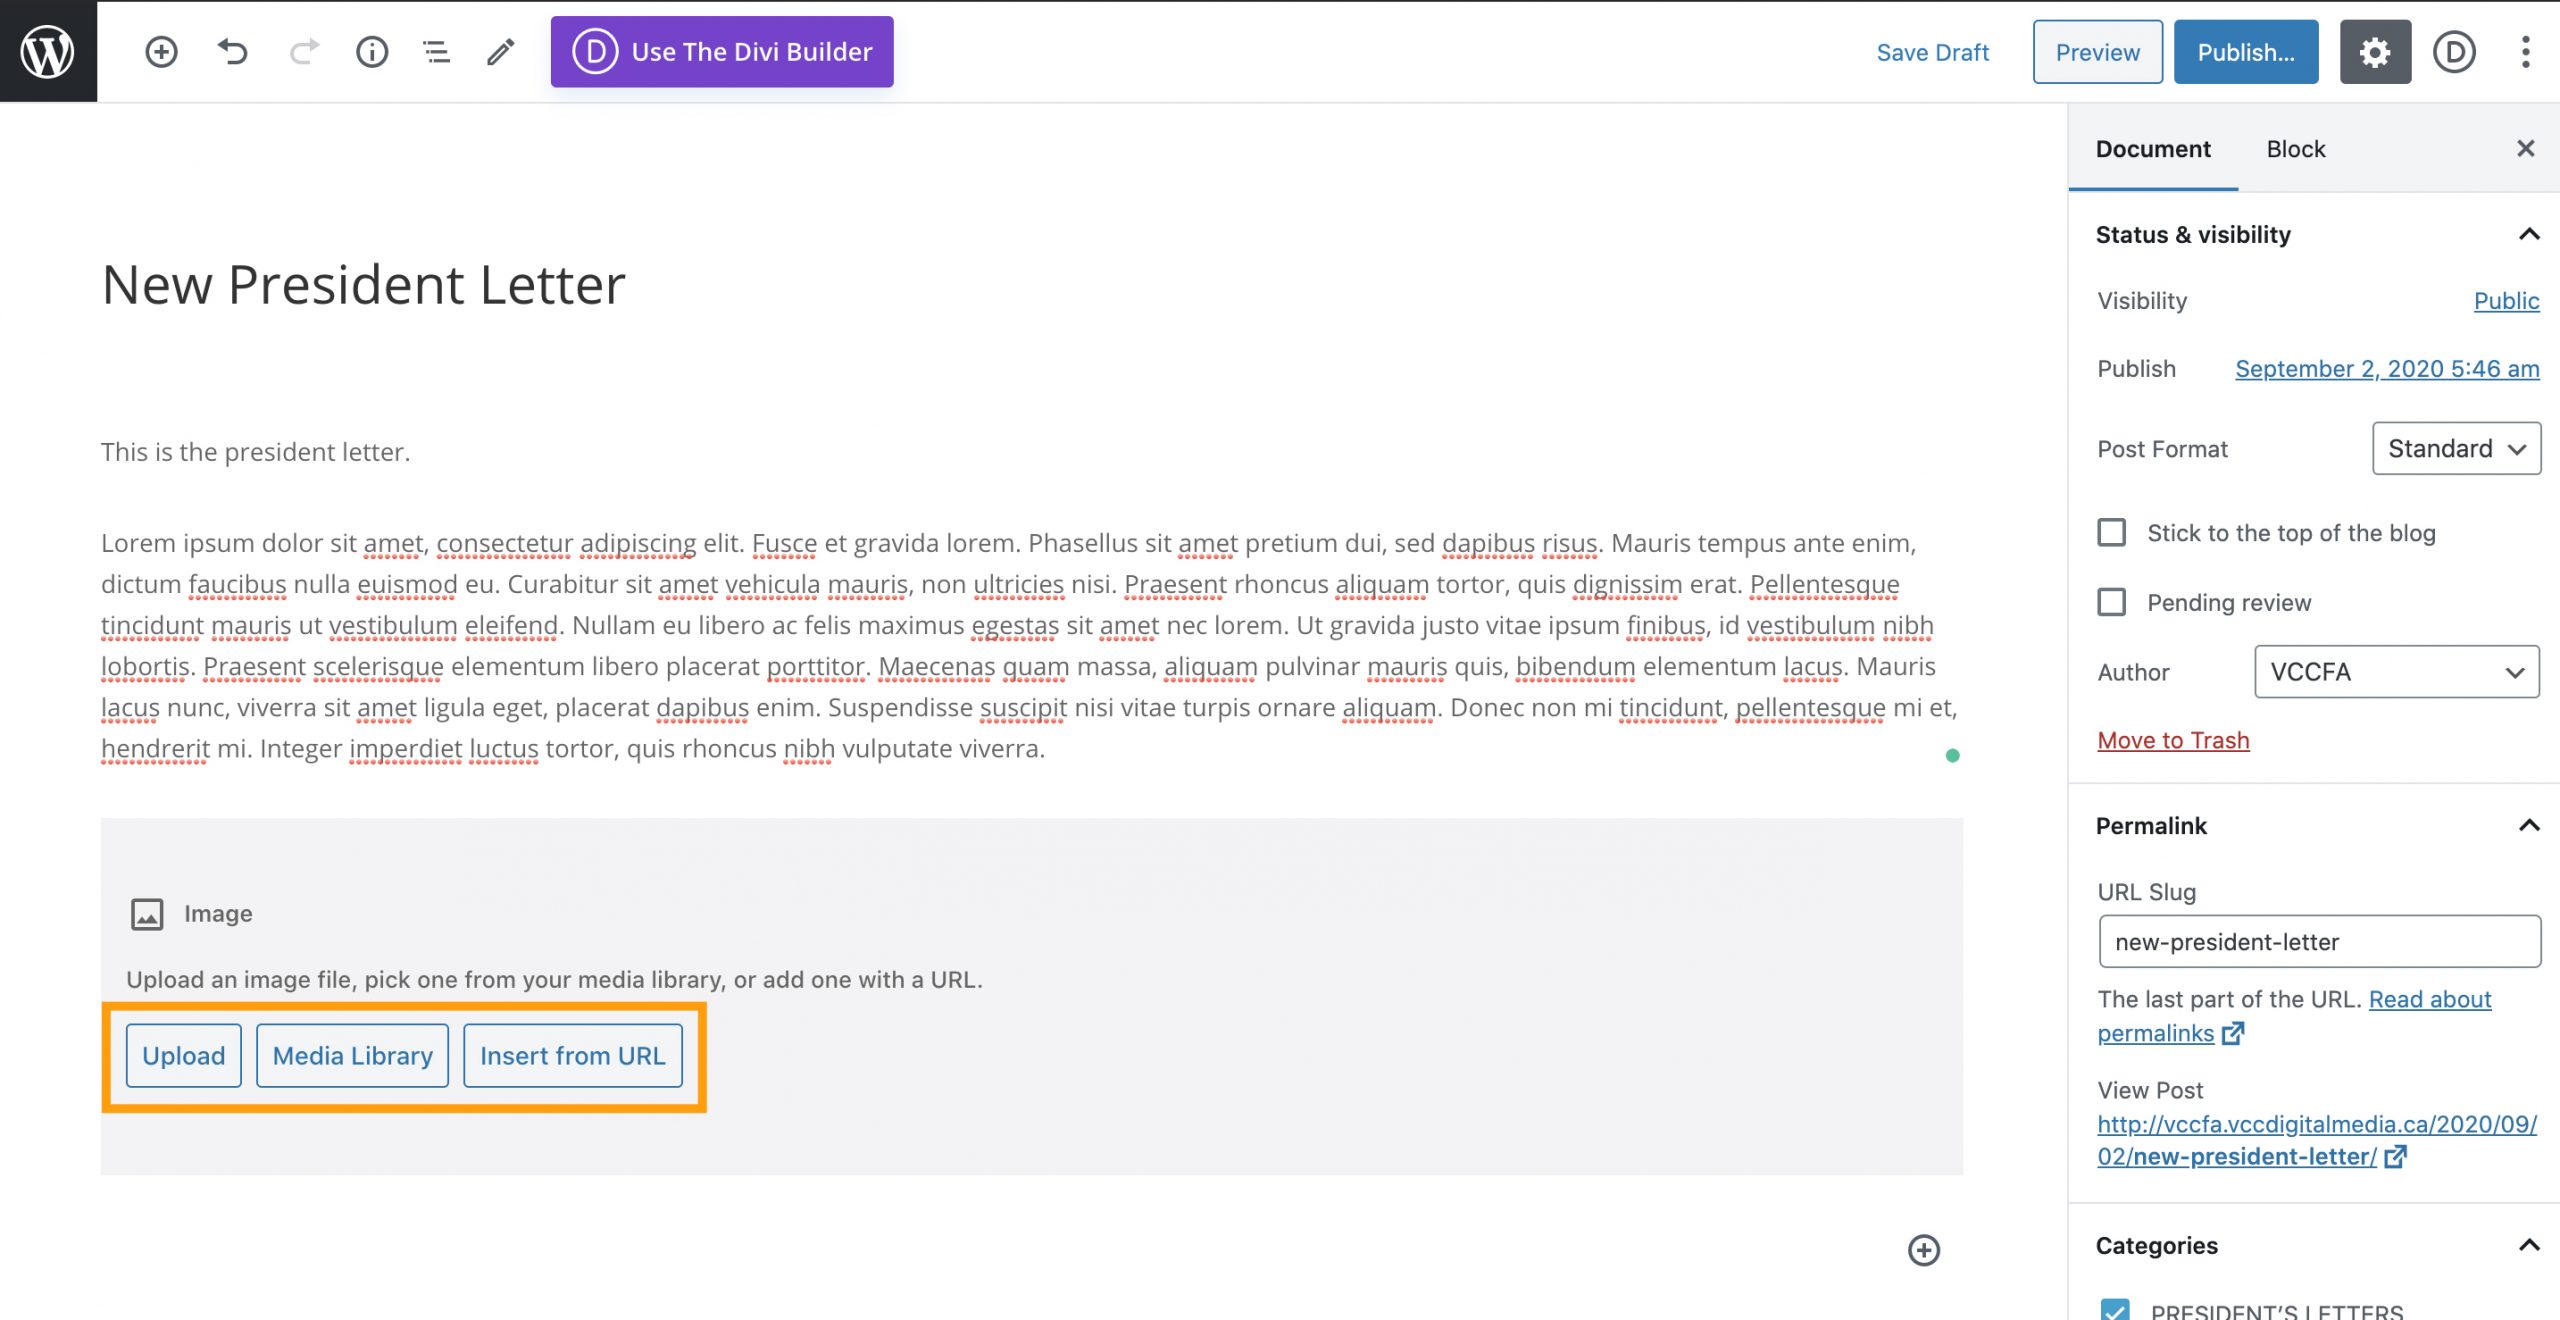
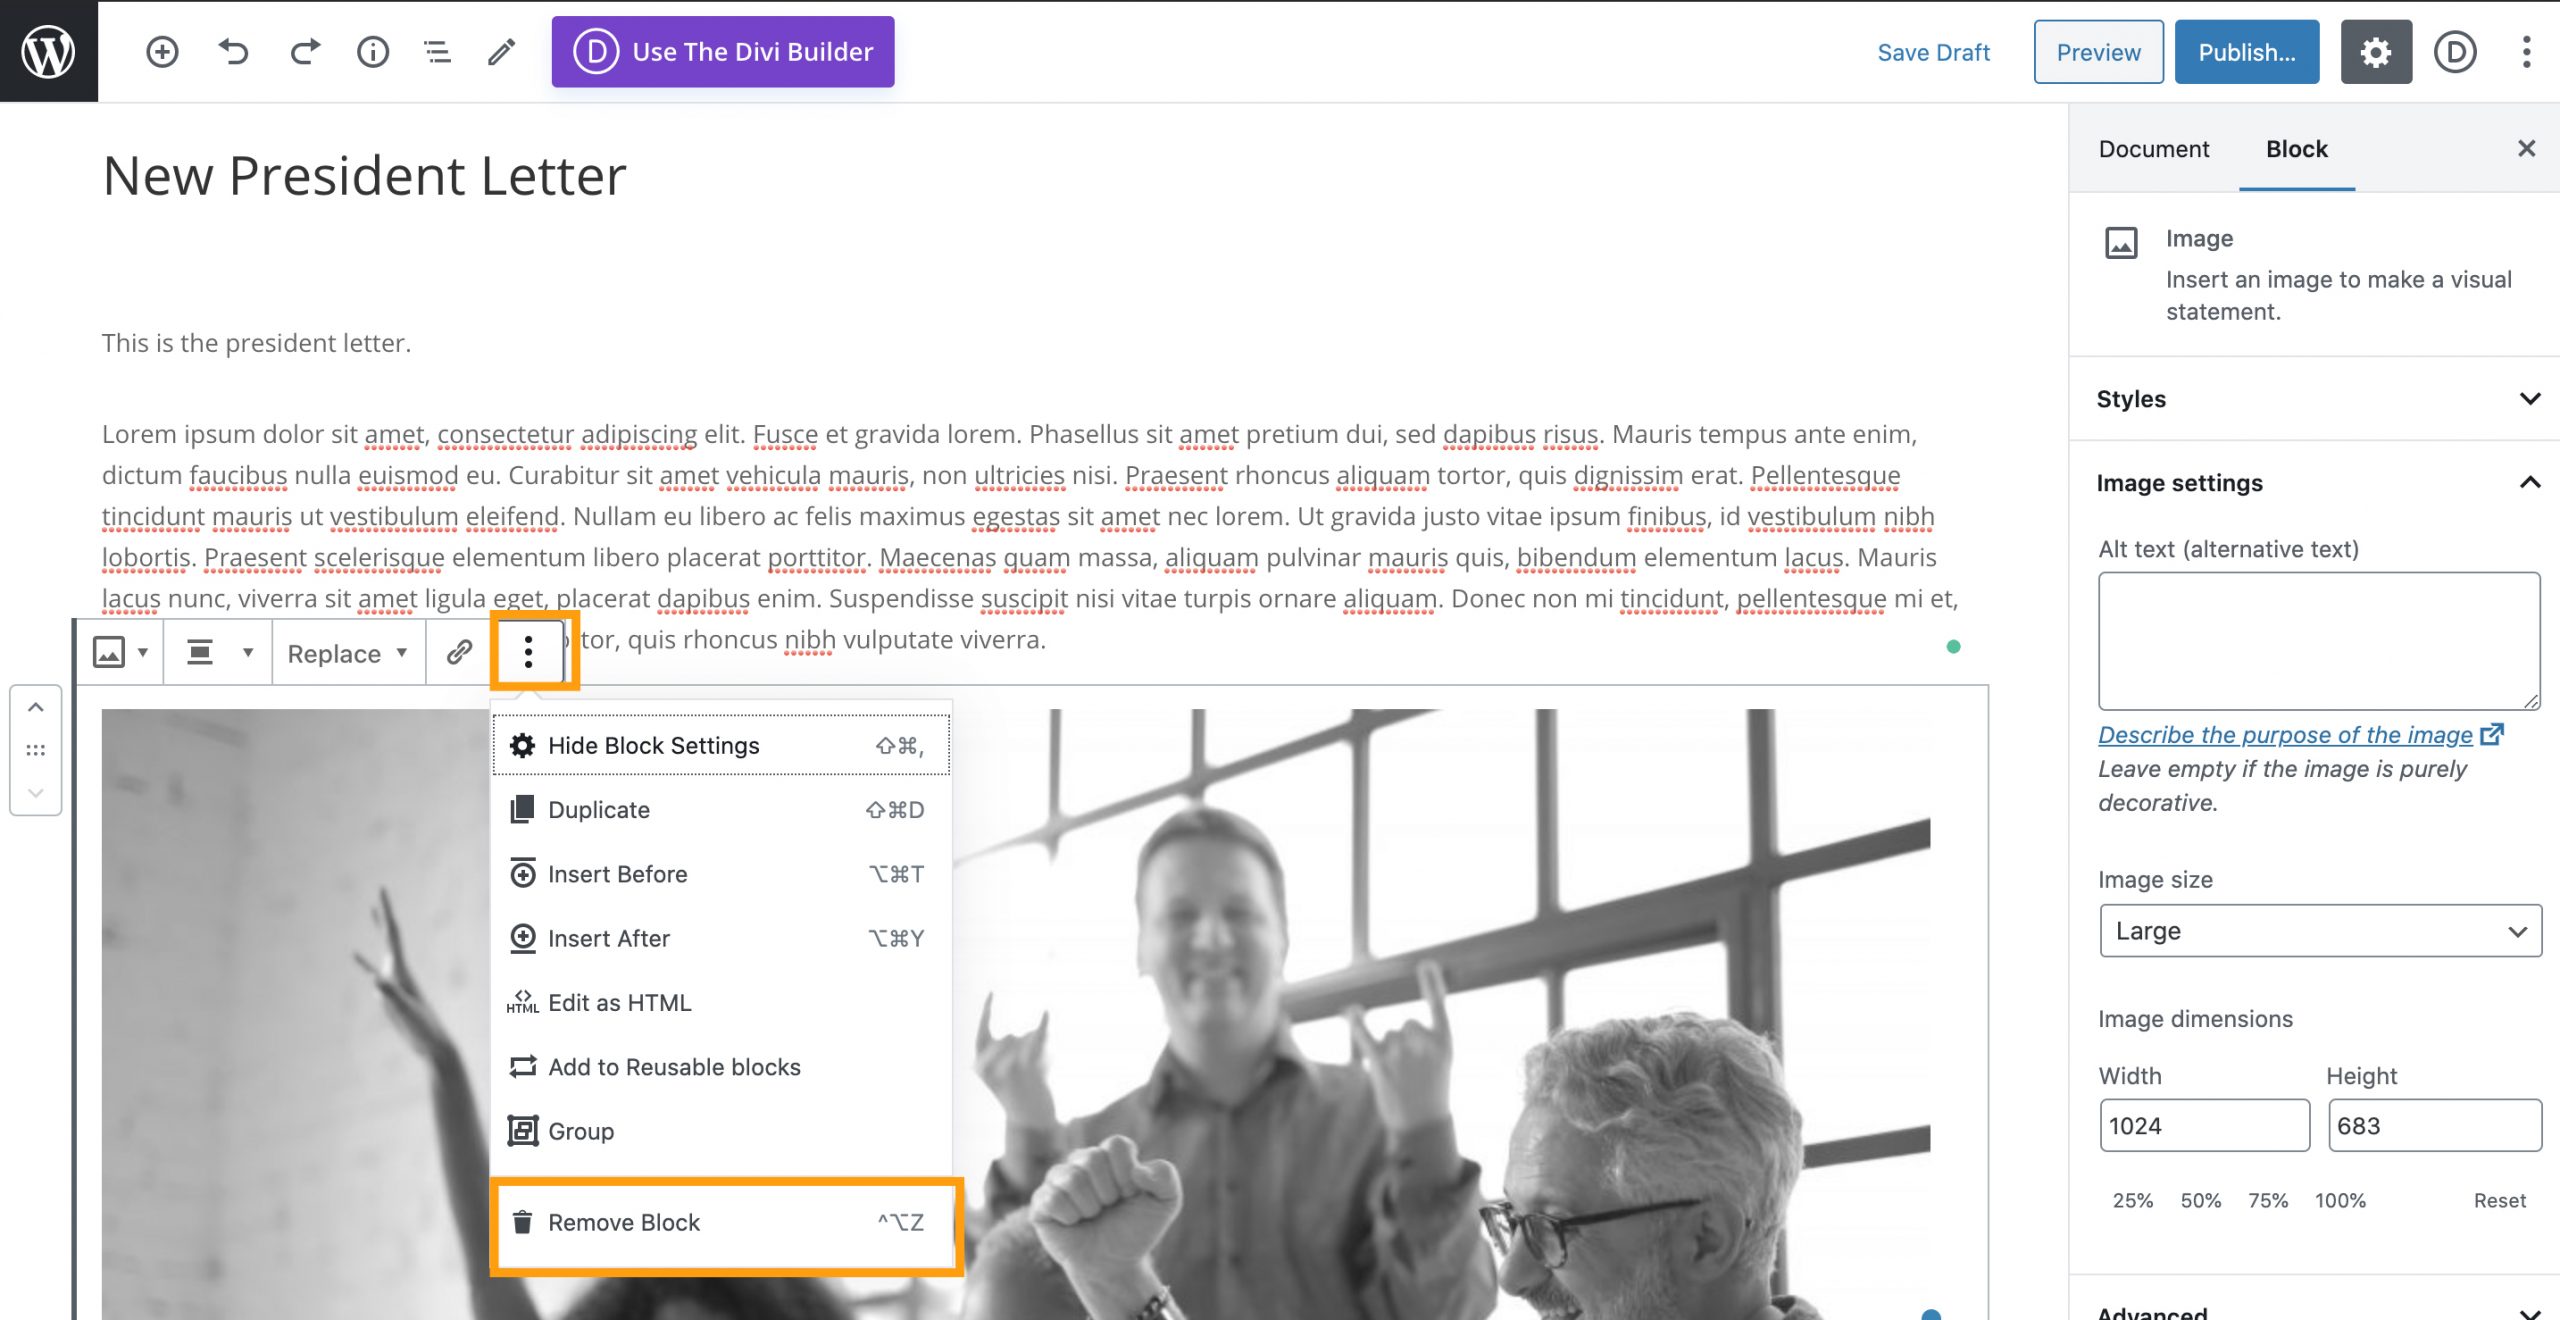
6) If you want to add some images in the contents, click the + plus button at the top left, and click ‘image’. You can upload images either directly from your computer, from the media library, or by inserting the URL.
3. How to Update Events
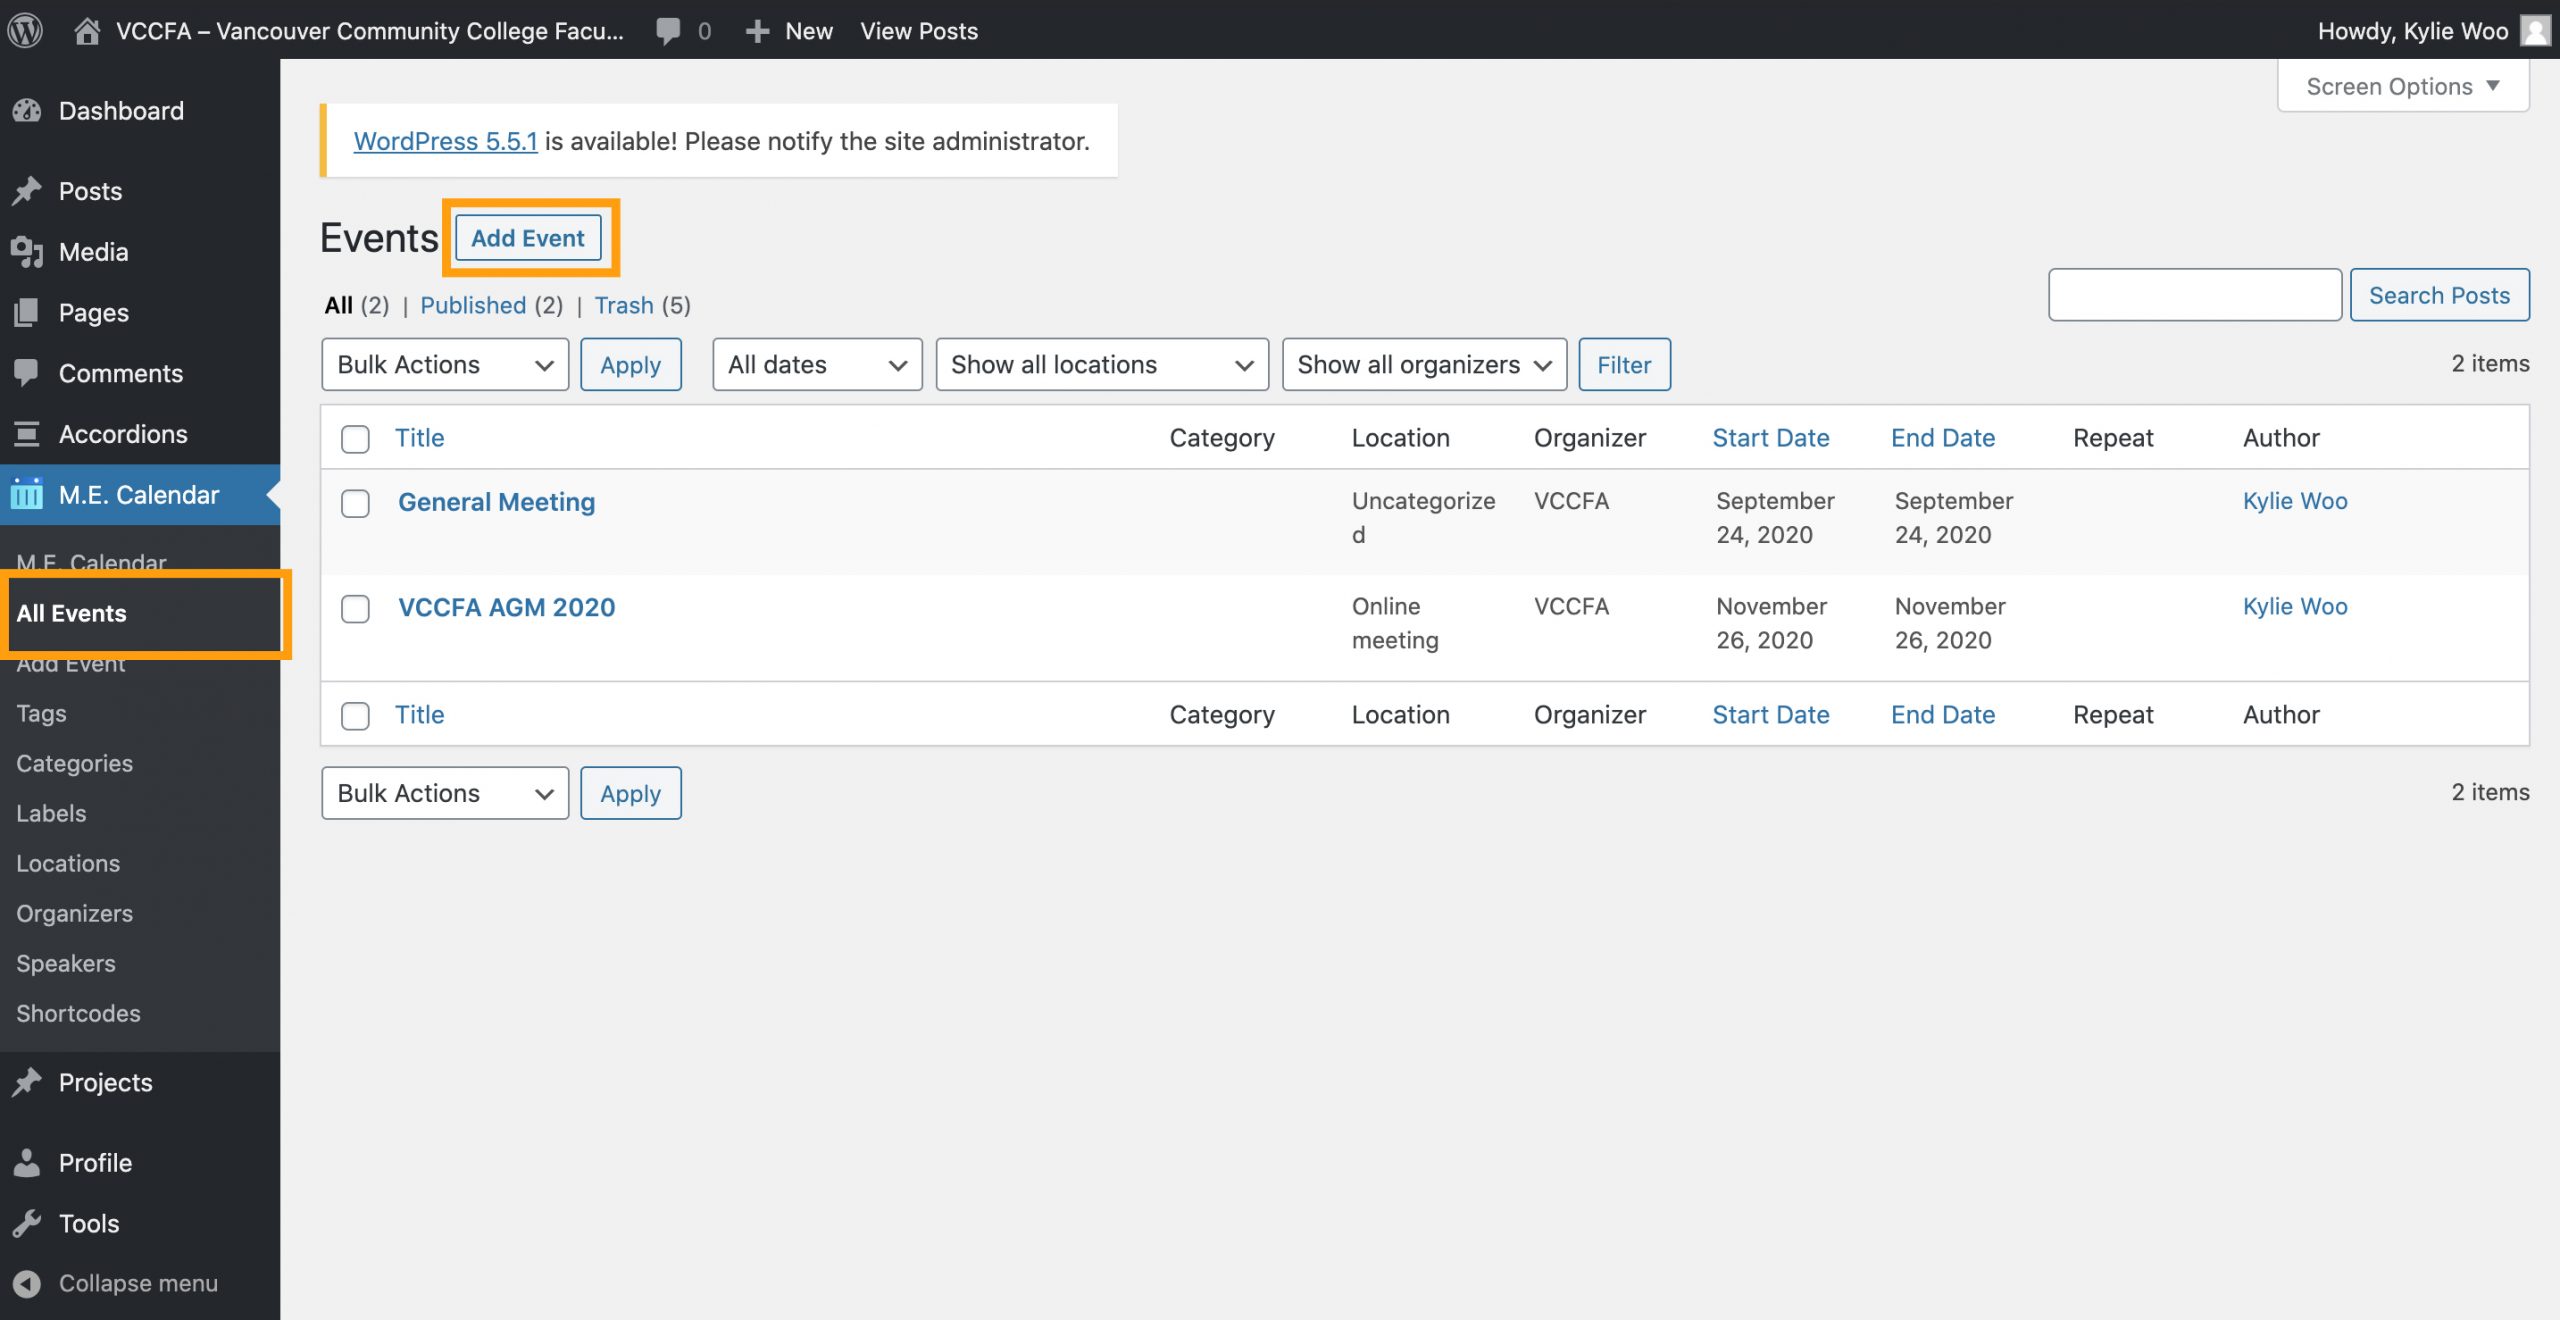
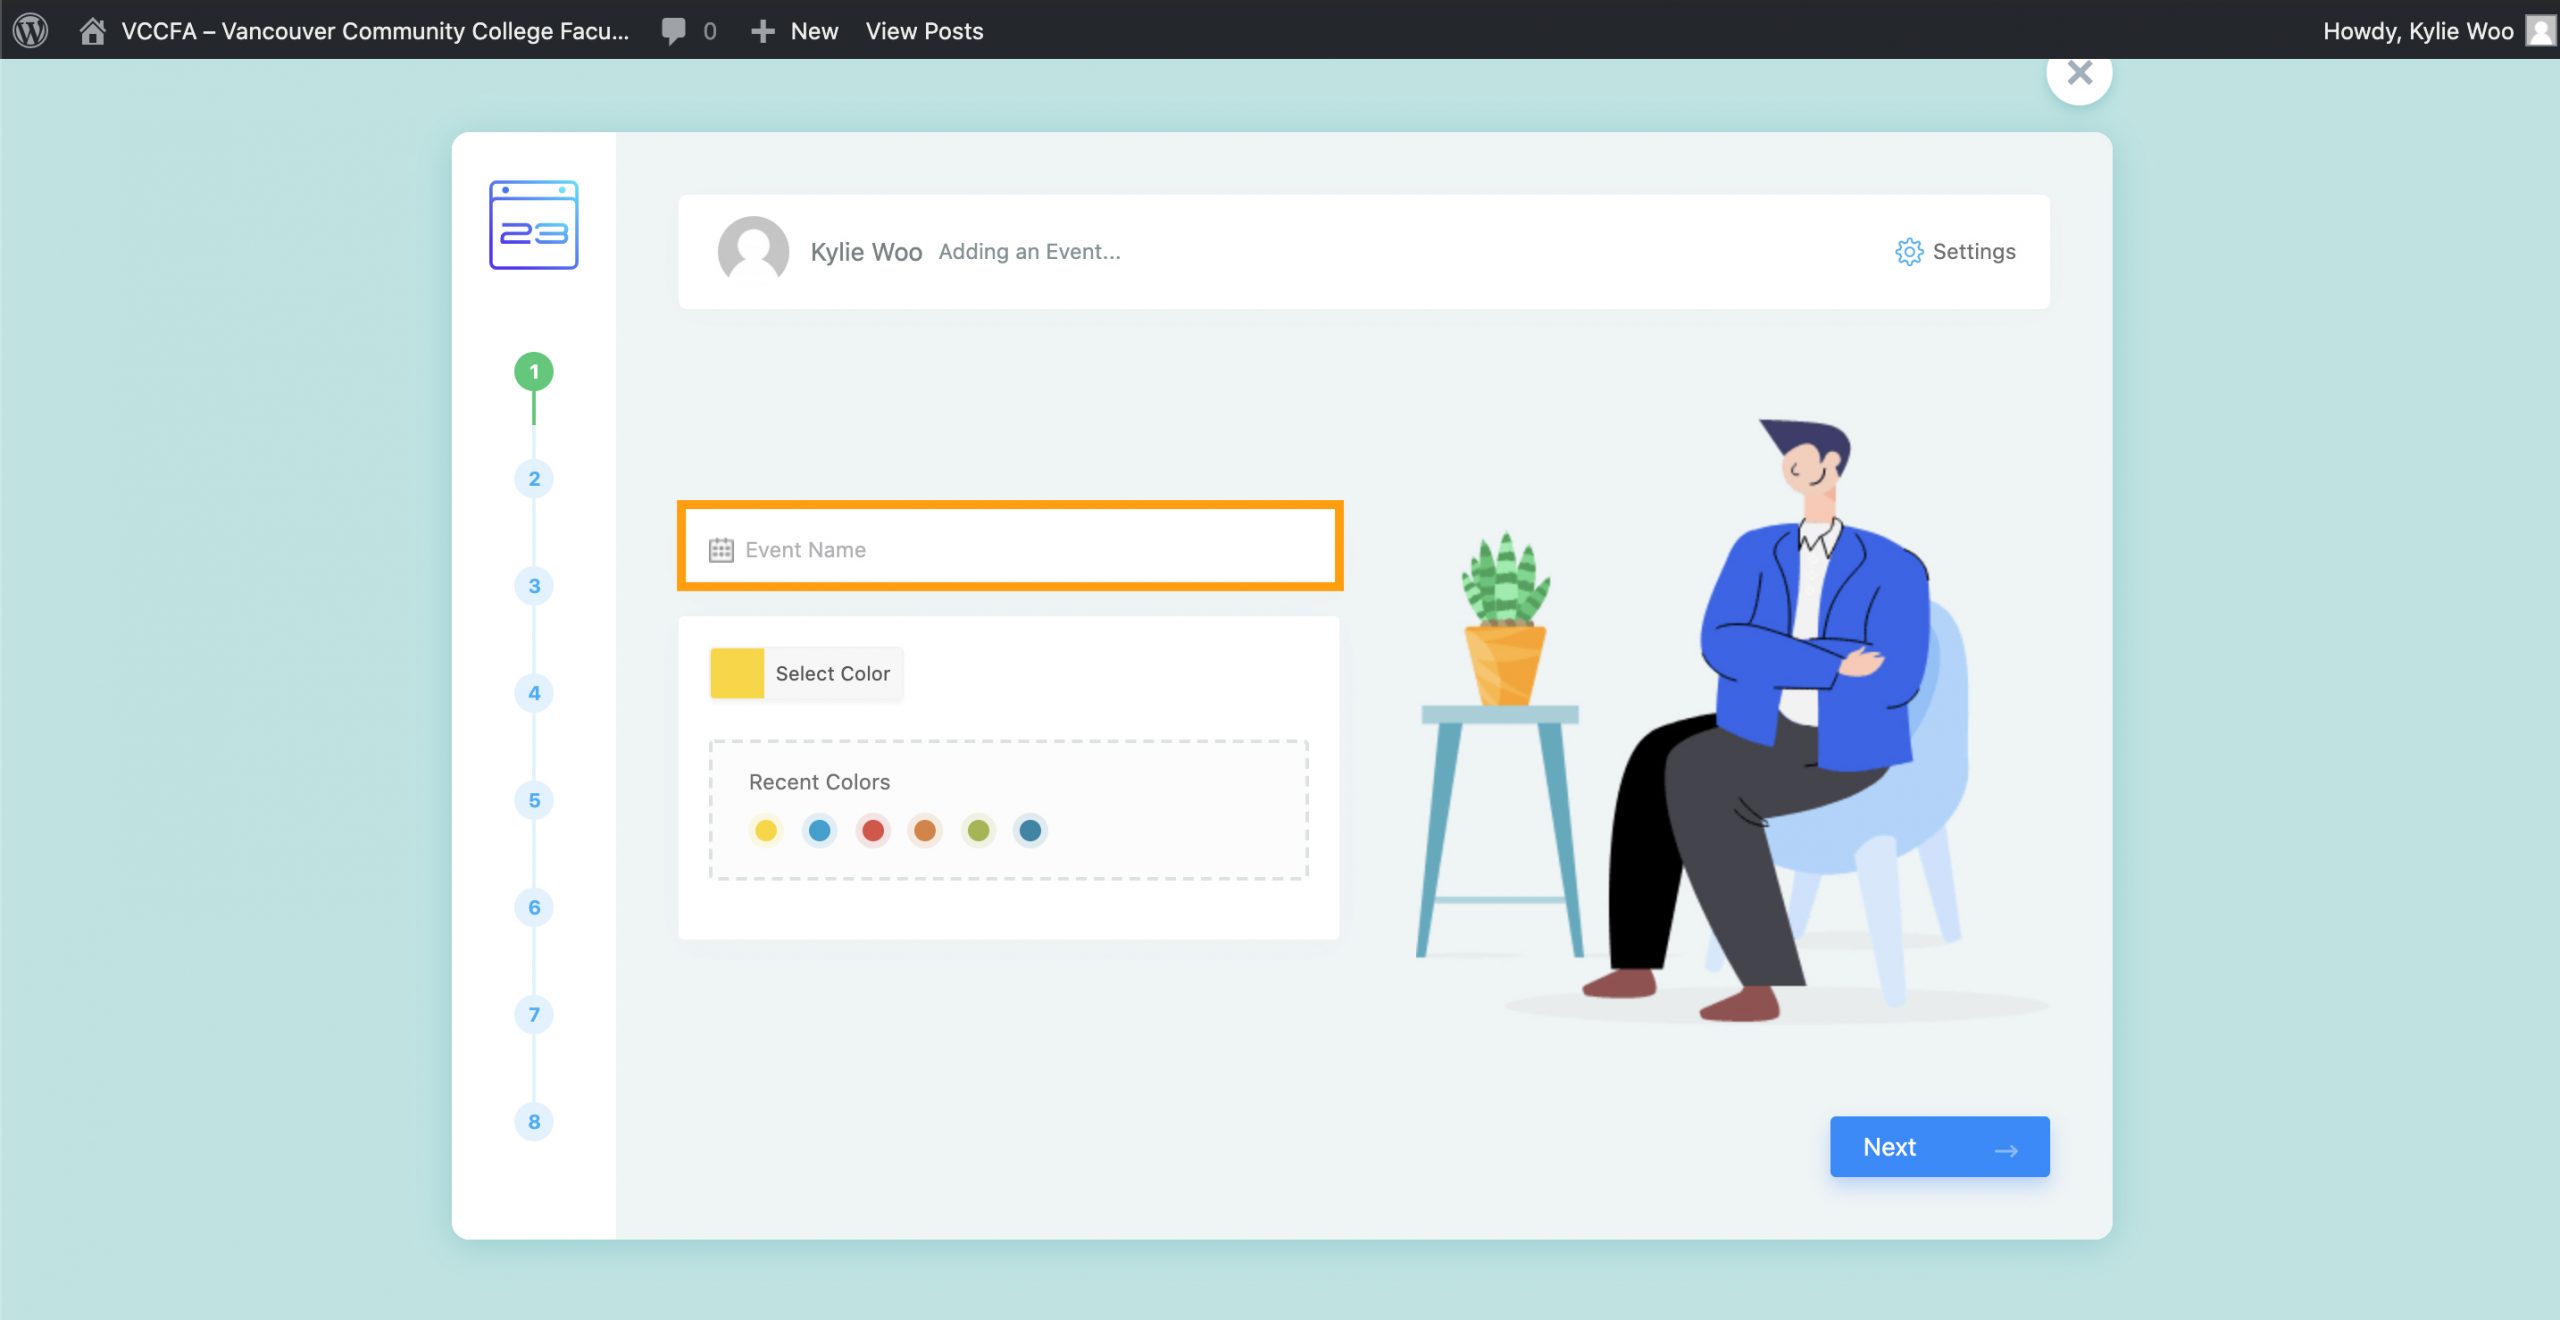
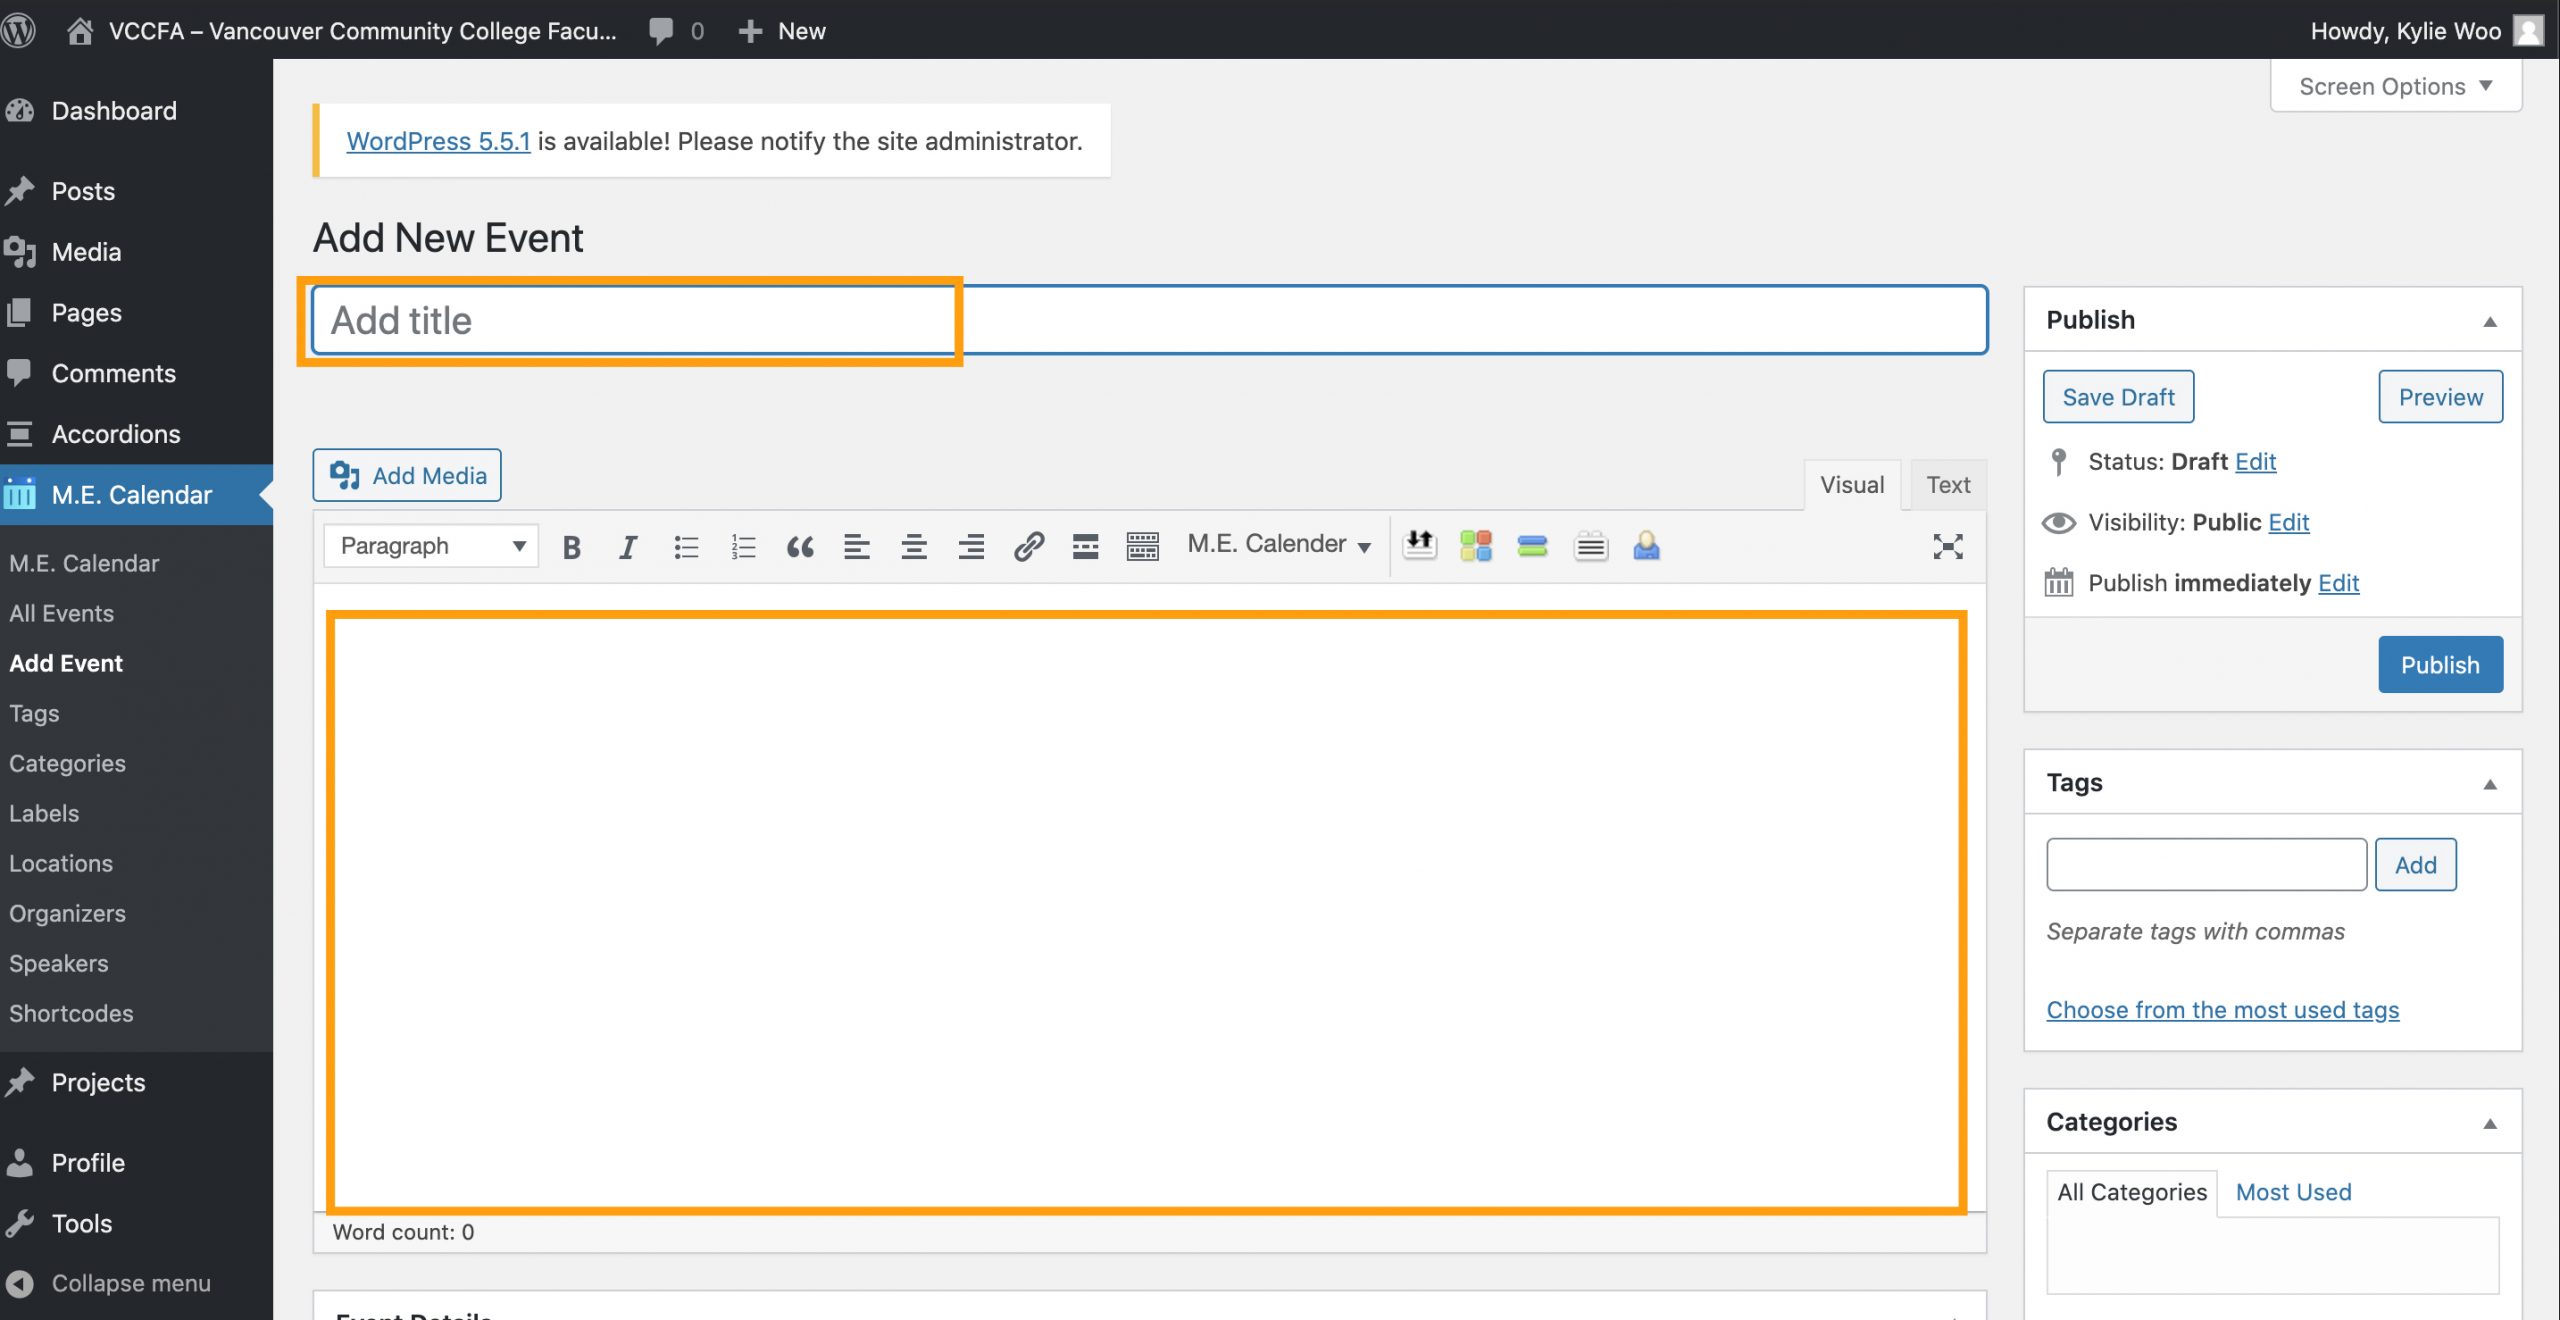
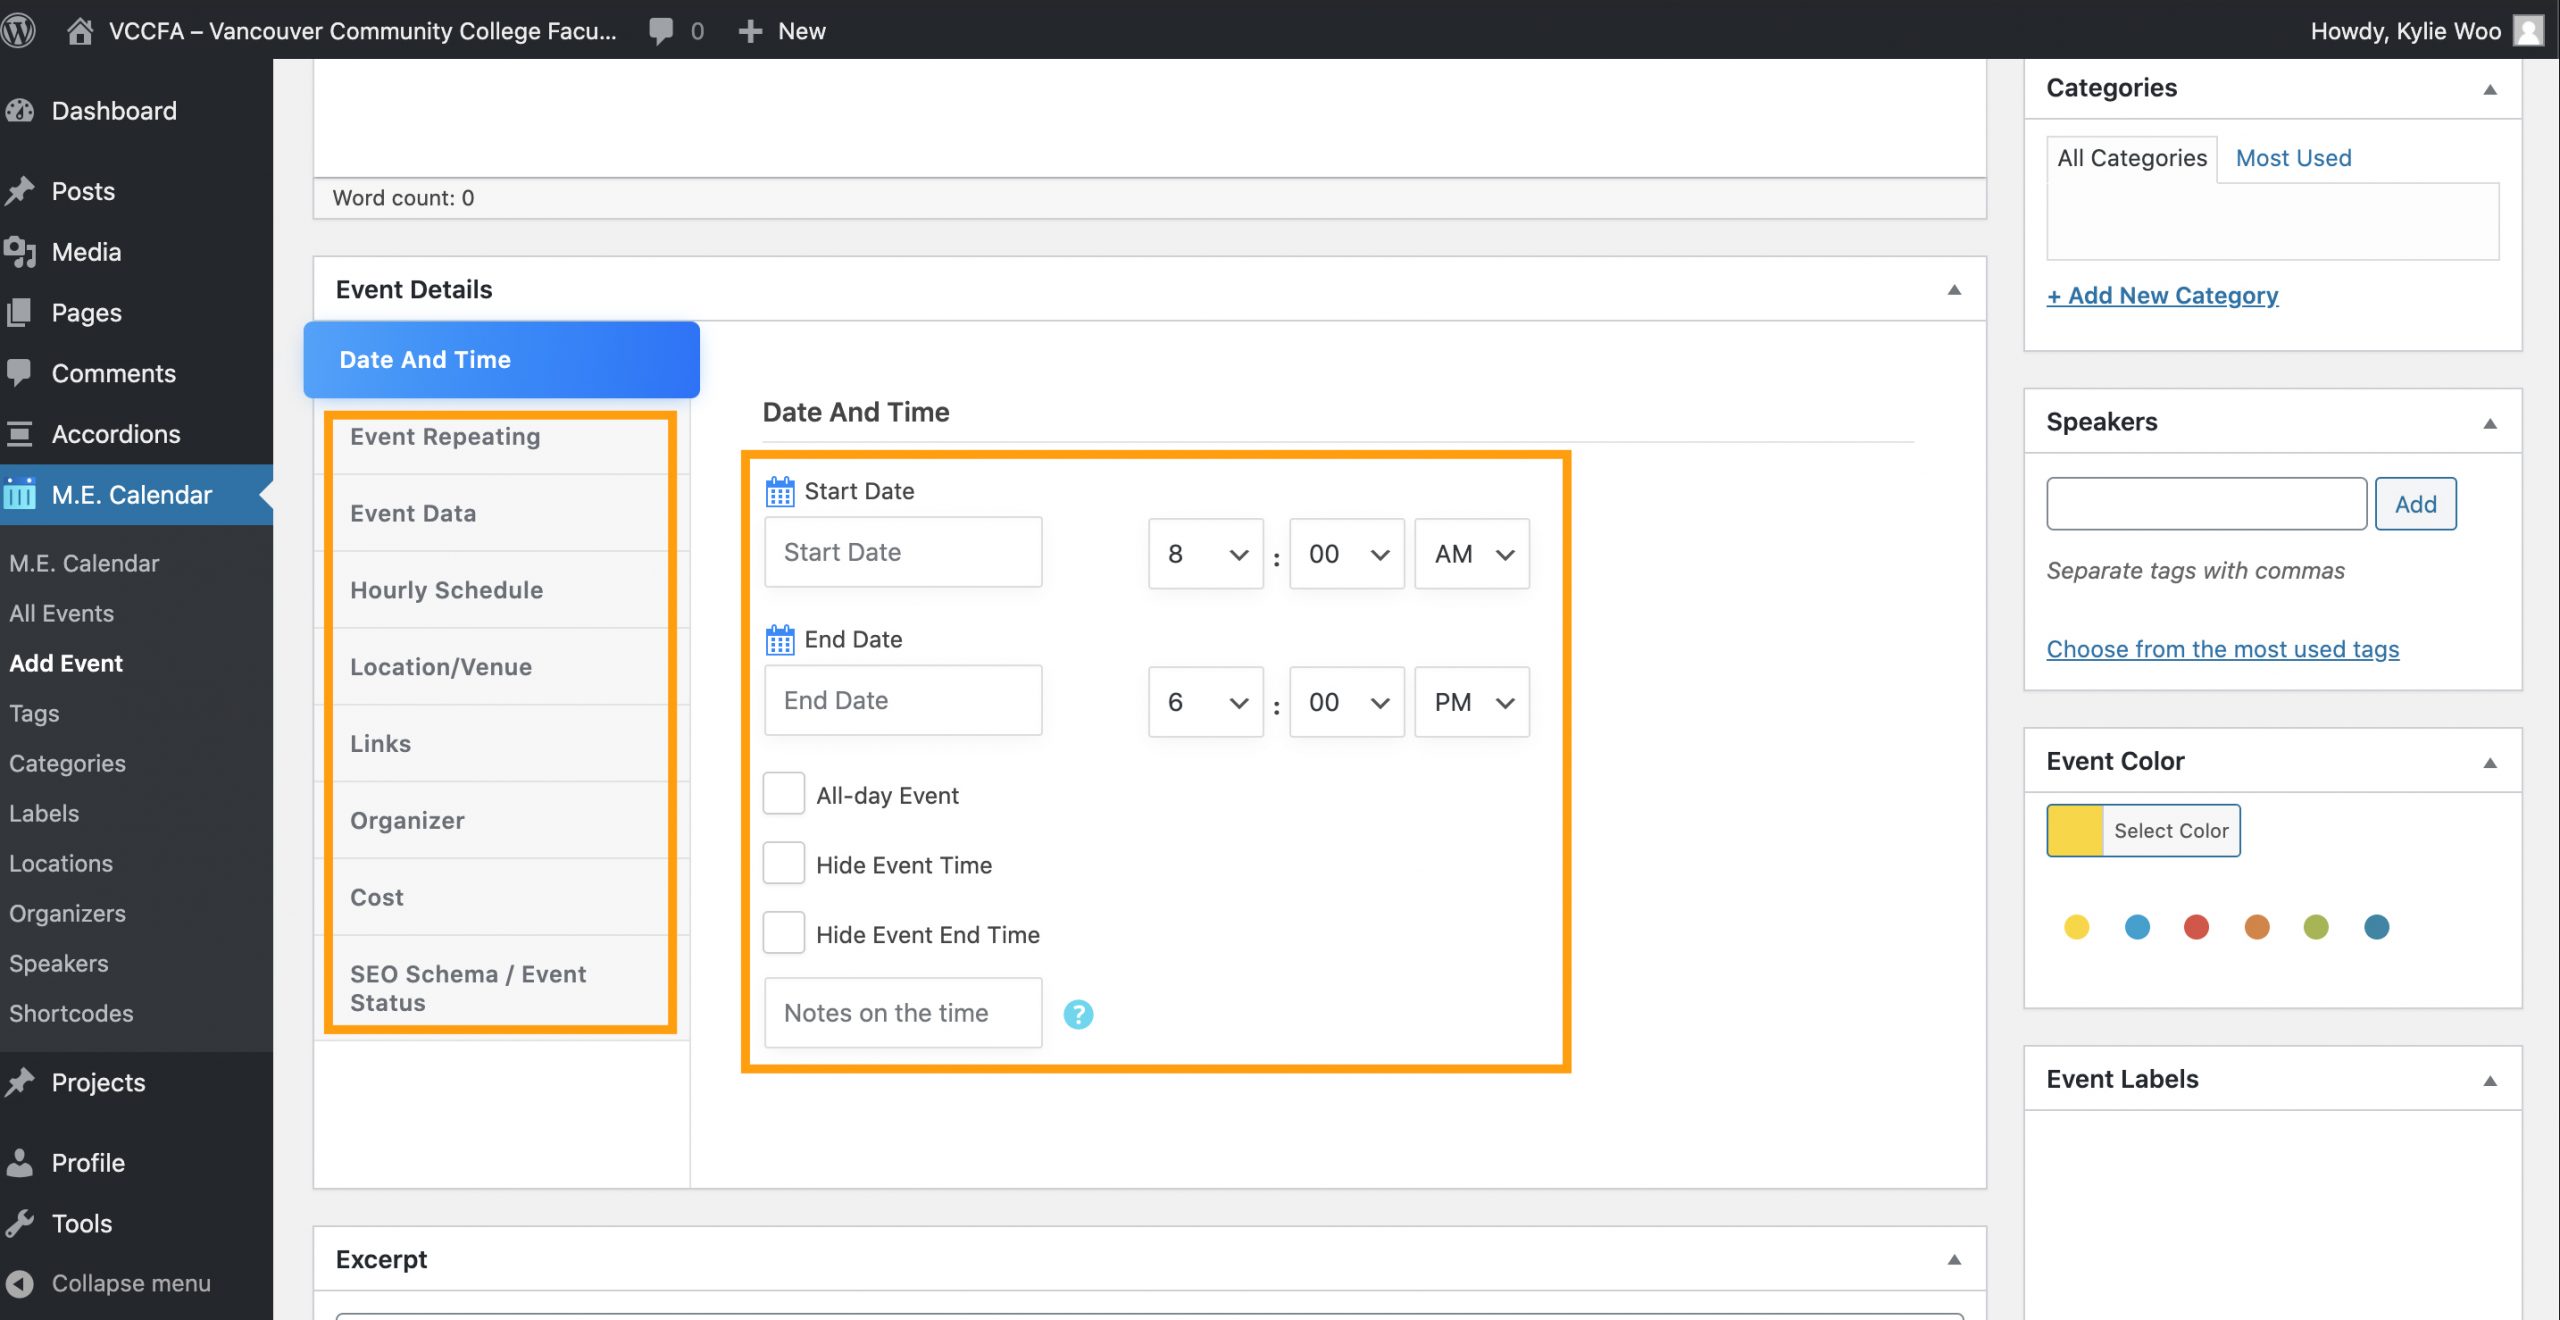
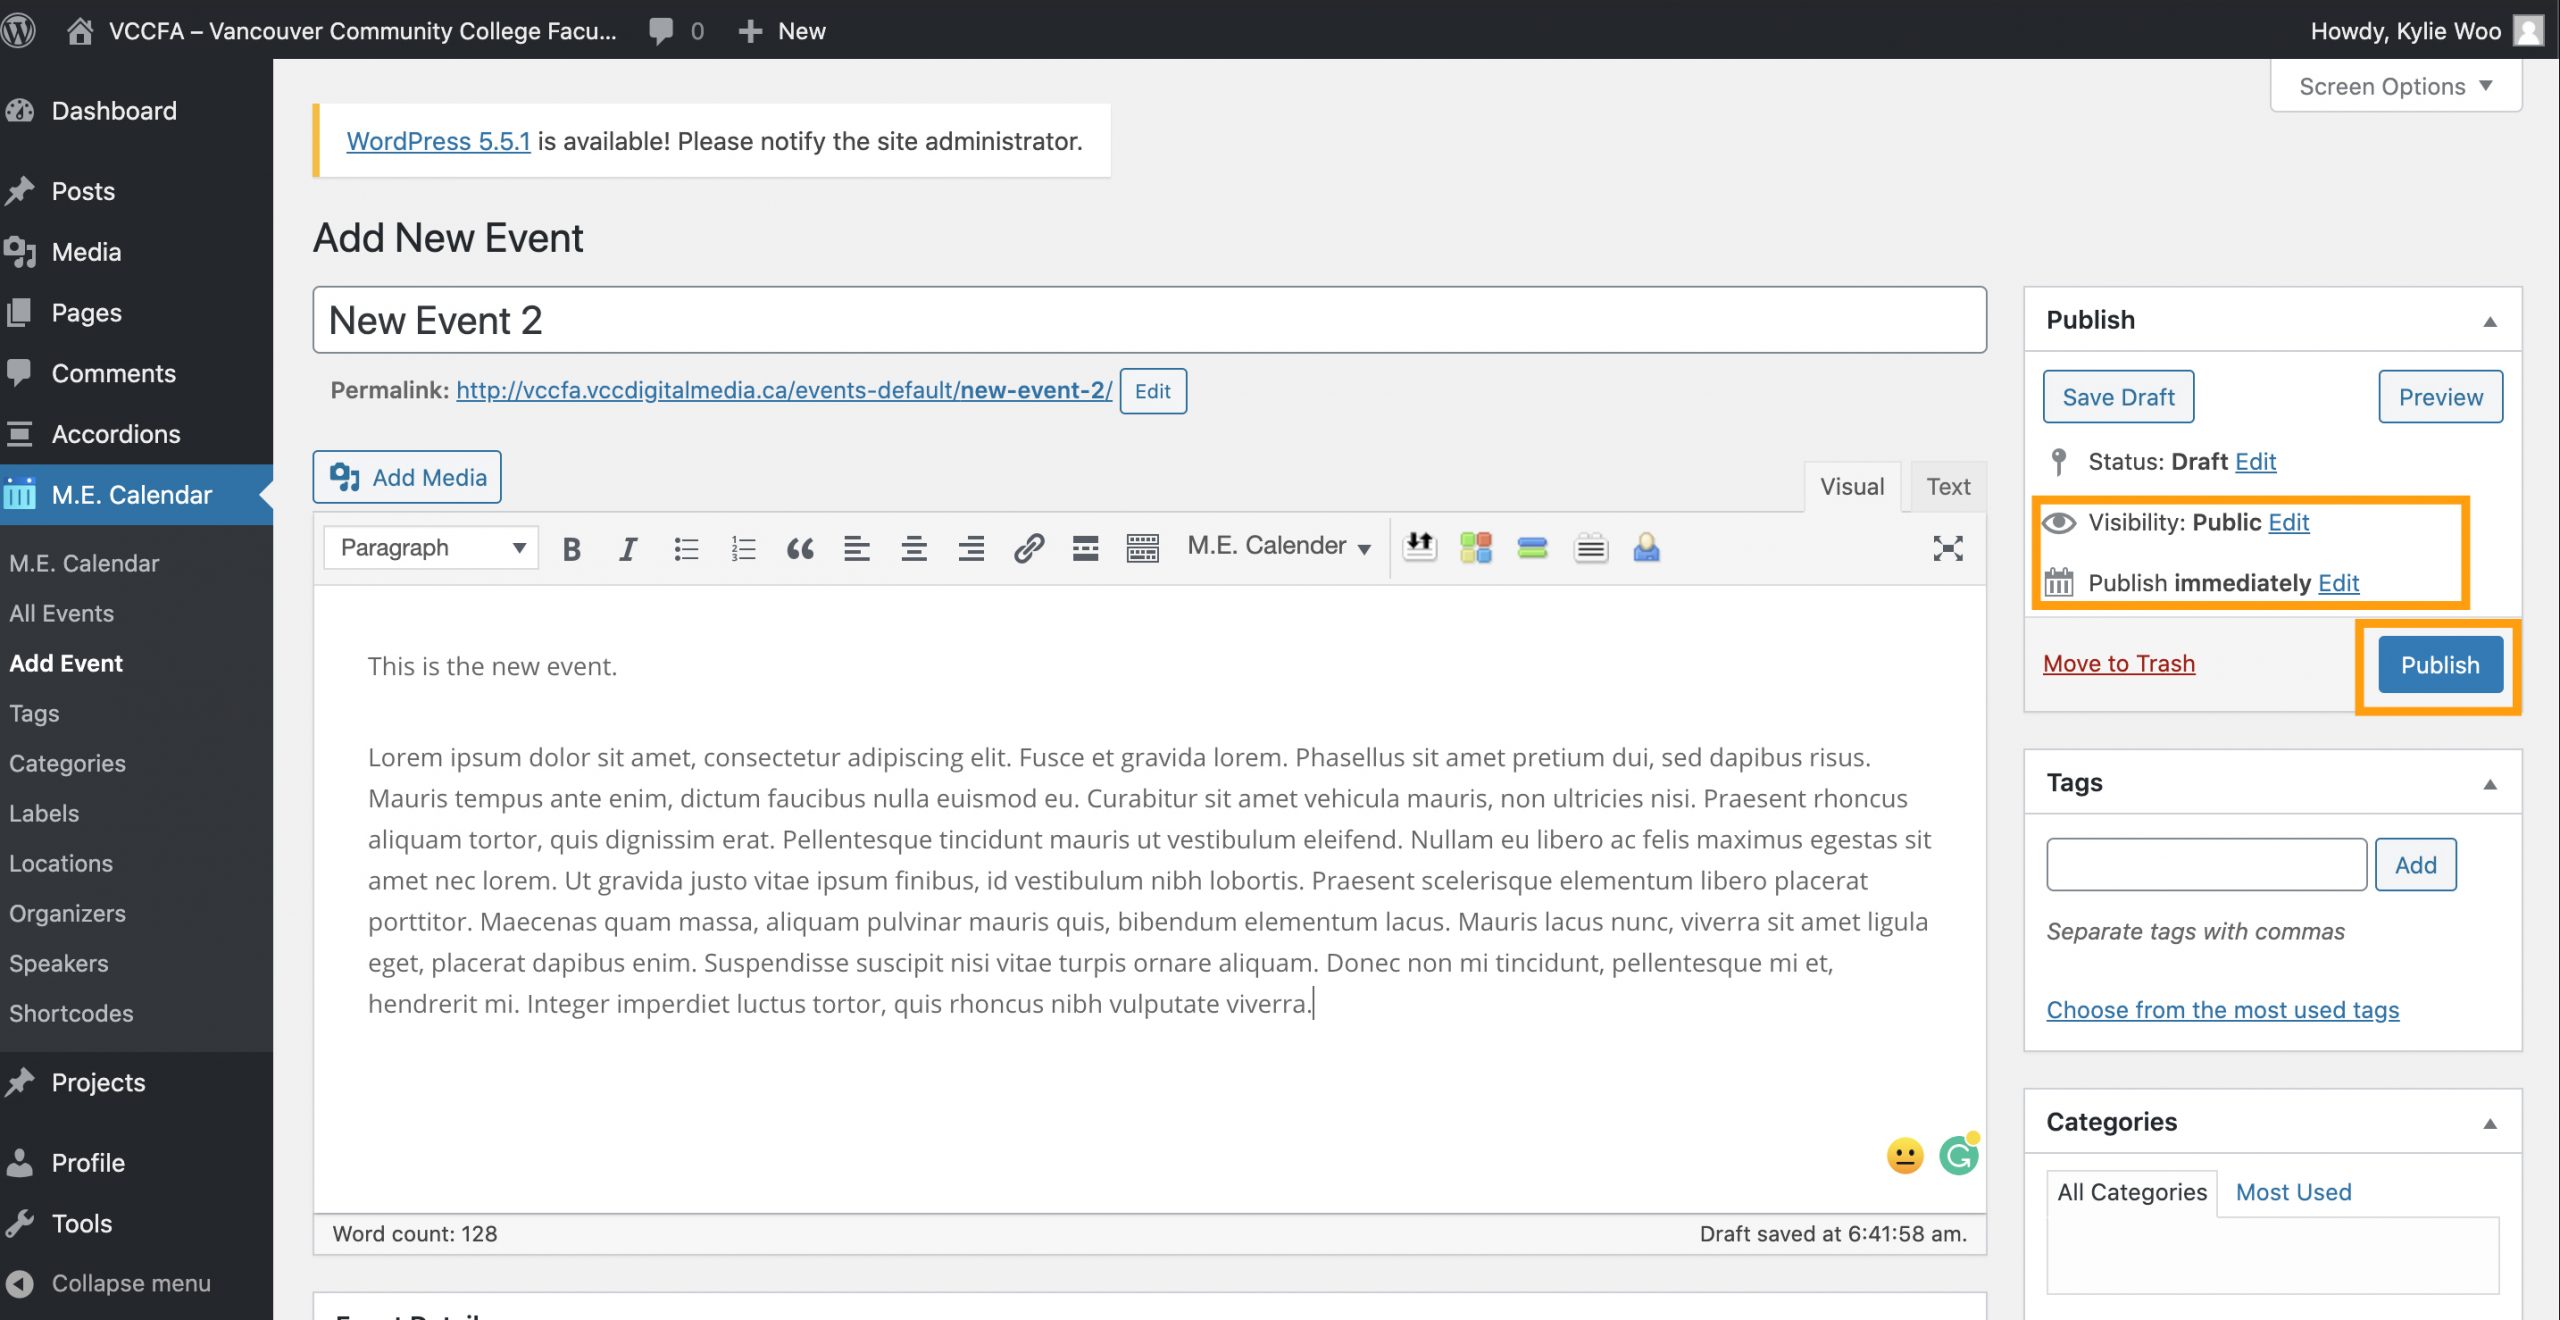
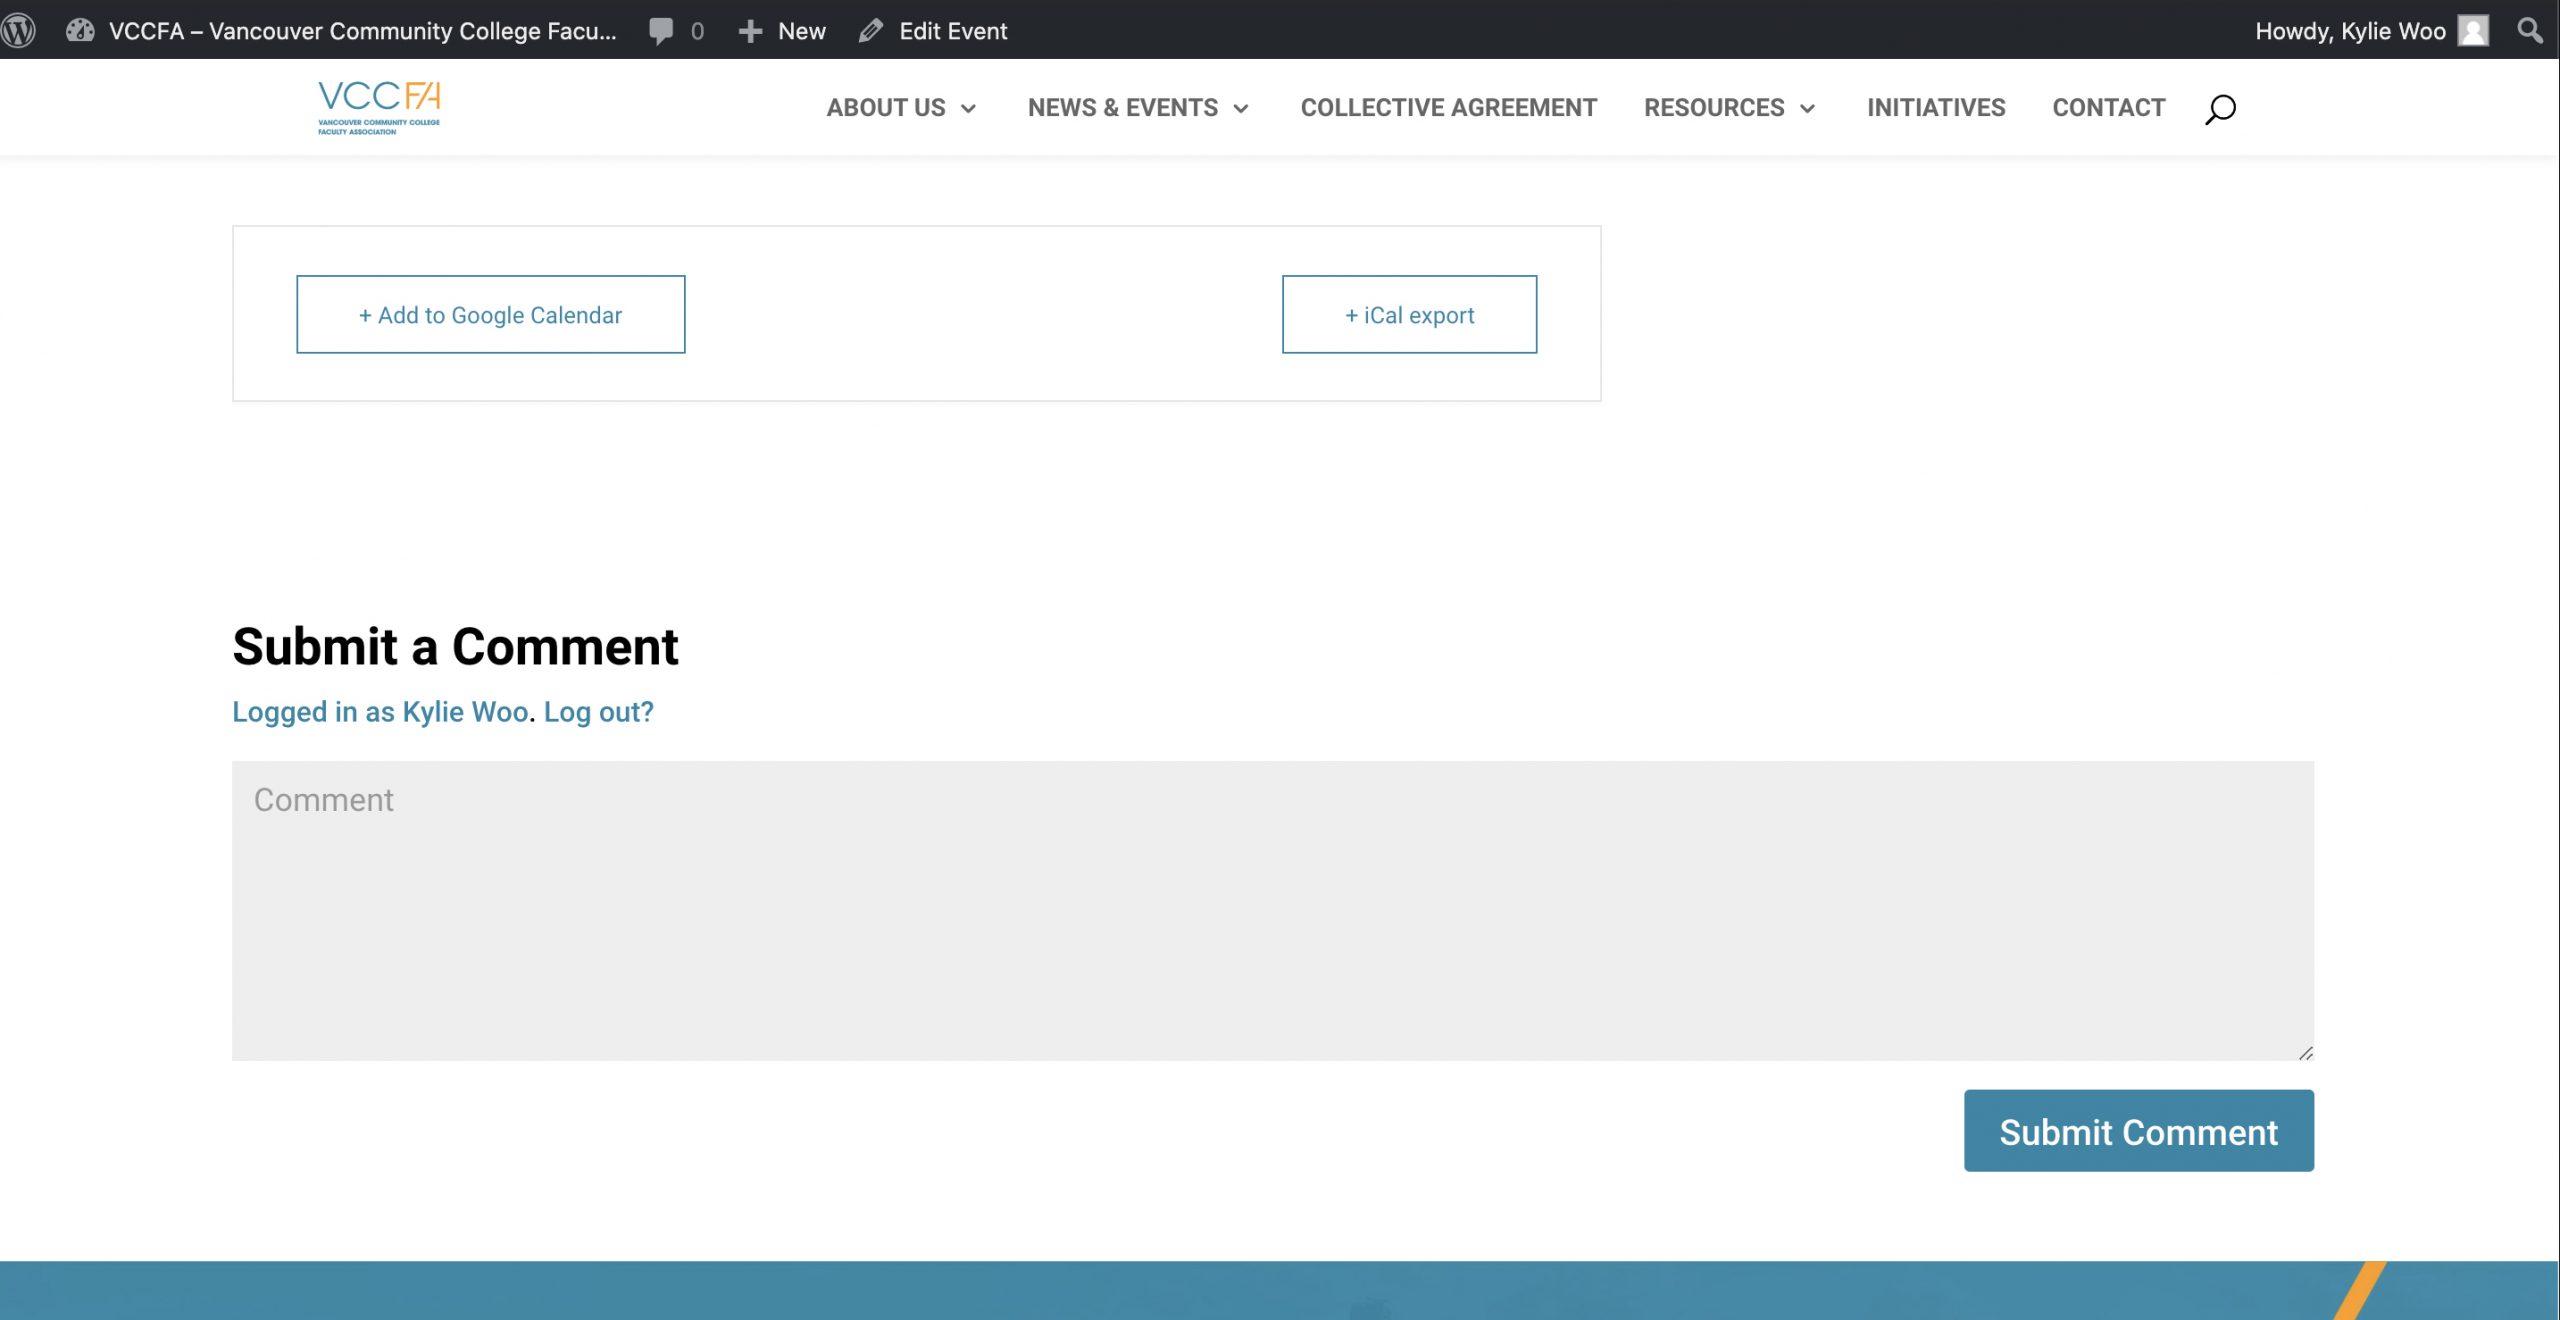
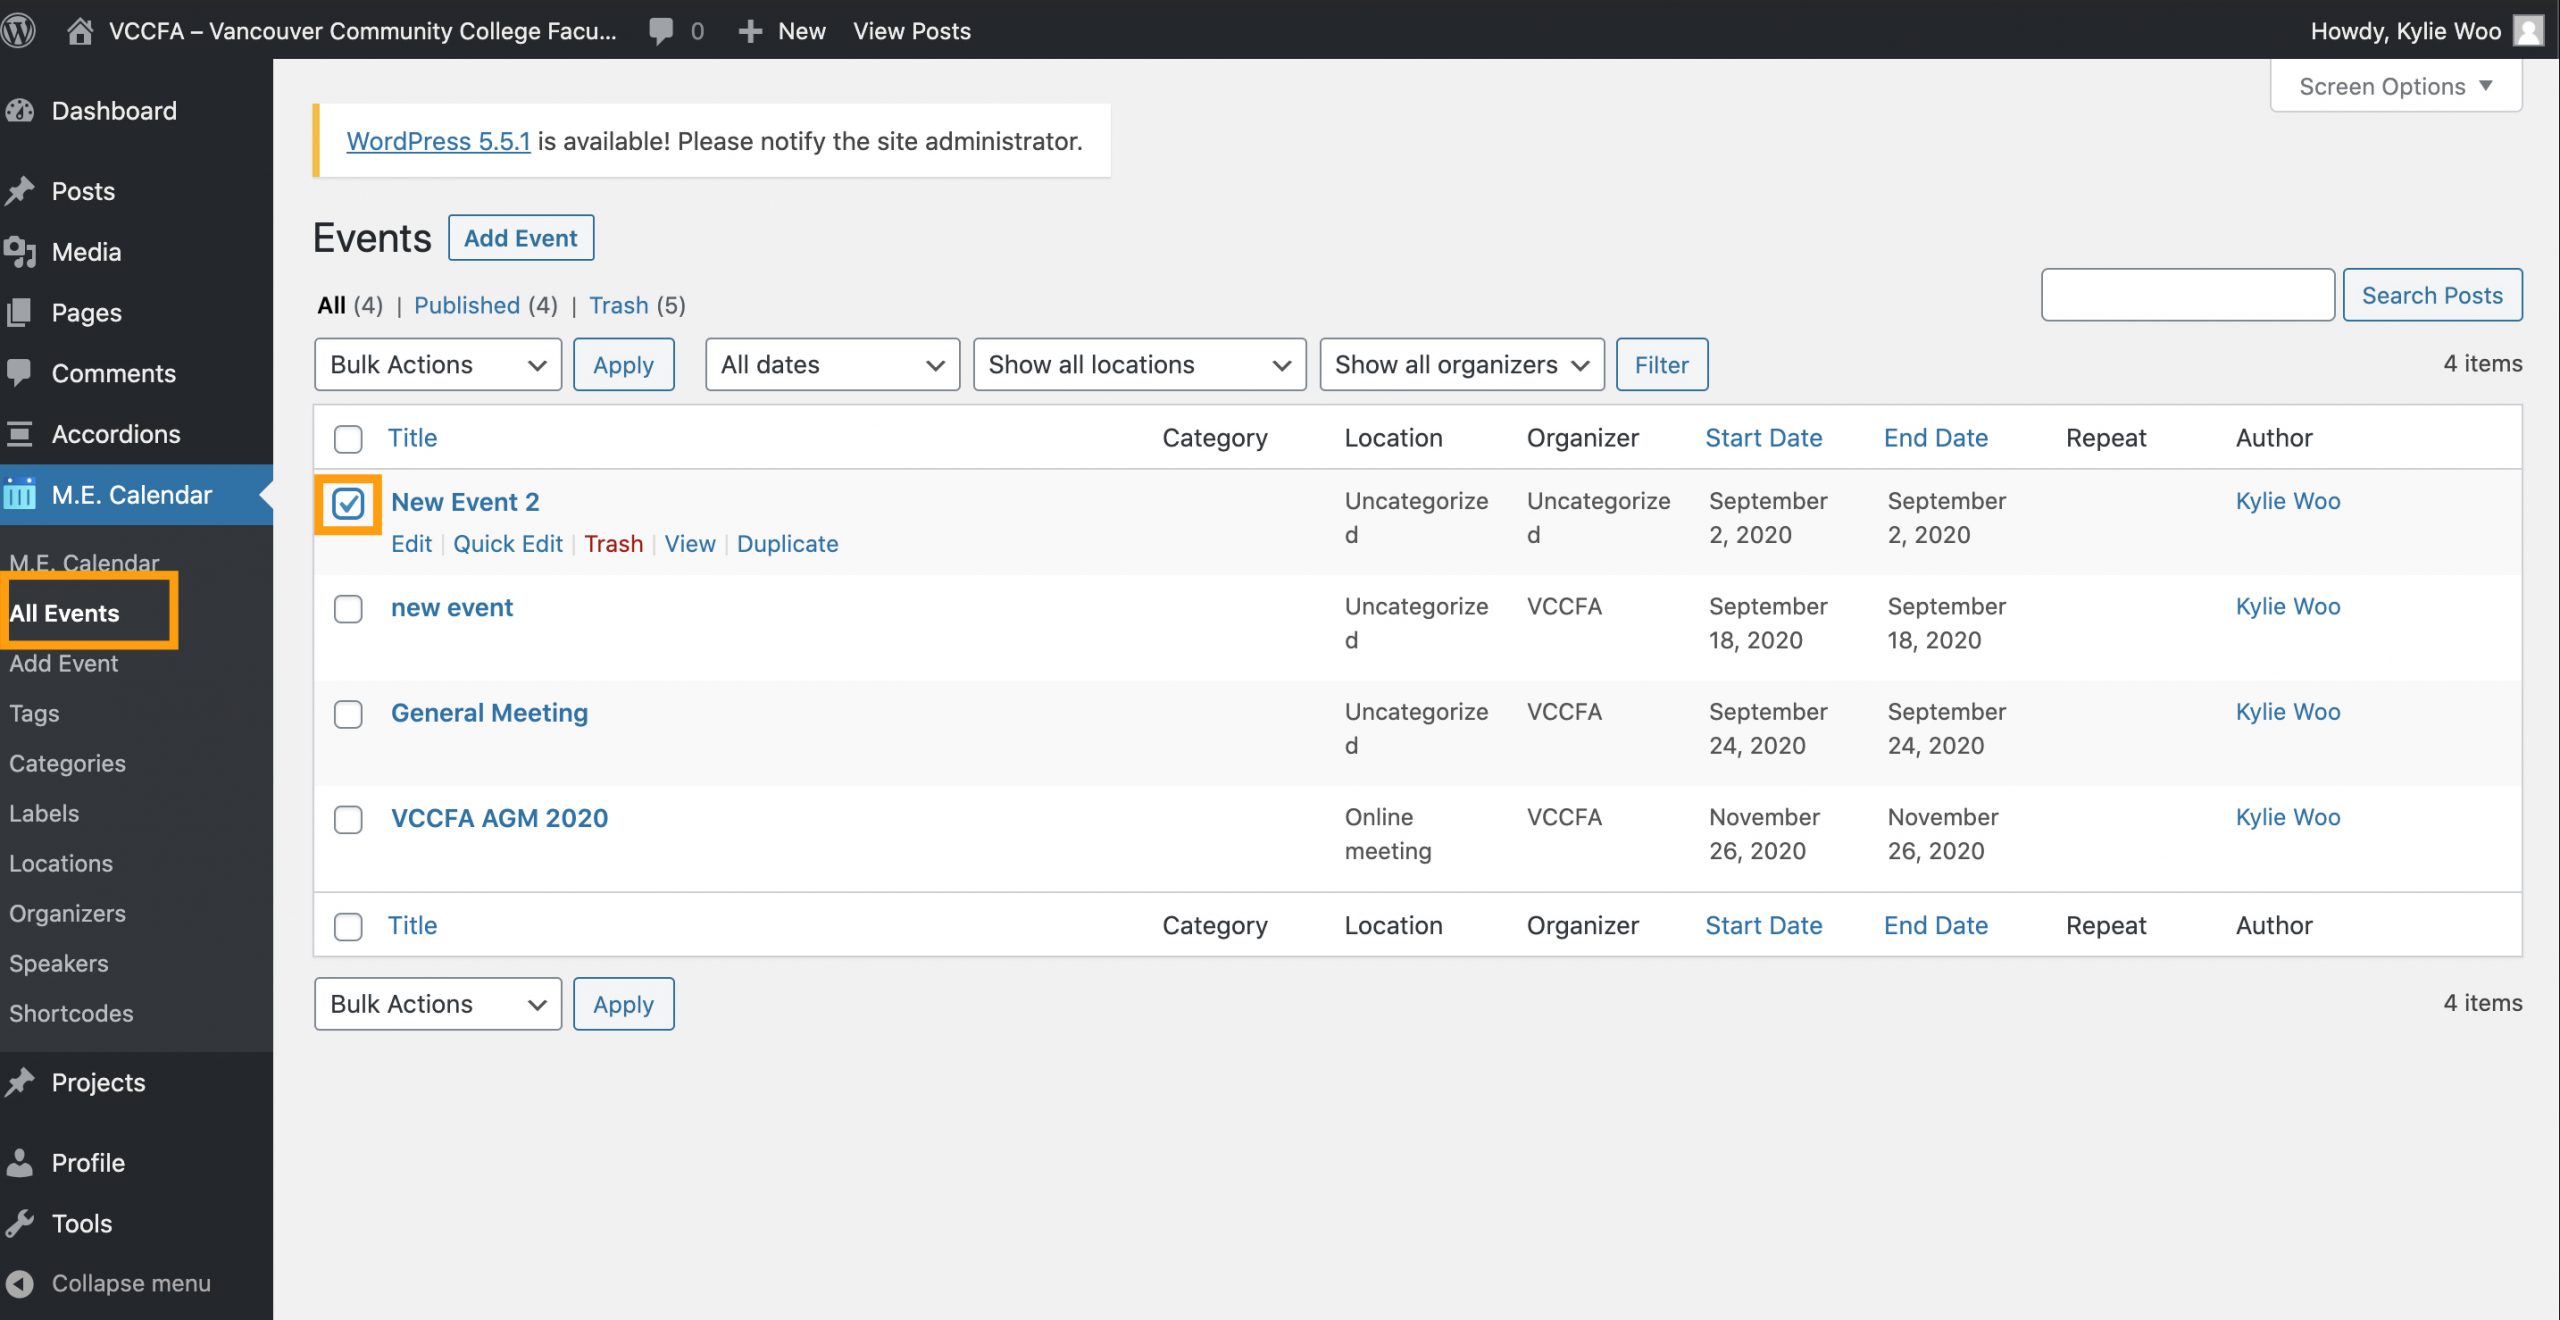
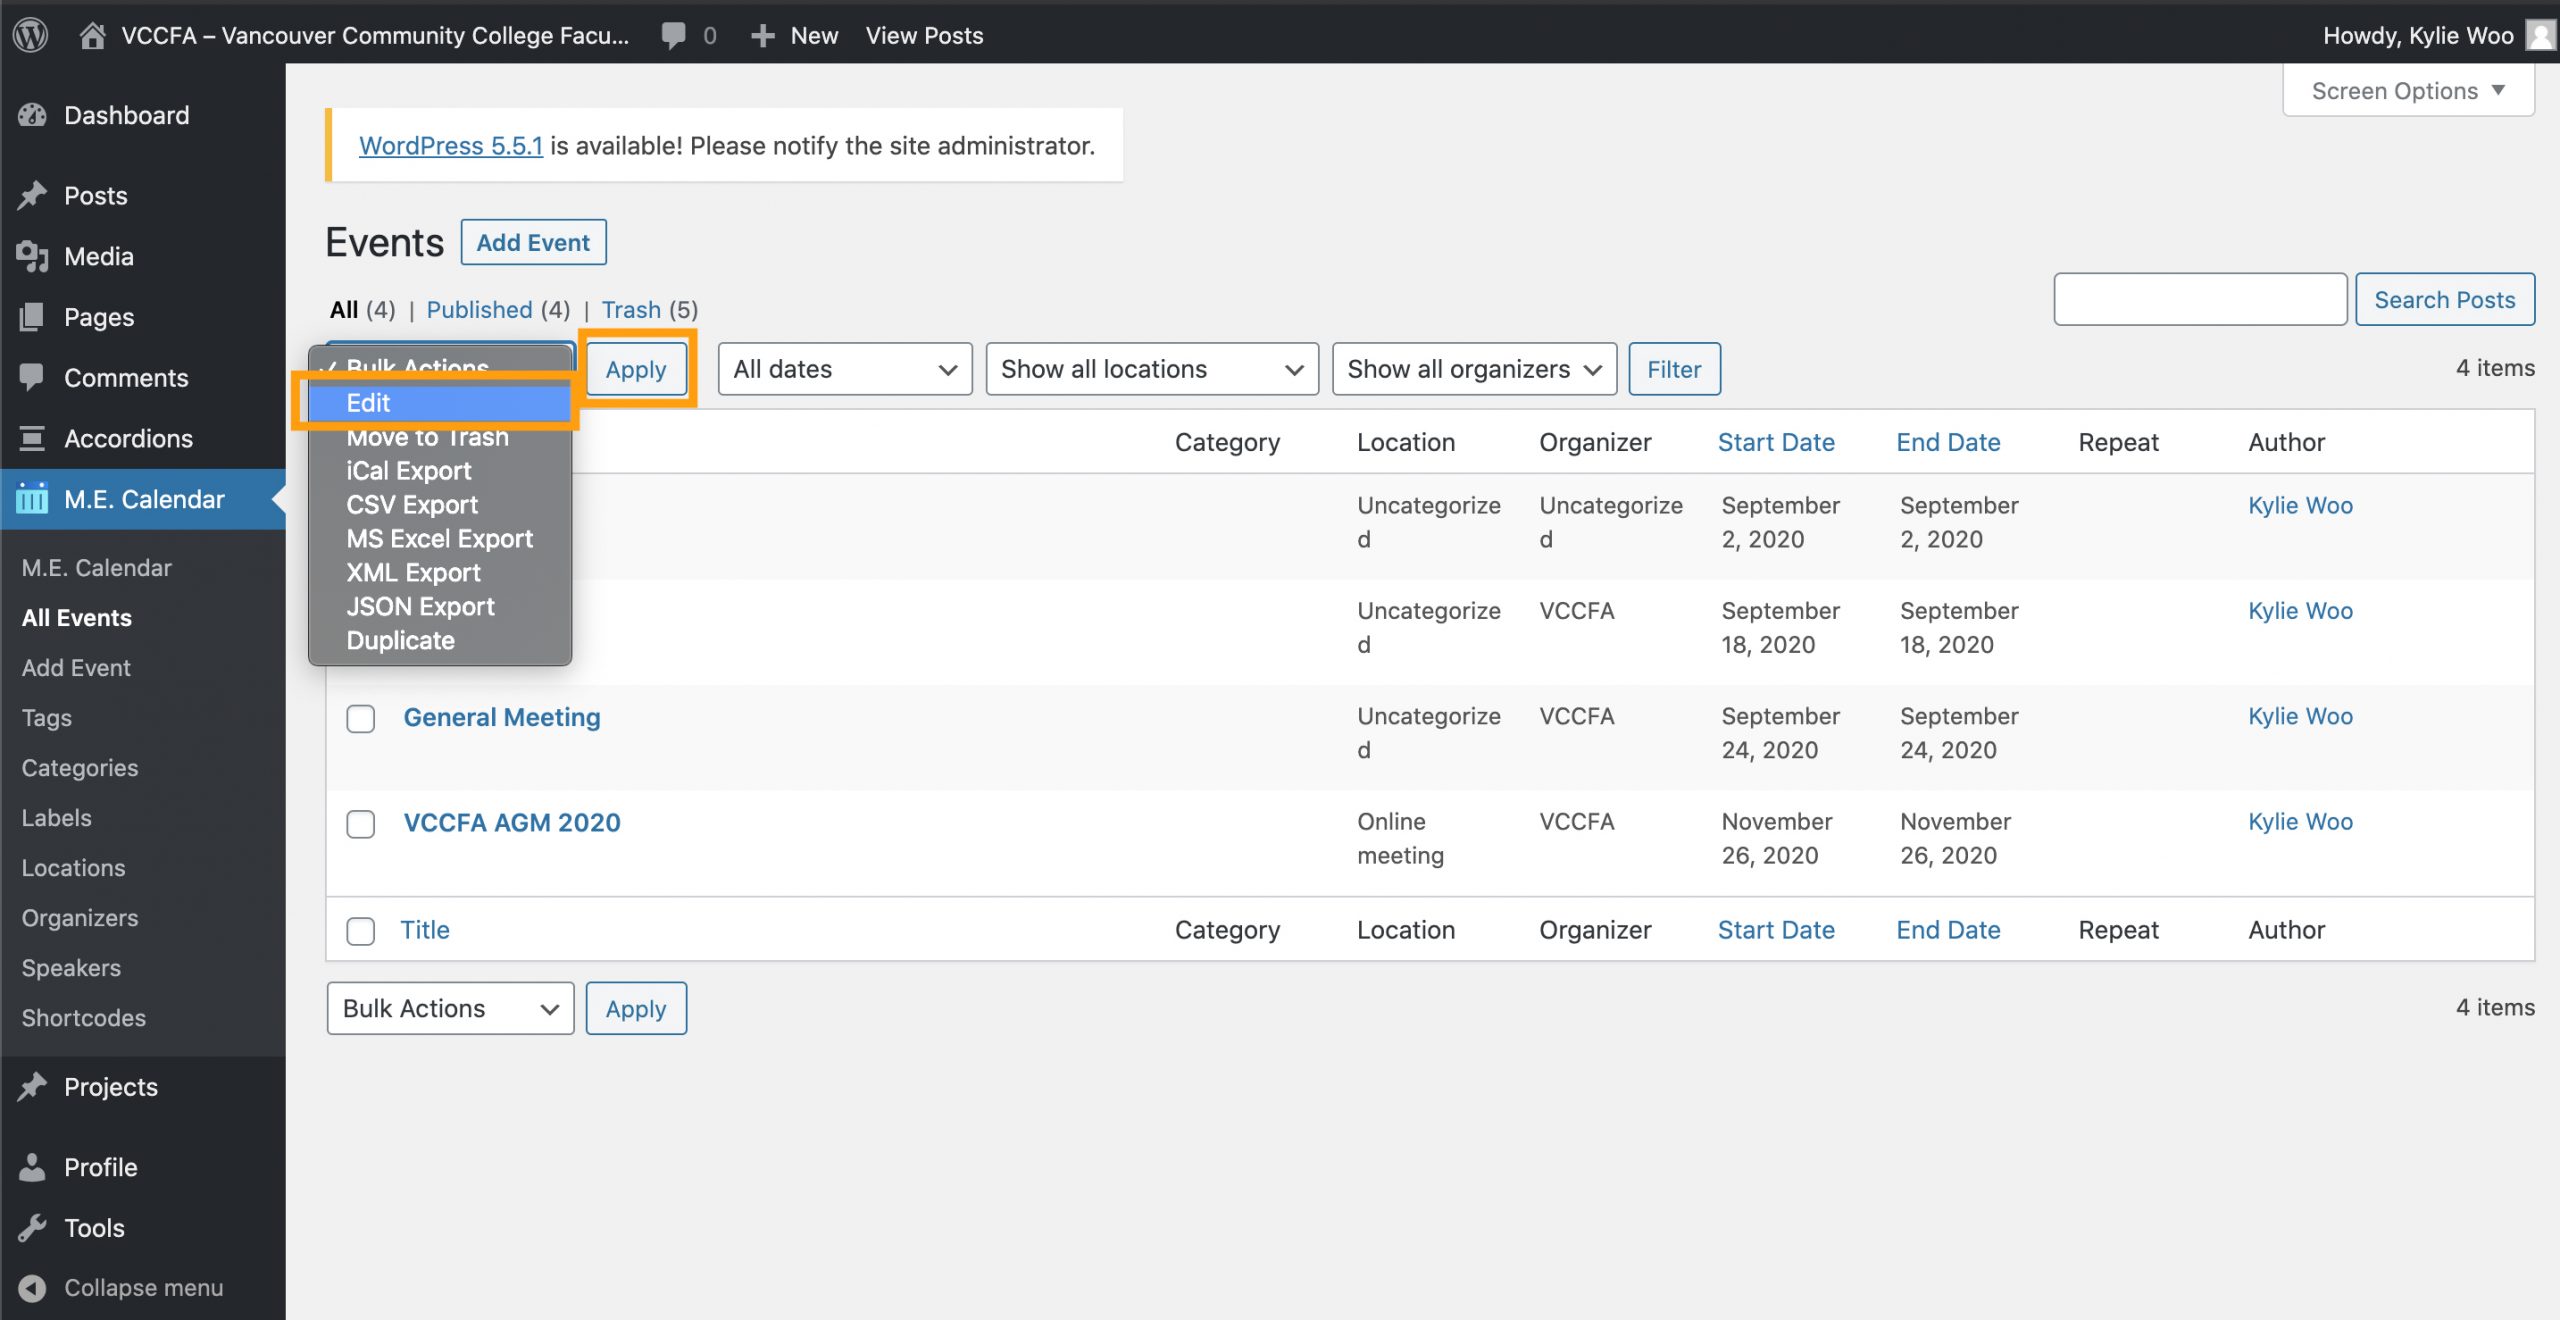
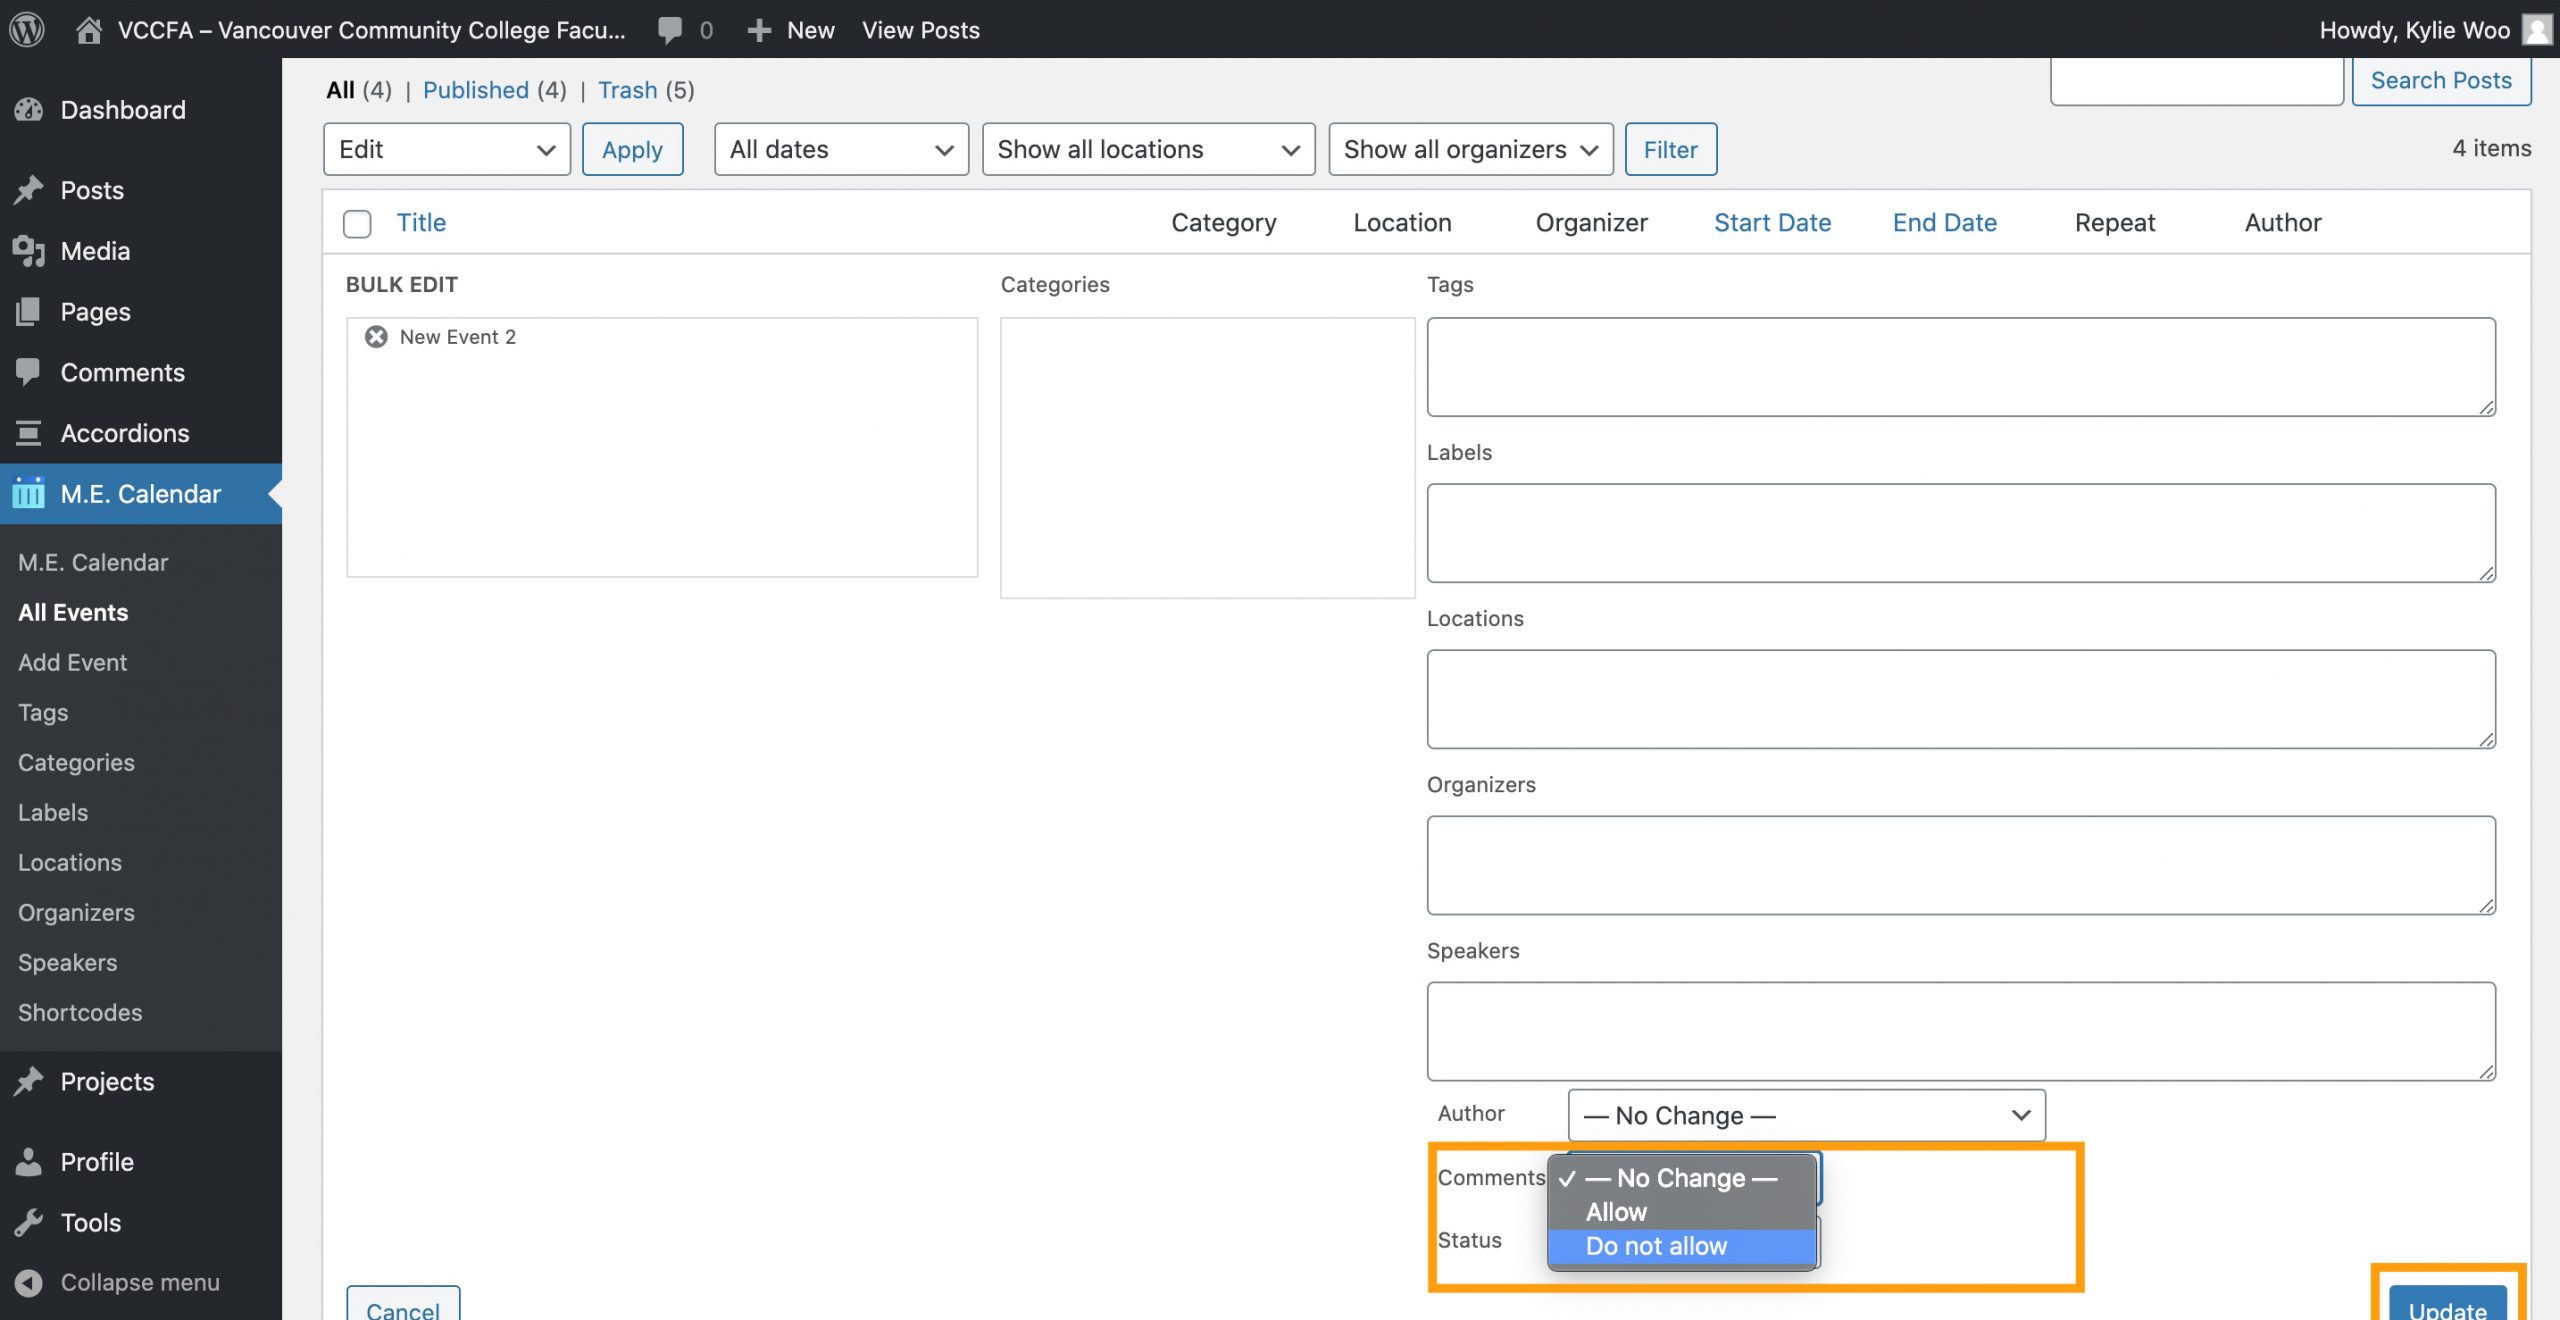
3) If you don’t see the above instructions, and see below the default editor instead, type in the event title and details there.
4. How to Update Files
4.1. Upload a File to Divi Library
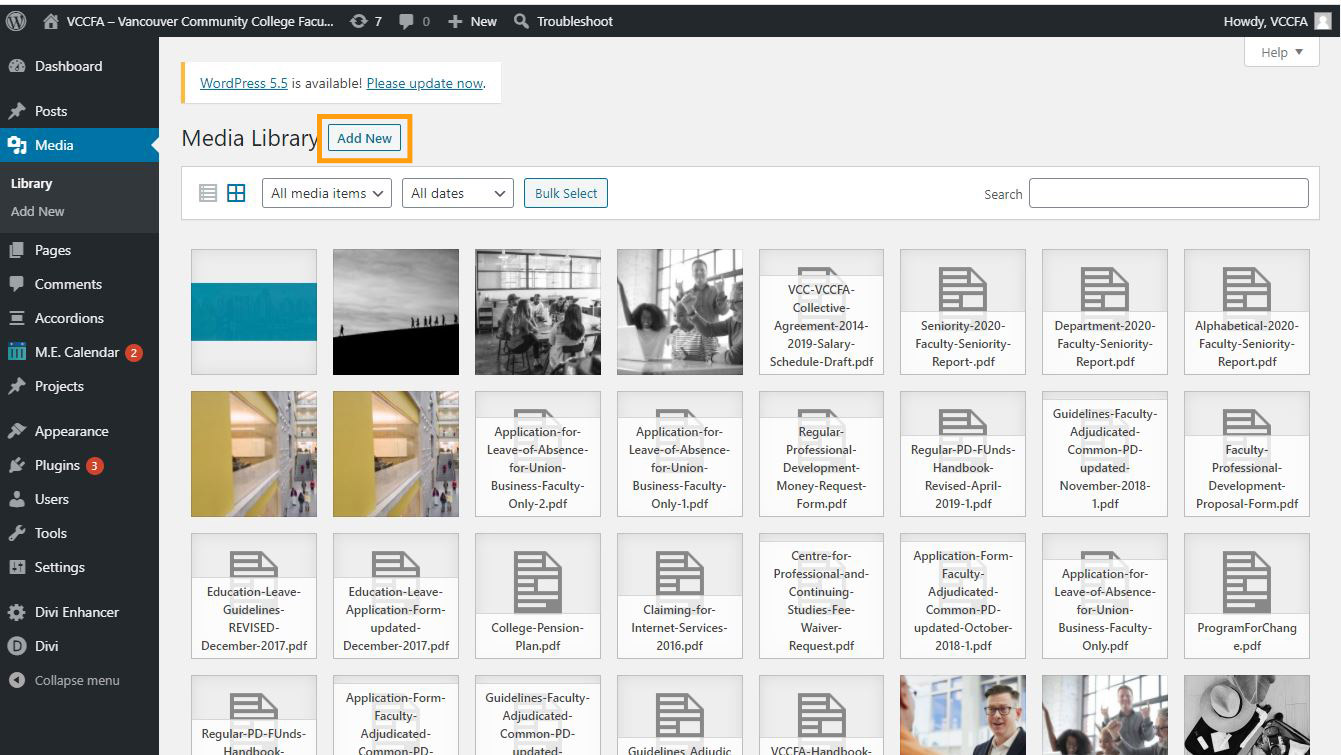
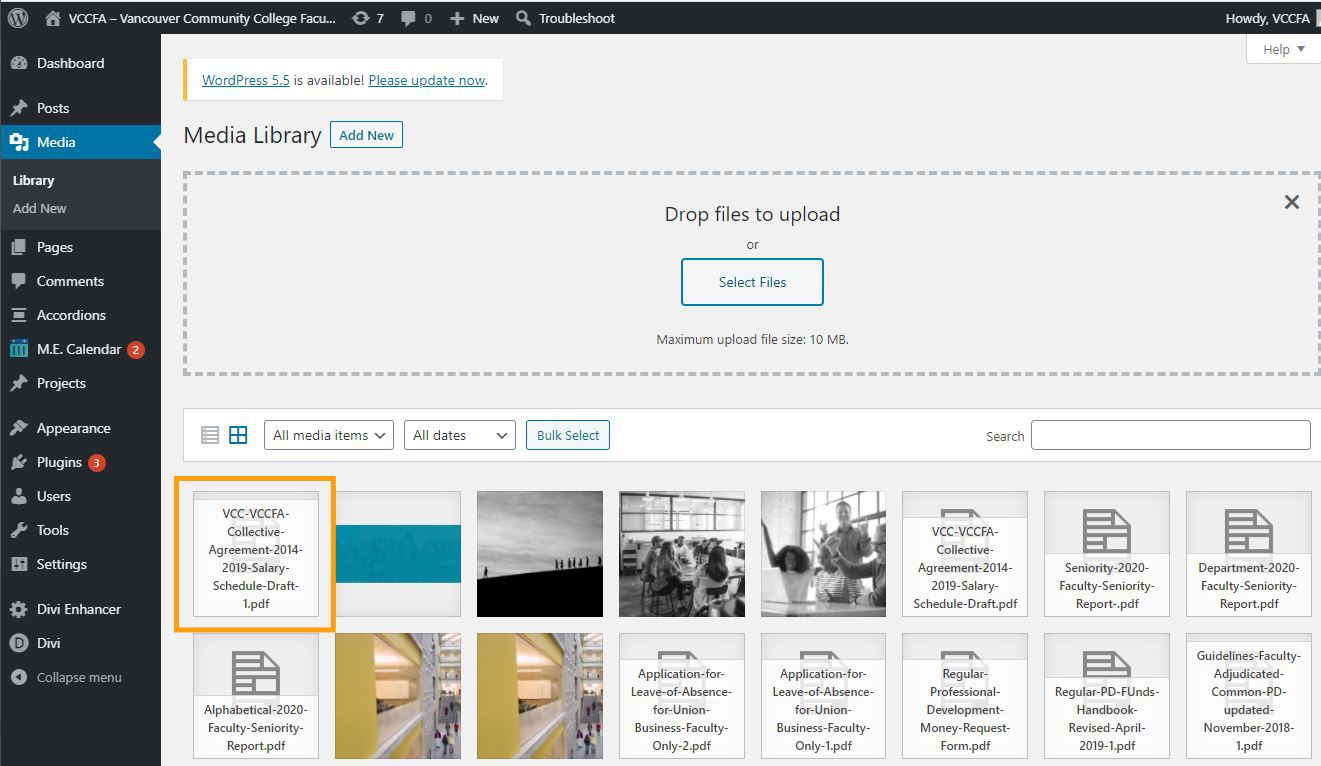
Media Library is a tab in your WordPress admin sidebar which is used to manage user uploads (images, audio, video, and other files). Under the Media menu, there are two screens. The first screen Library lists all the files in the media library. These files can be edited and deleted from the library.
Open the WordPress Dashboard and click the ‘Media’ menu in the sidebar.
Media Library list shows up. Click the ‘Add New’ button.
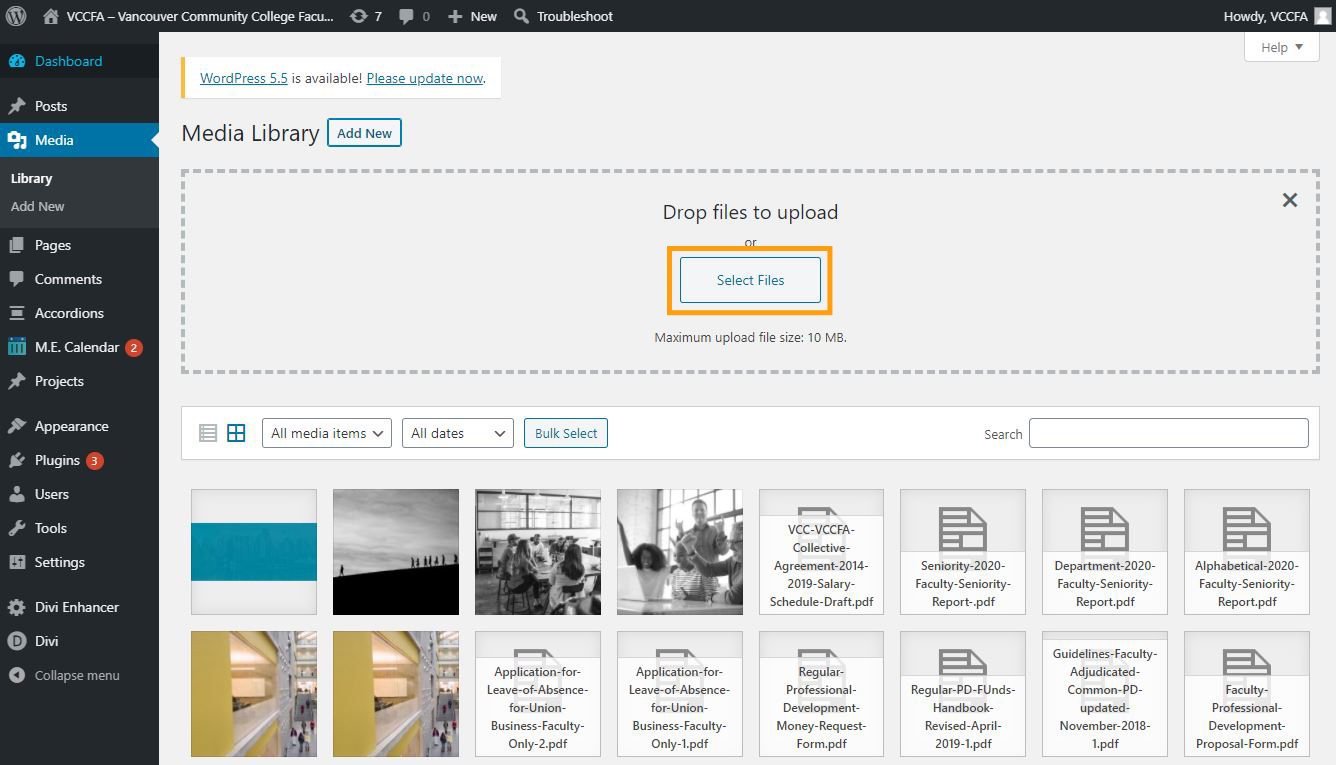
To upload a new file, drop the file to the upload area or click the ‘Select Files’ button, and select the file.
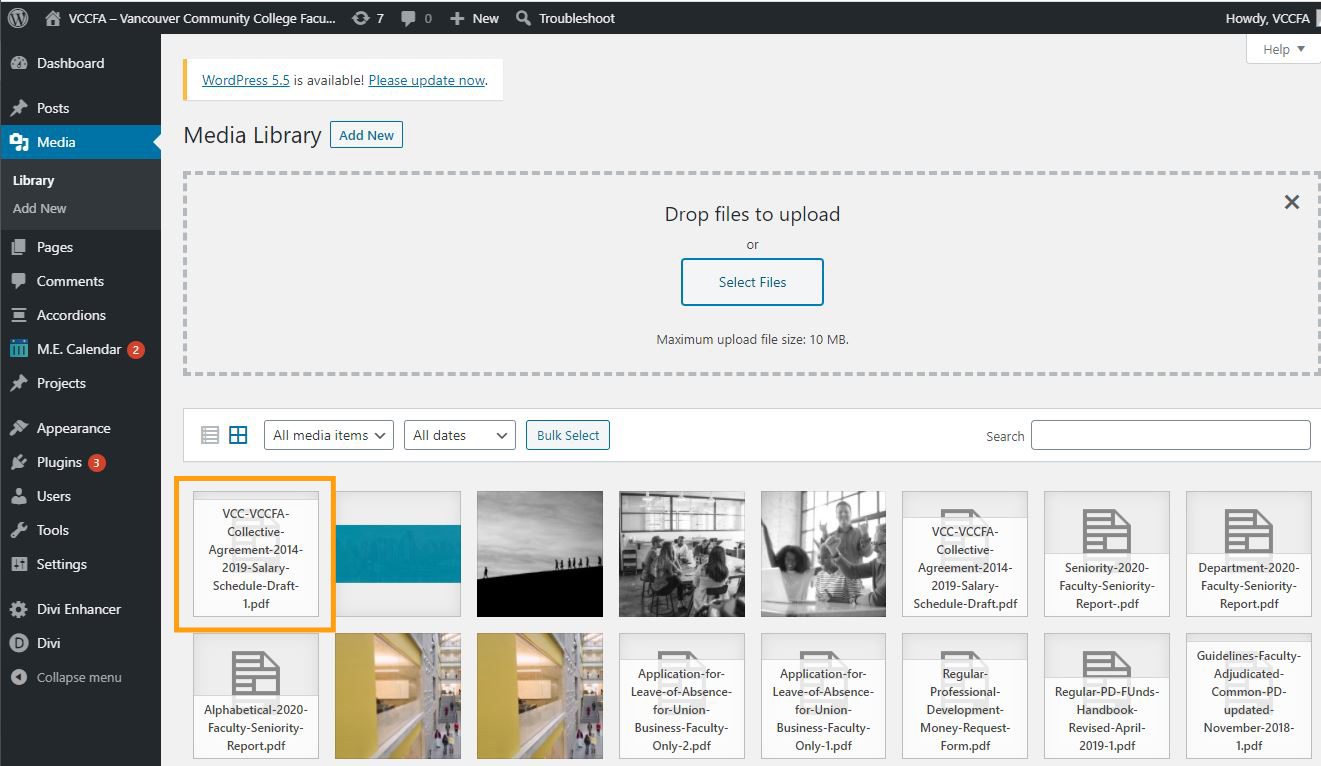
When you upload the new file successfully, the new file will show up in the list.
4.2. Update a File on a Page
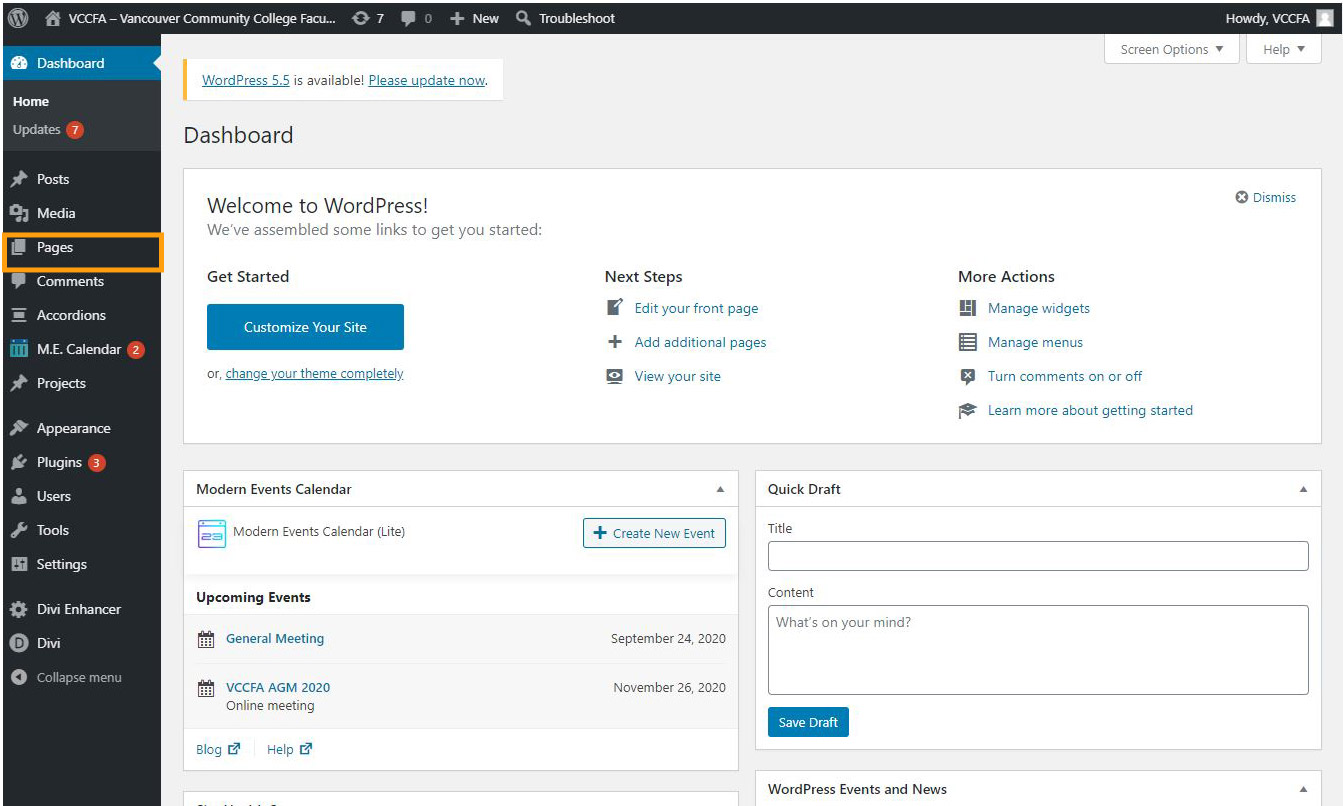
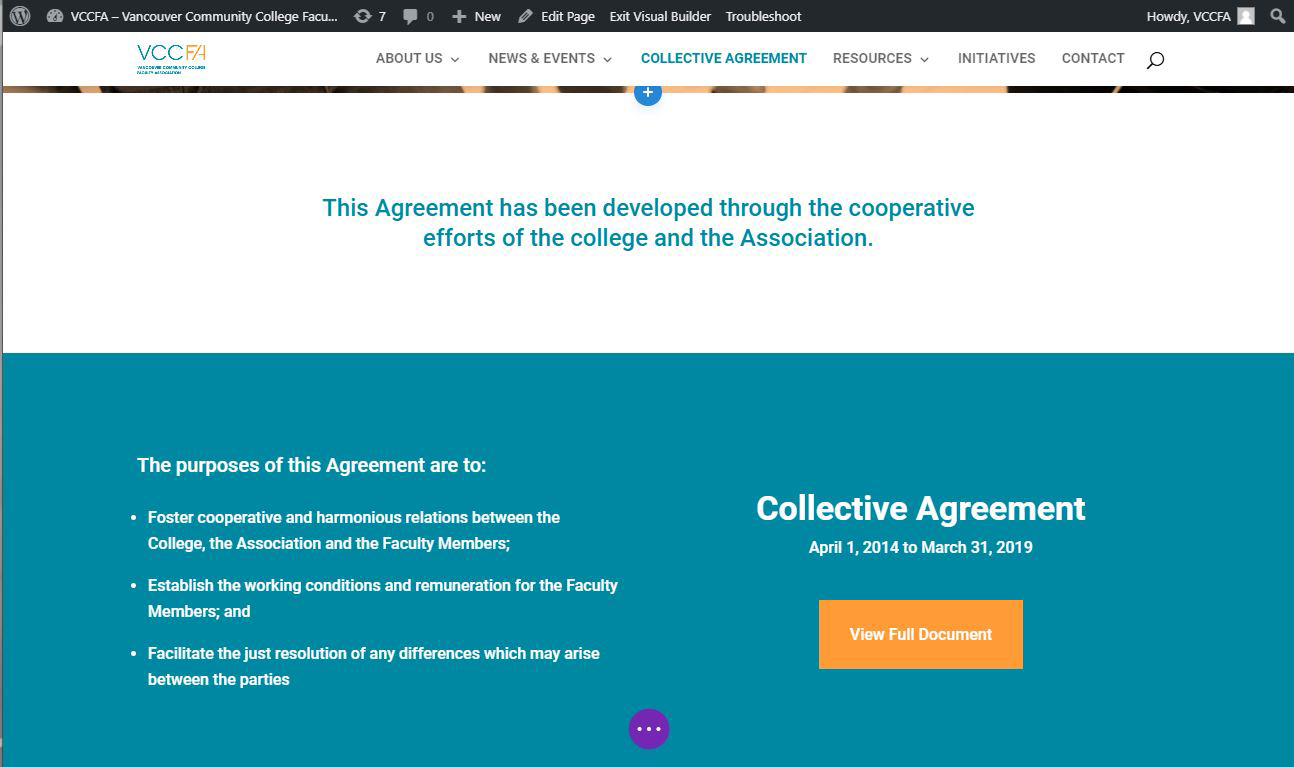
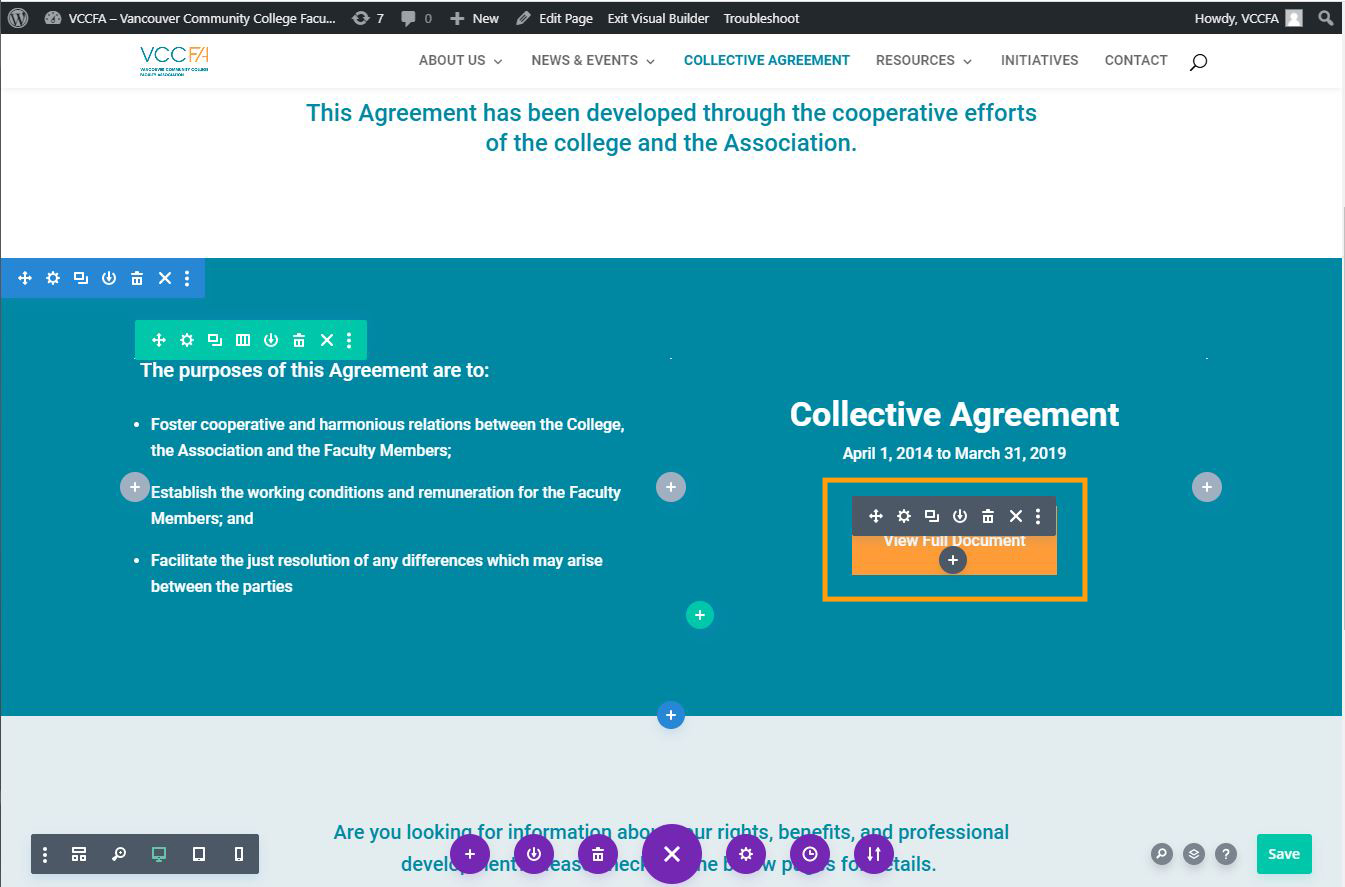
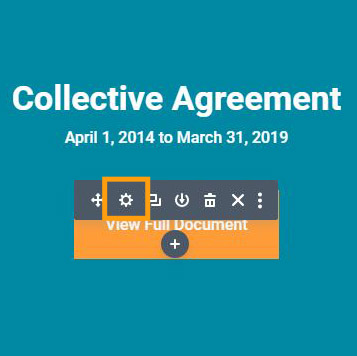
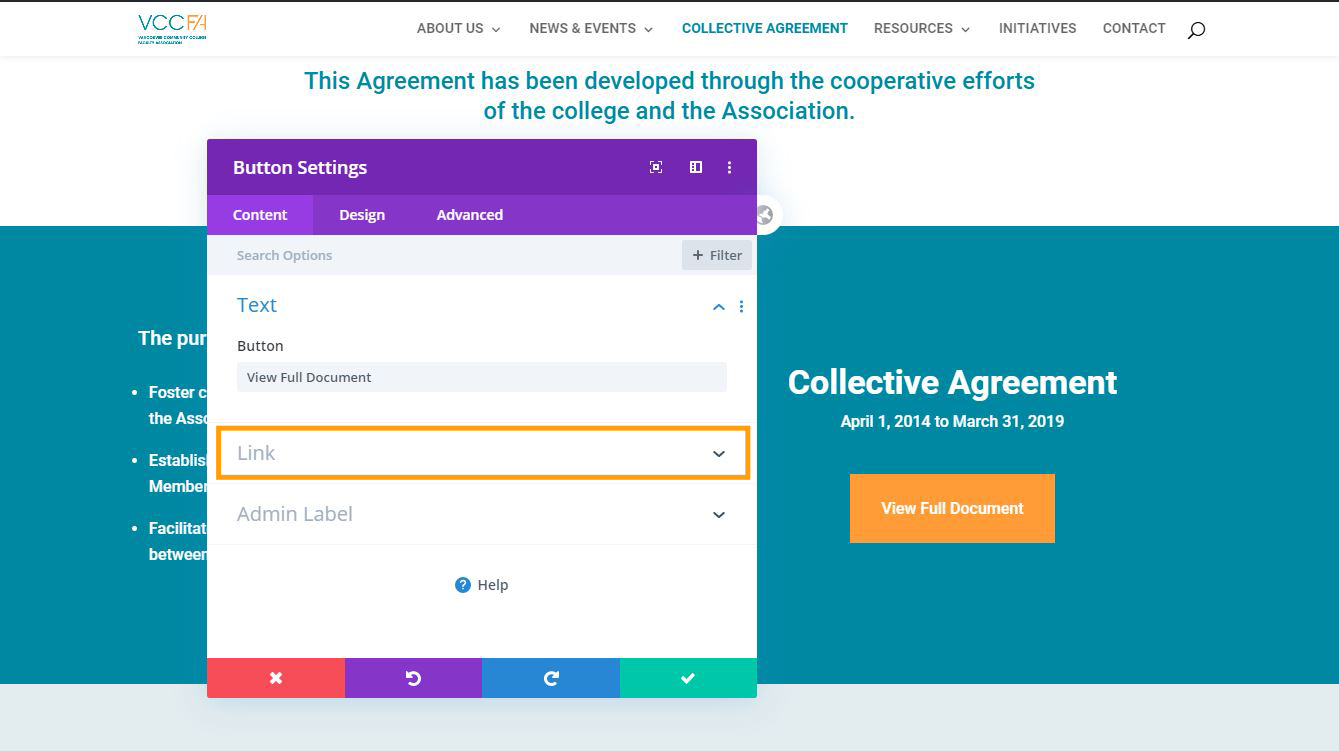
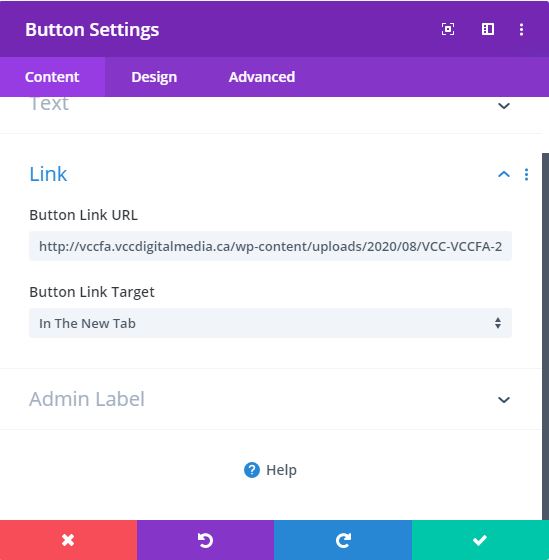
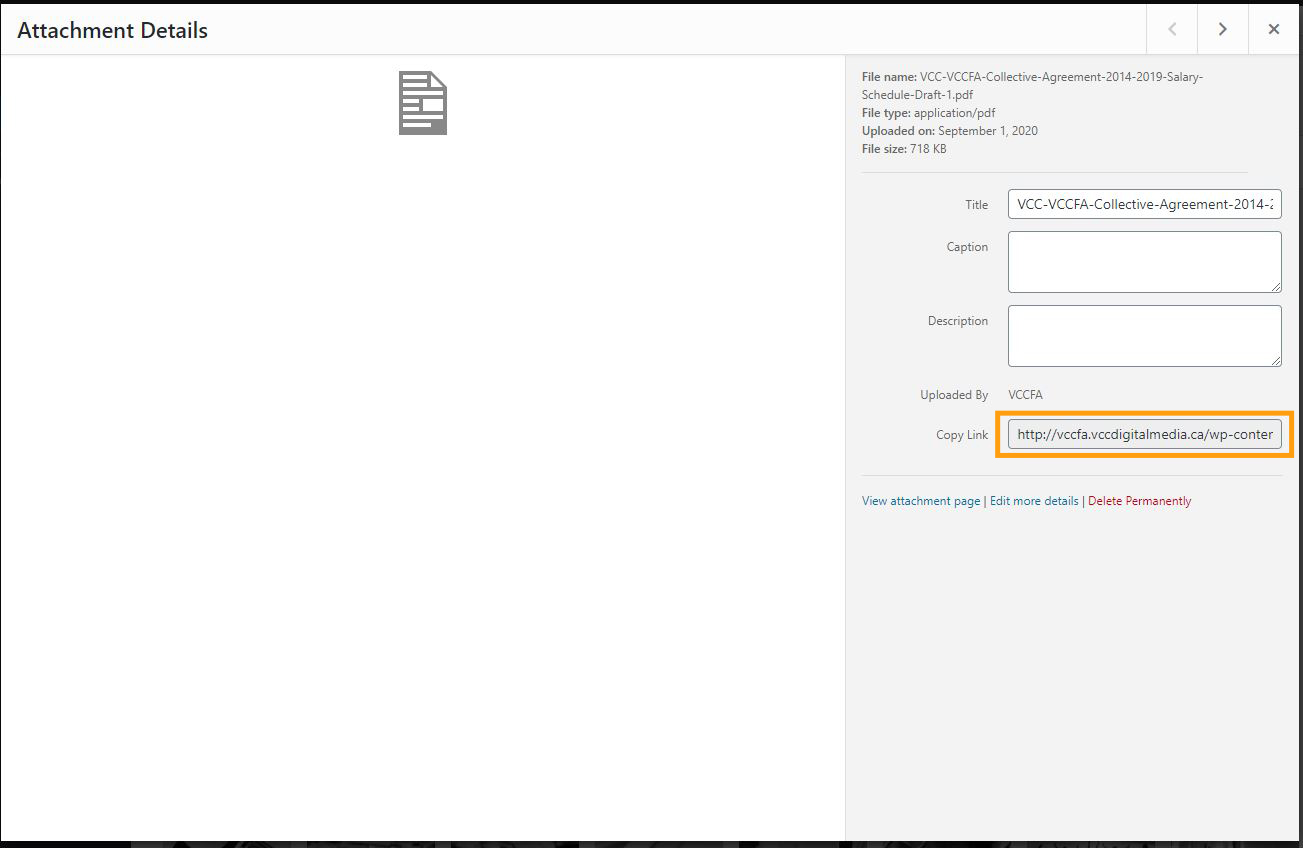
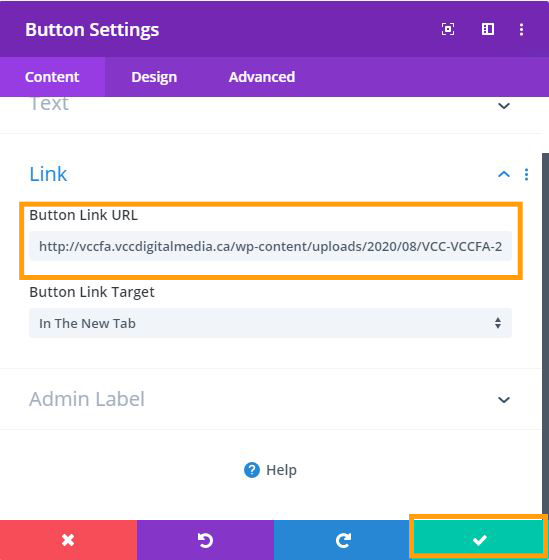
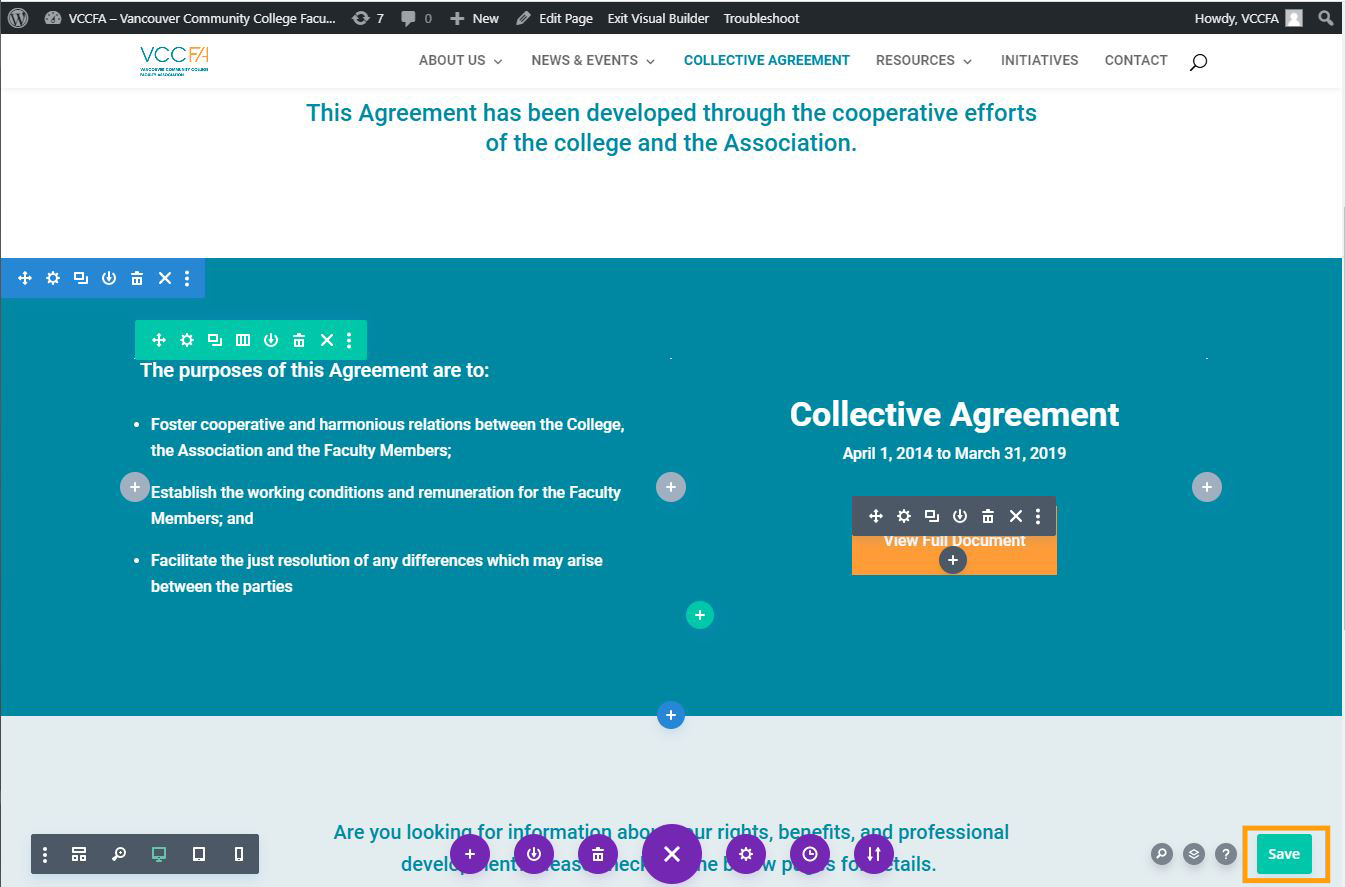
To edit a link to the file you uploaded to Divi Library, you need to change the settings under Page editor (Divi Builder). To use the page editor, click the ‘Page’ menu in the sidebar.
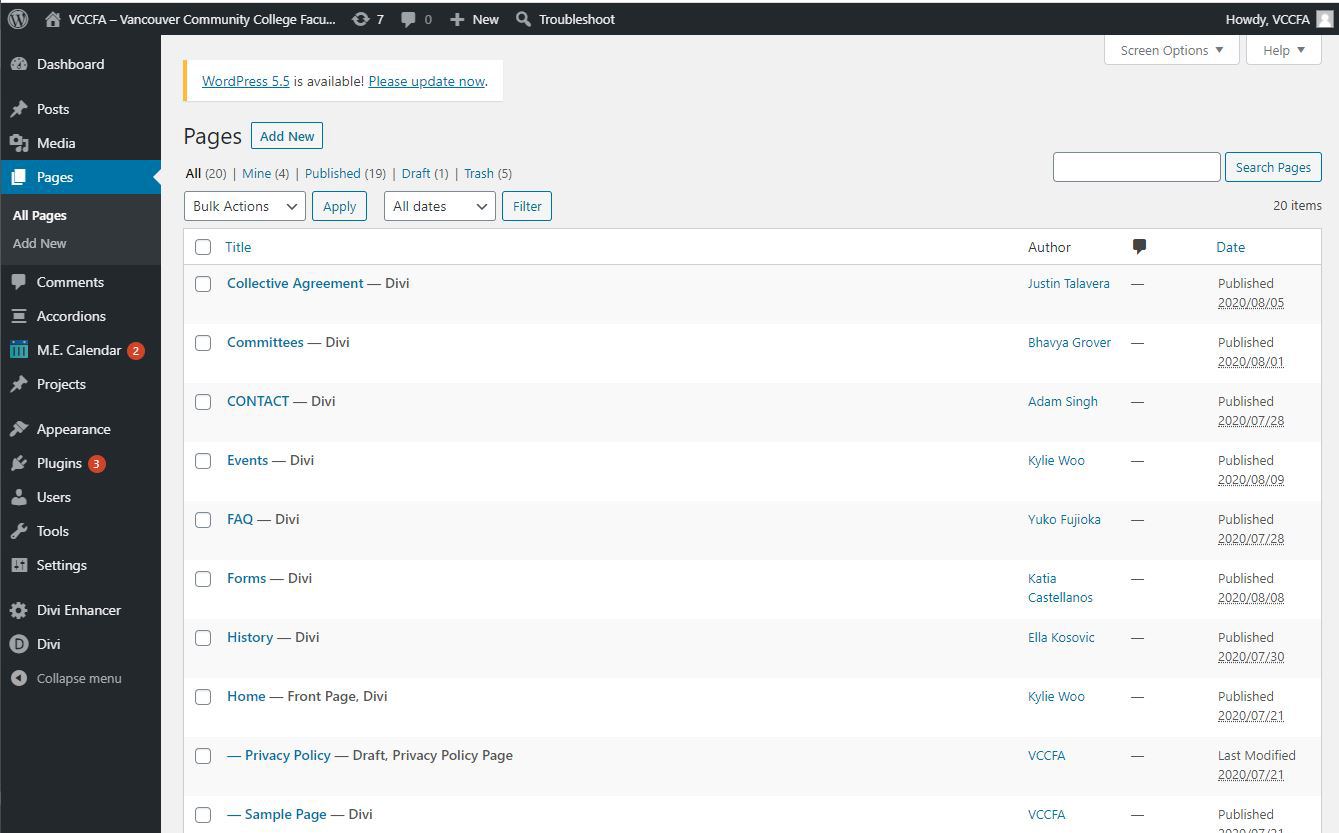
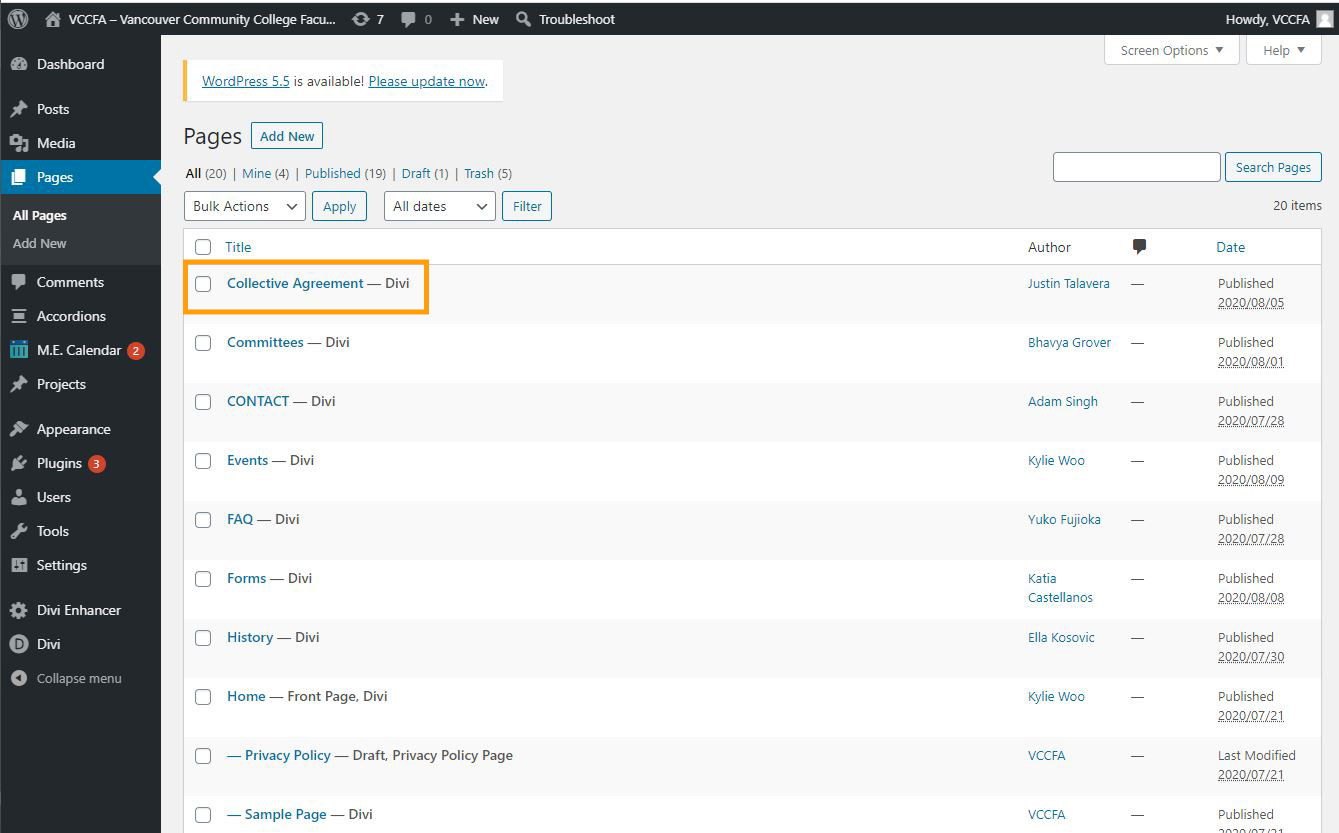
The page list will show up and so click the page title that you would like to edit.
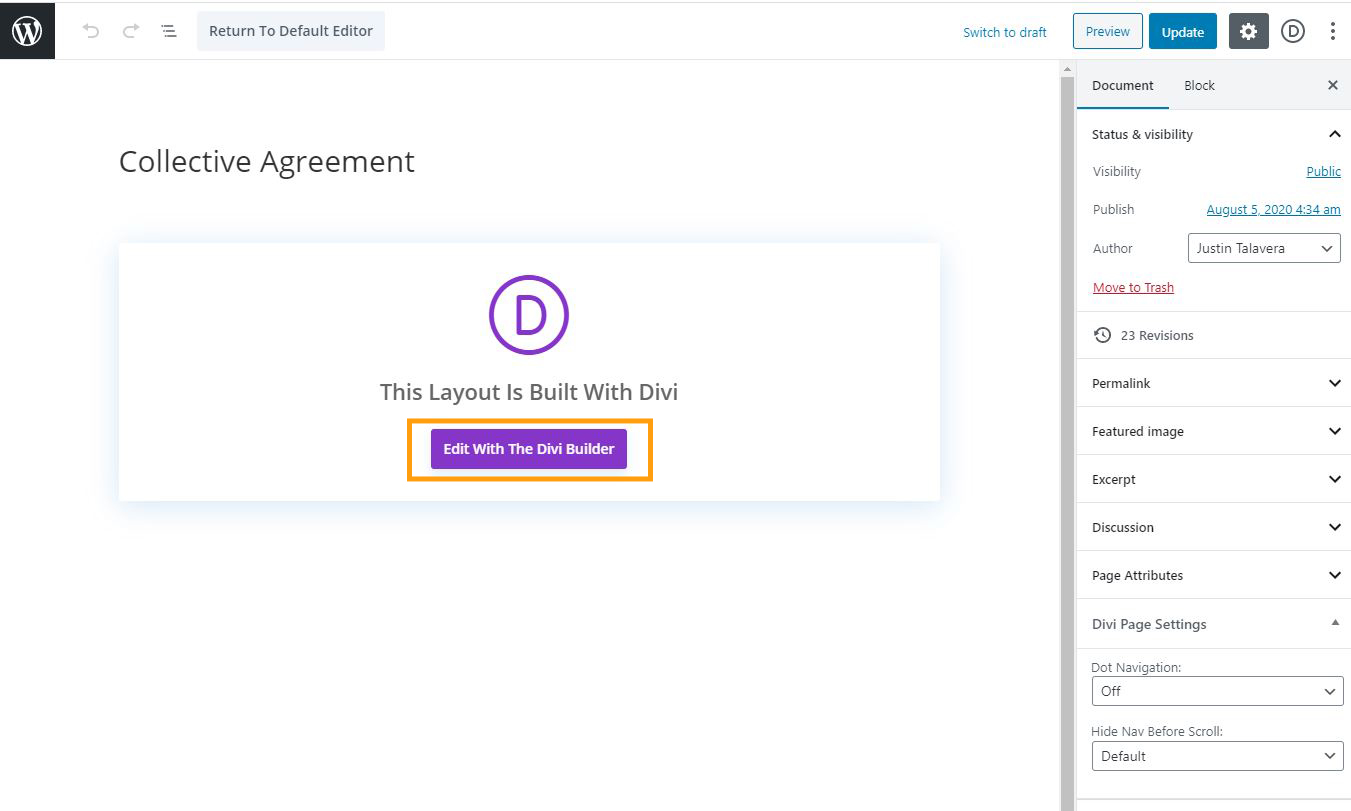
4.2.1. Collective Agreement
4.2.2. Seniority List
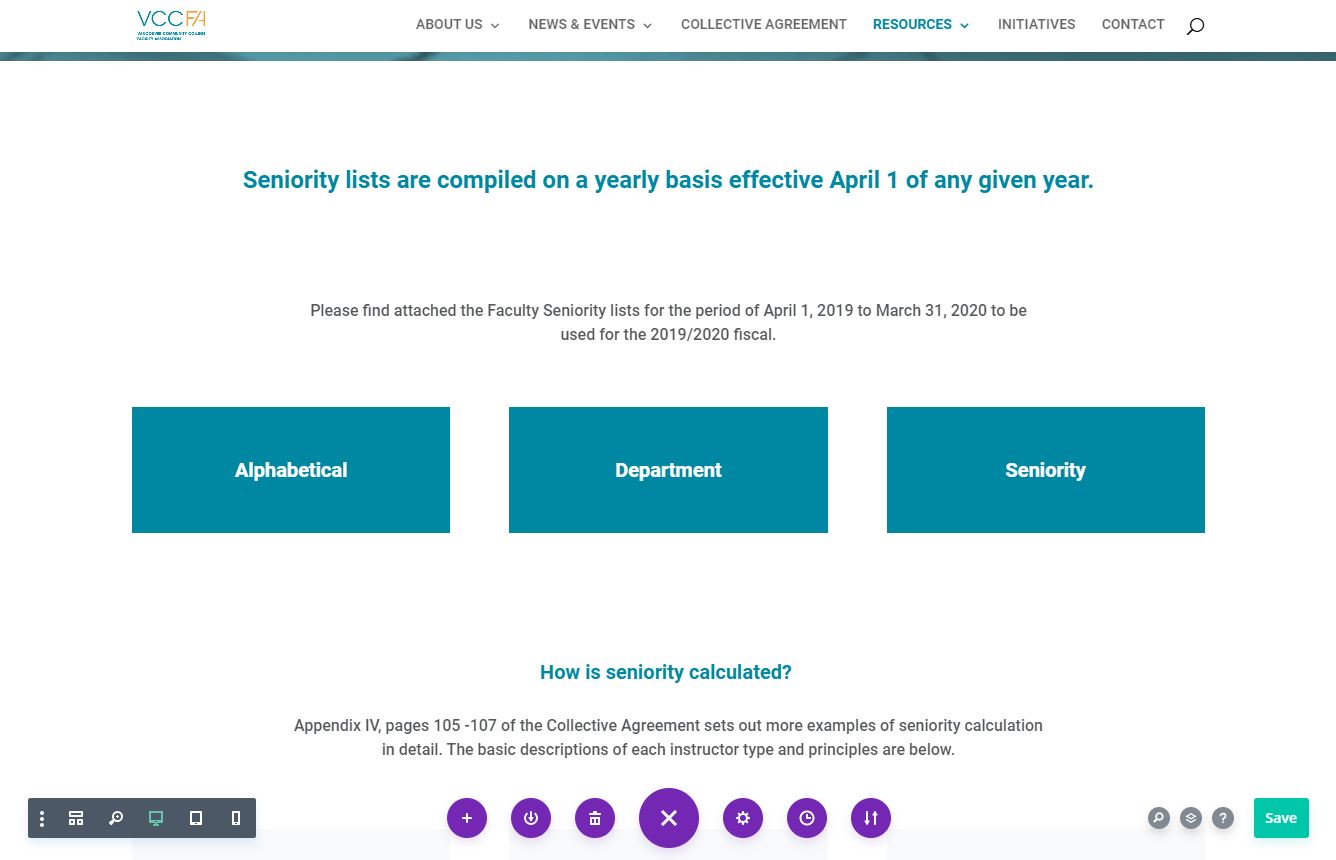
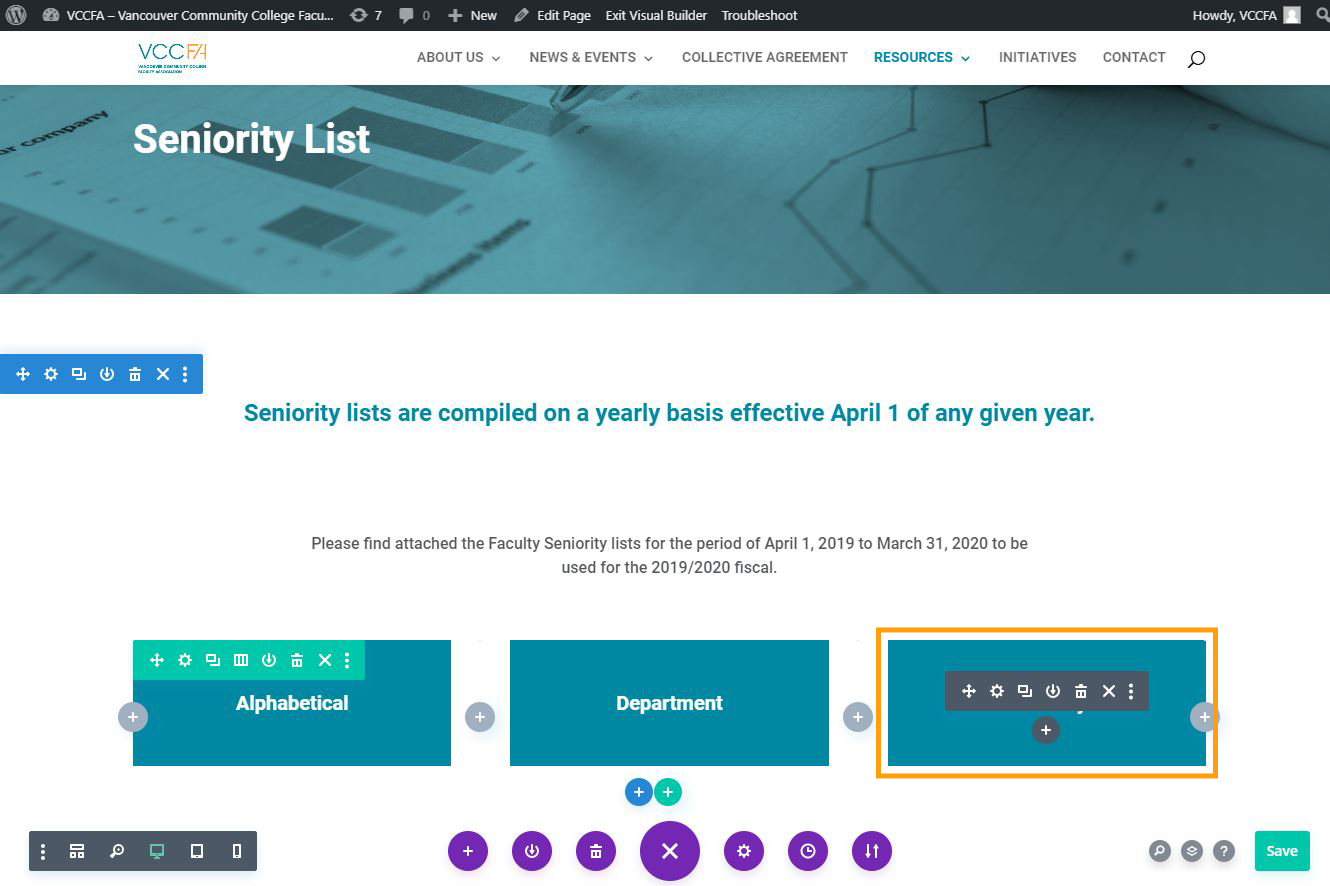

4.2.3. Professional Development
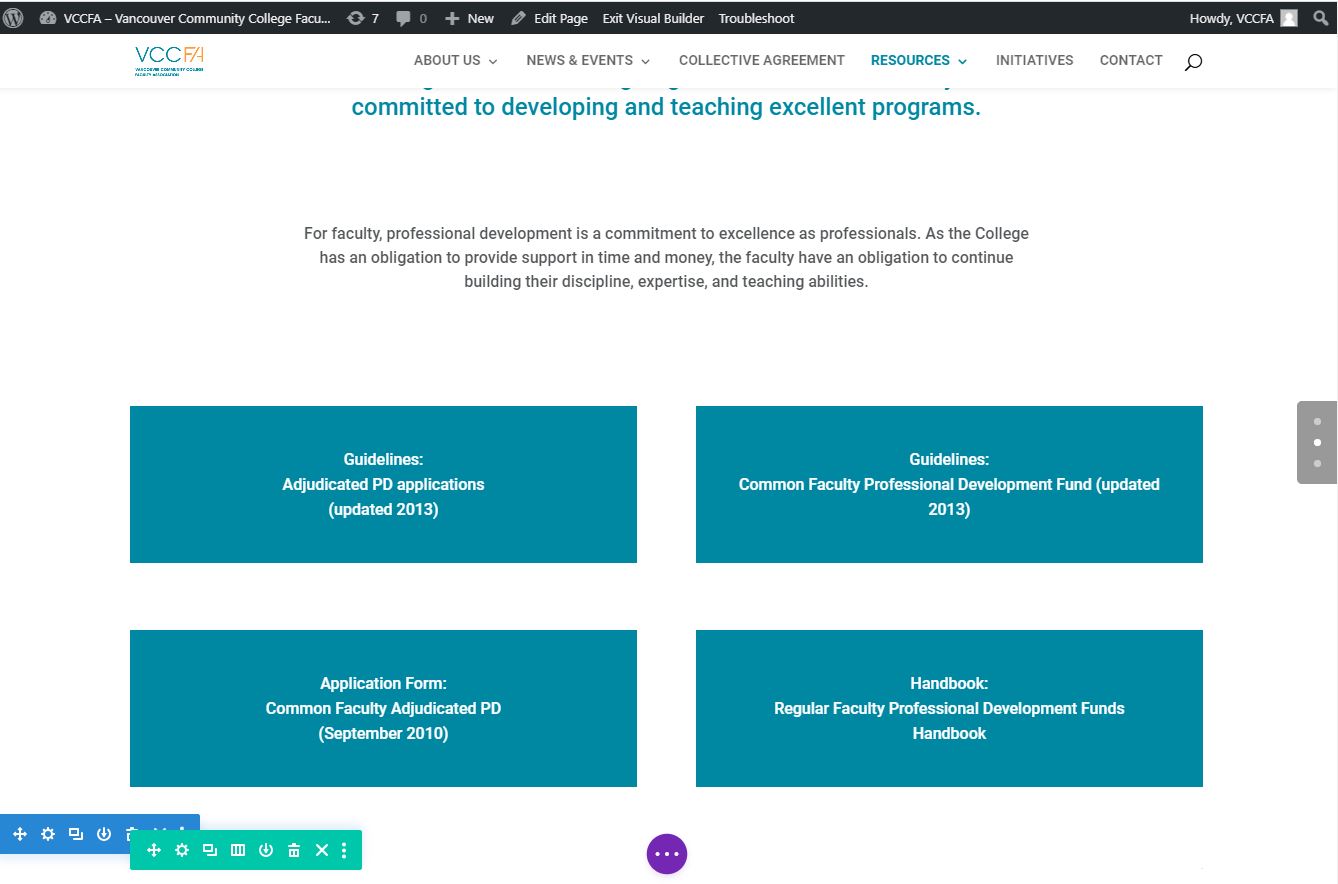
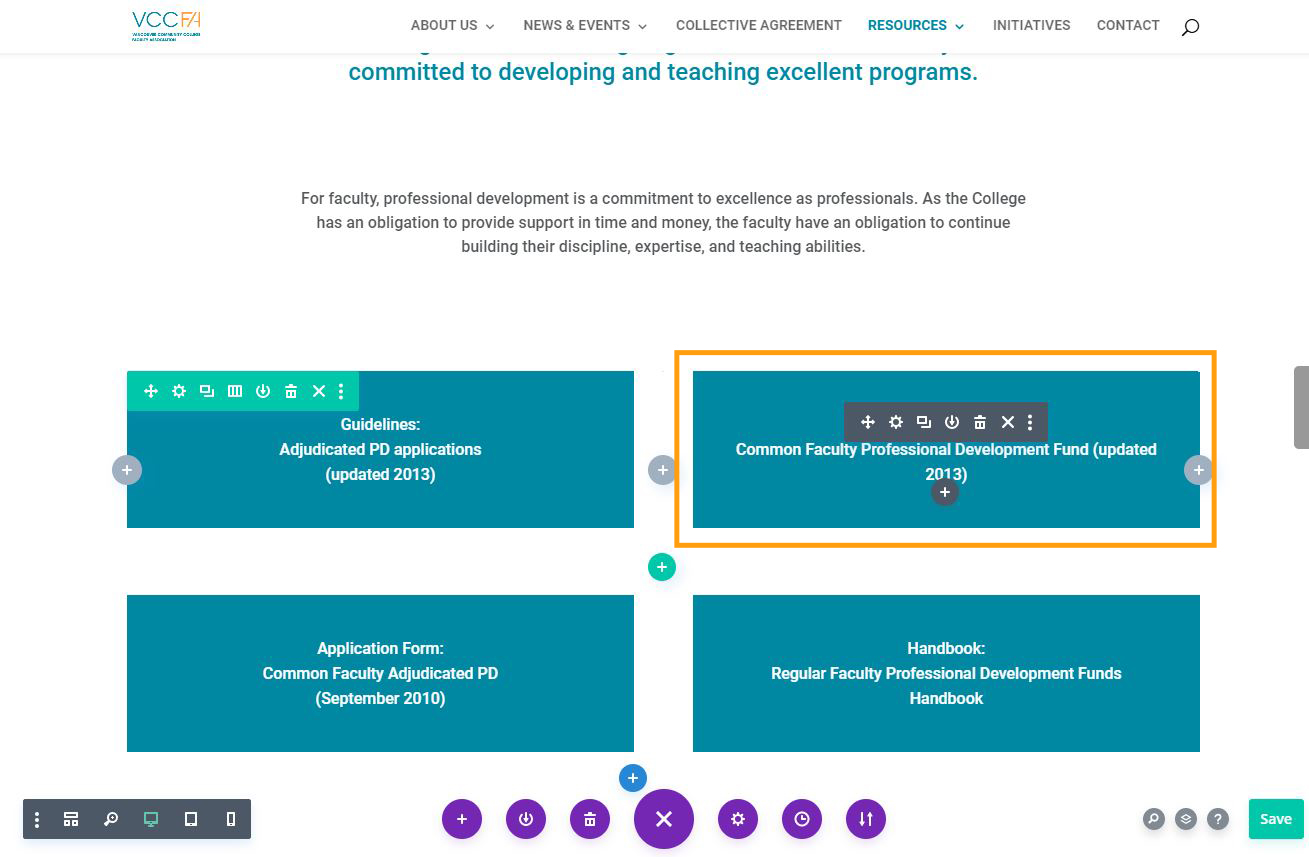
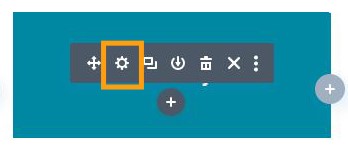
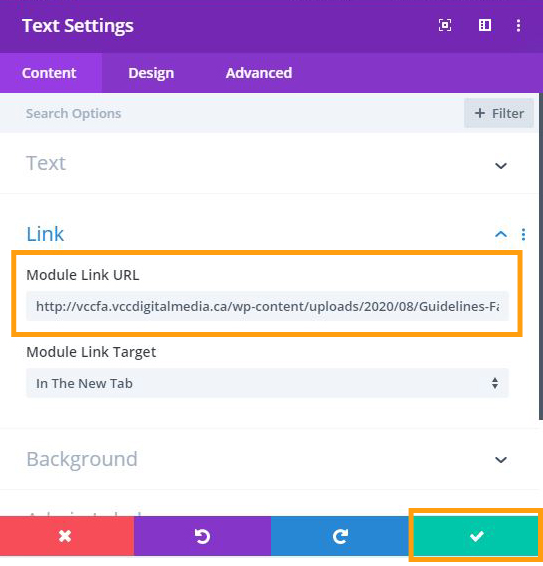
4.2.4. VCCFA Handbook
5. How to Update Accordions
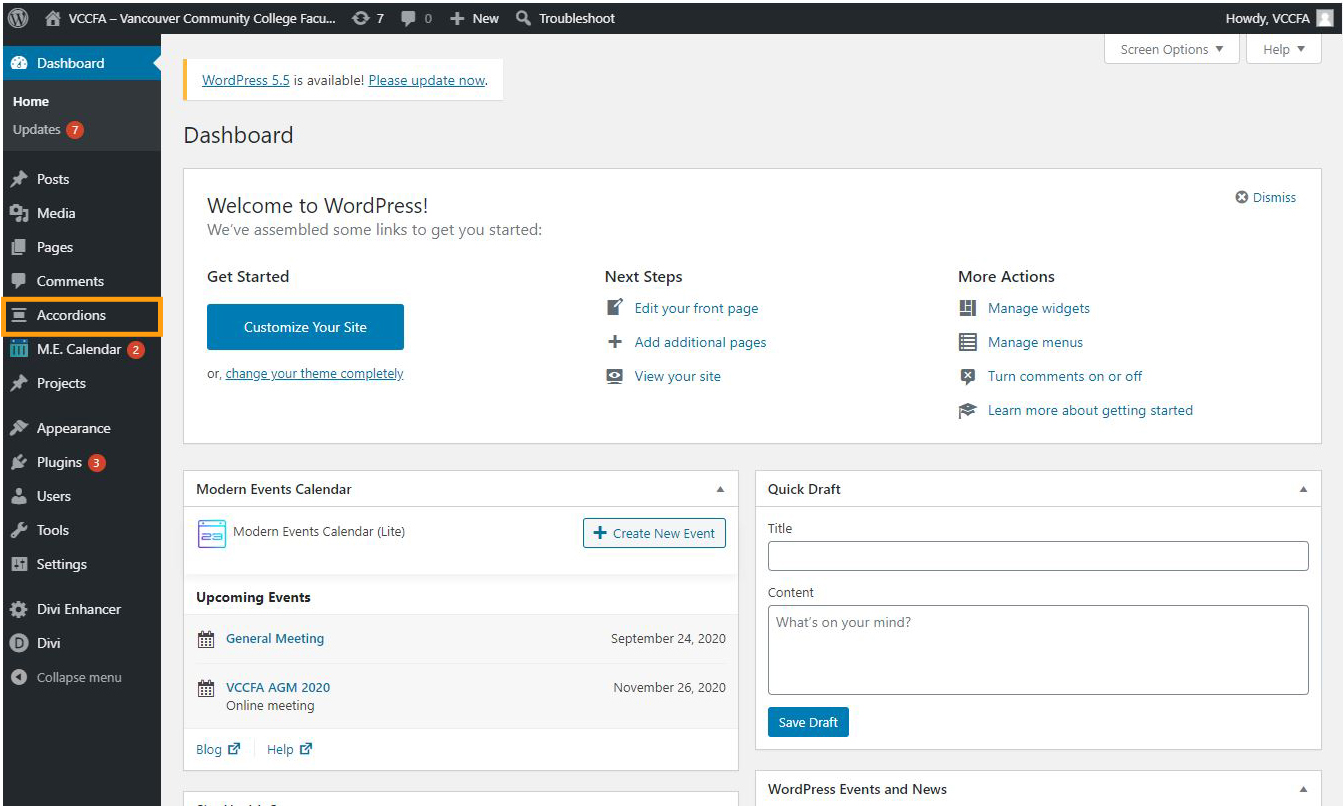
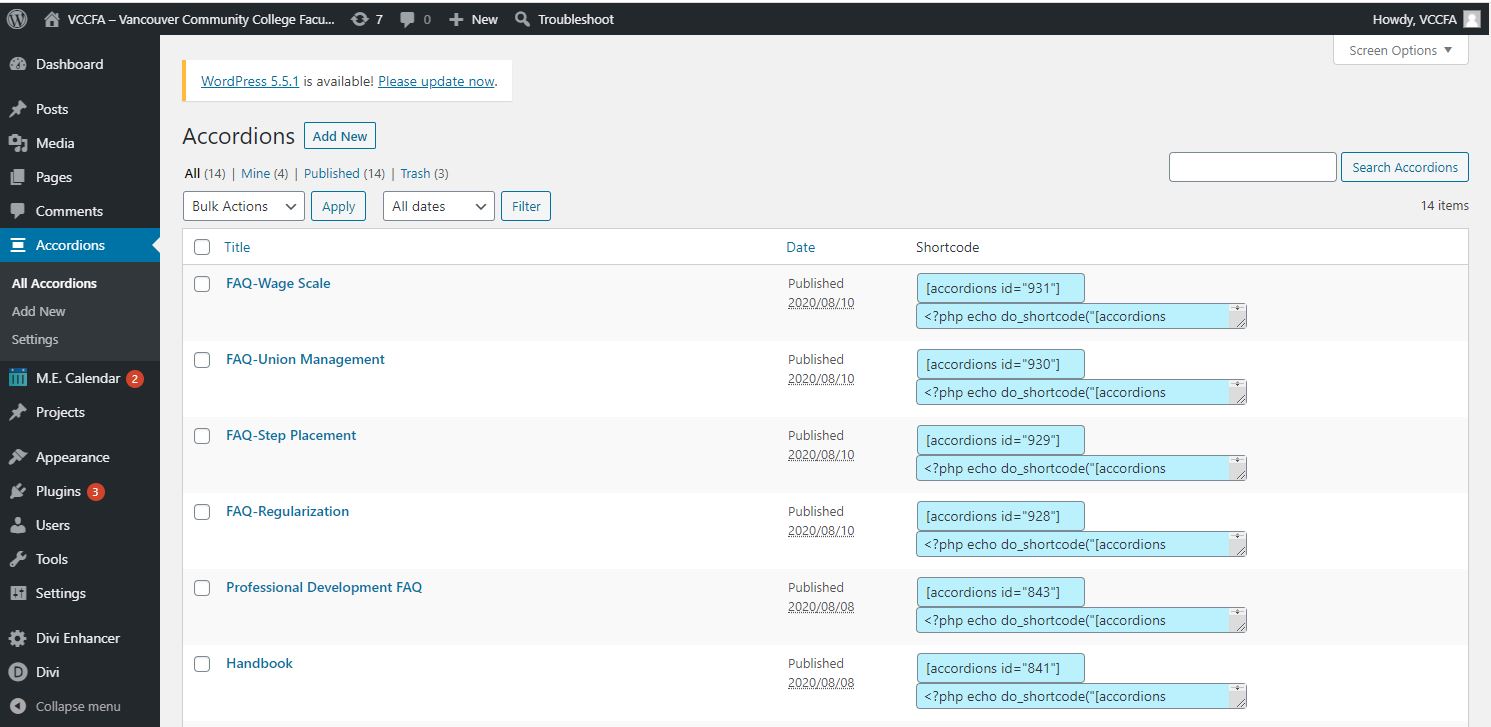
5.1. About Accordions Menu
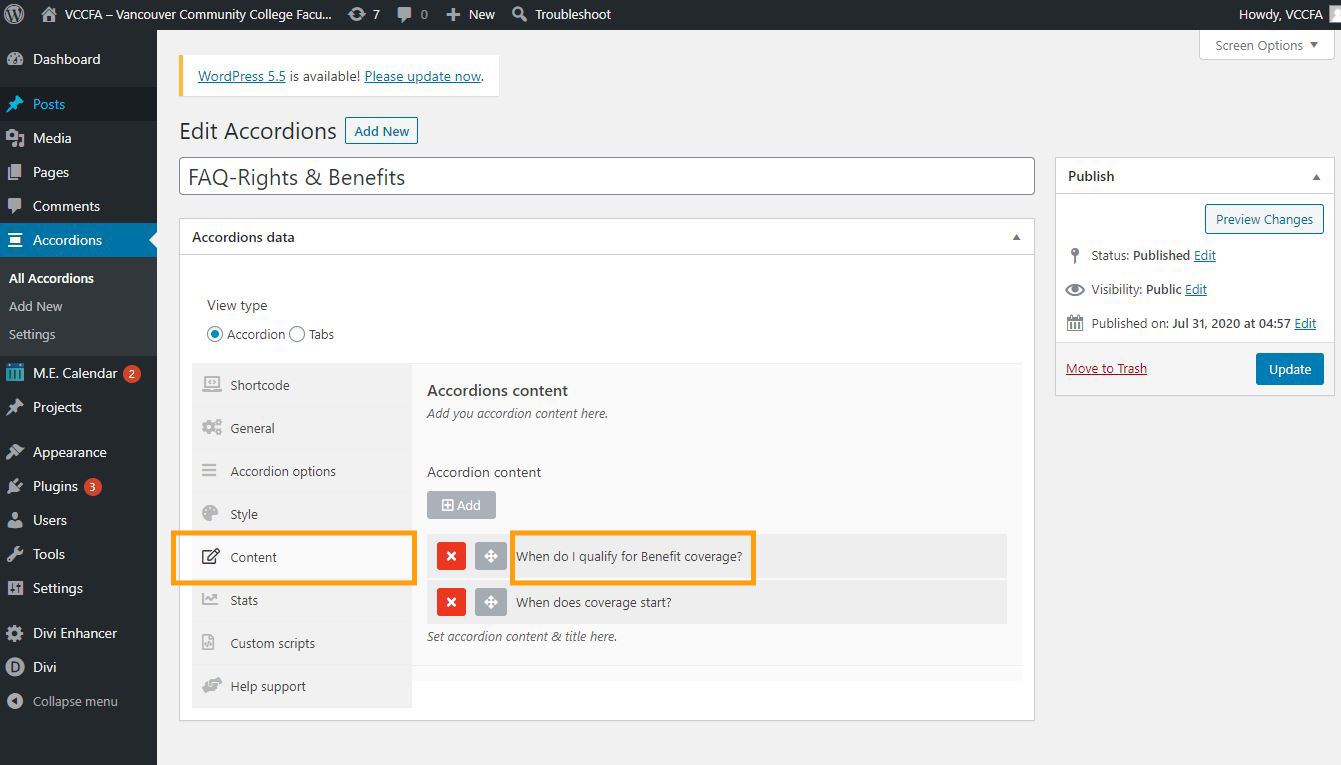
5.2. How to Update Accordion Contents
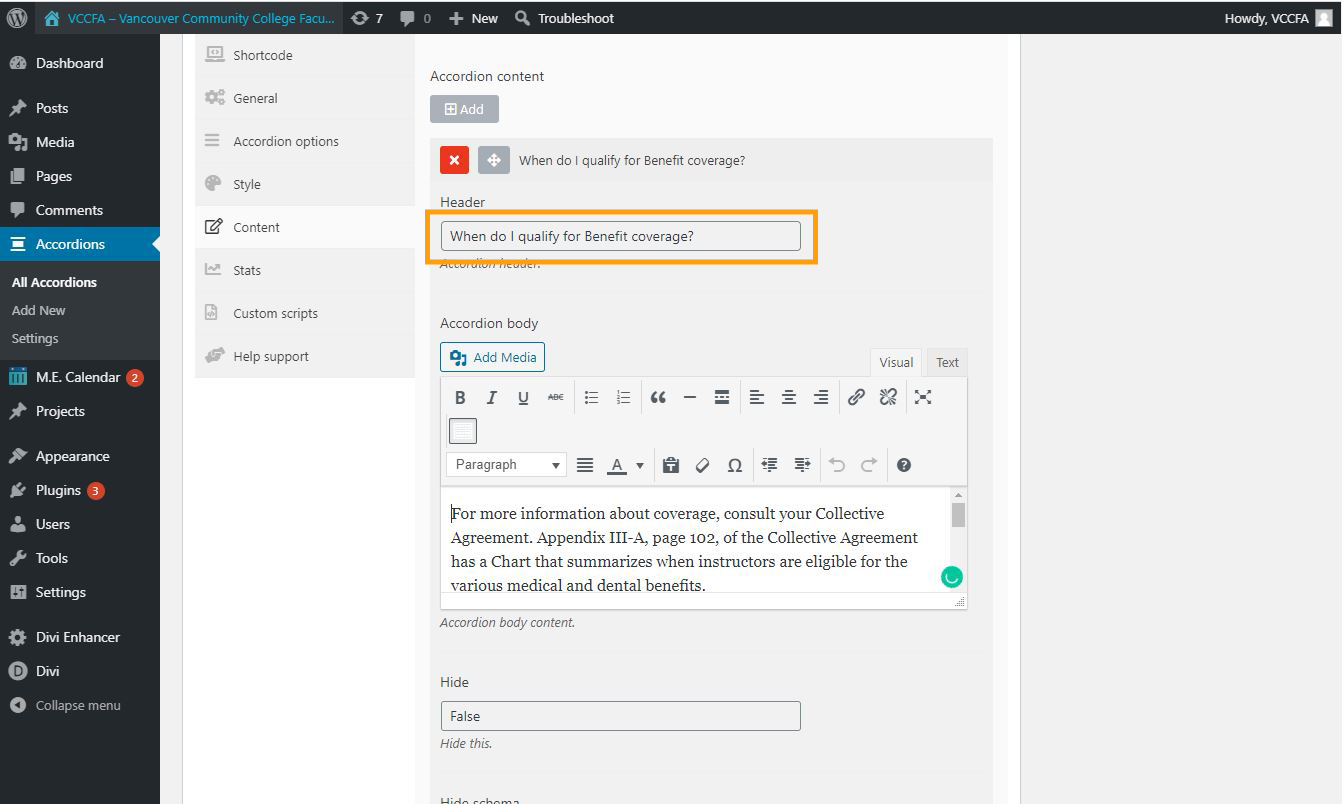
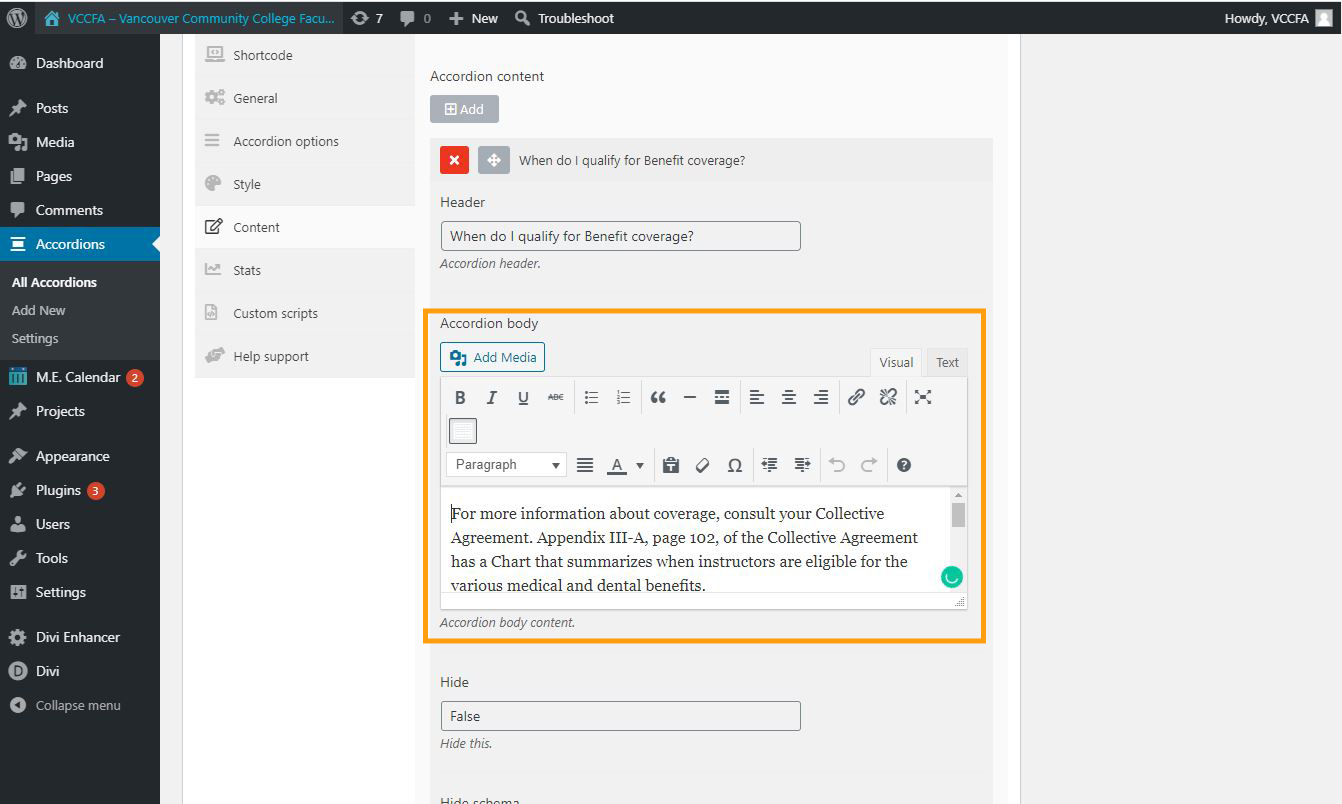
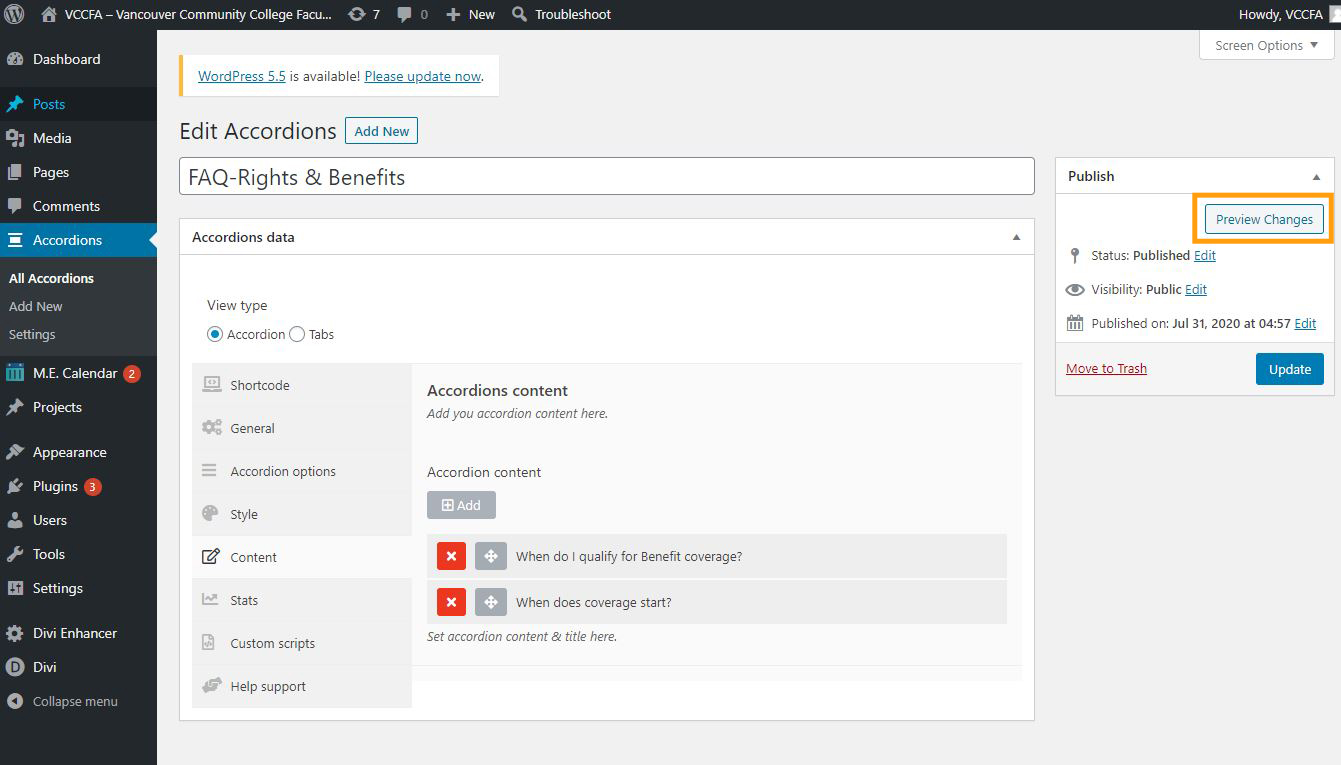
5.2.1. Edit the Header Title and Text
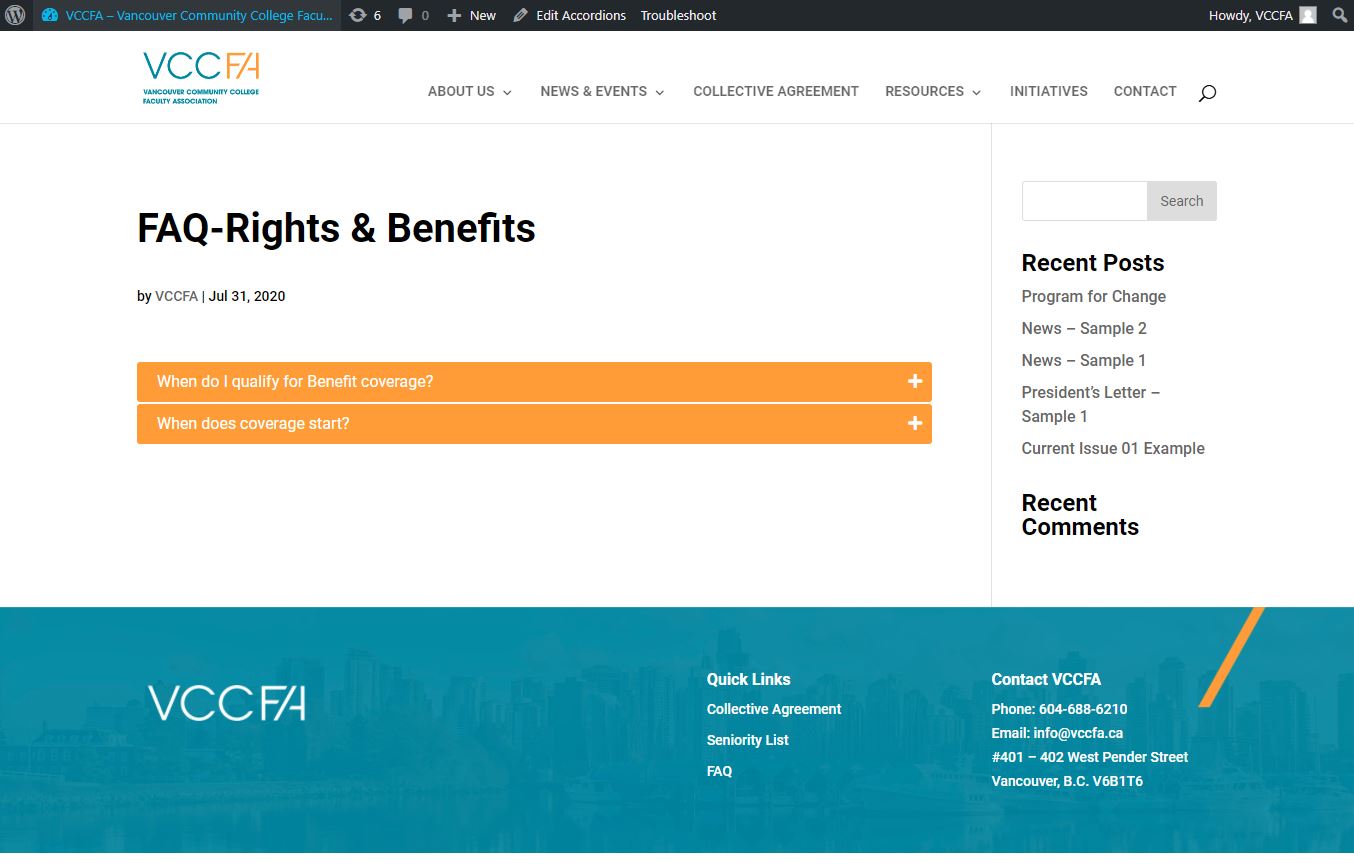
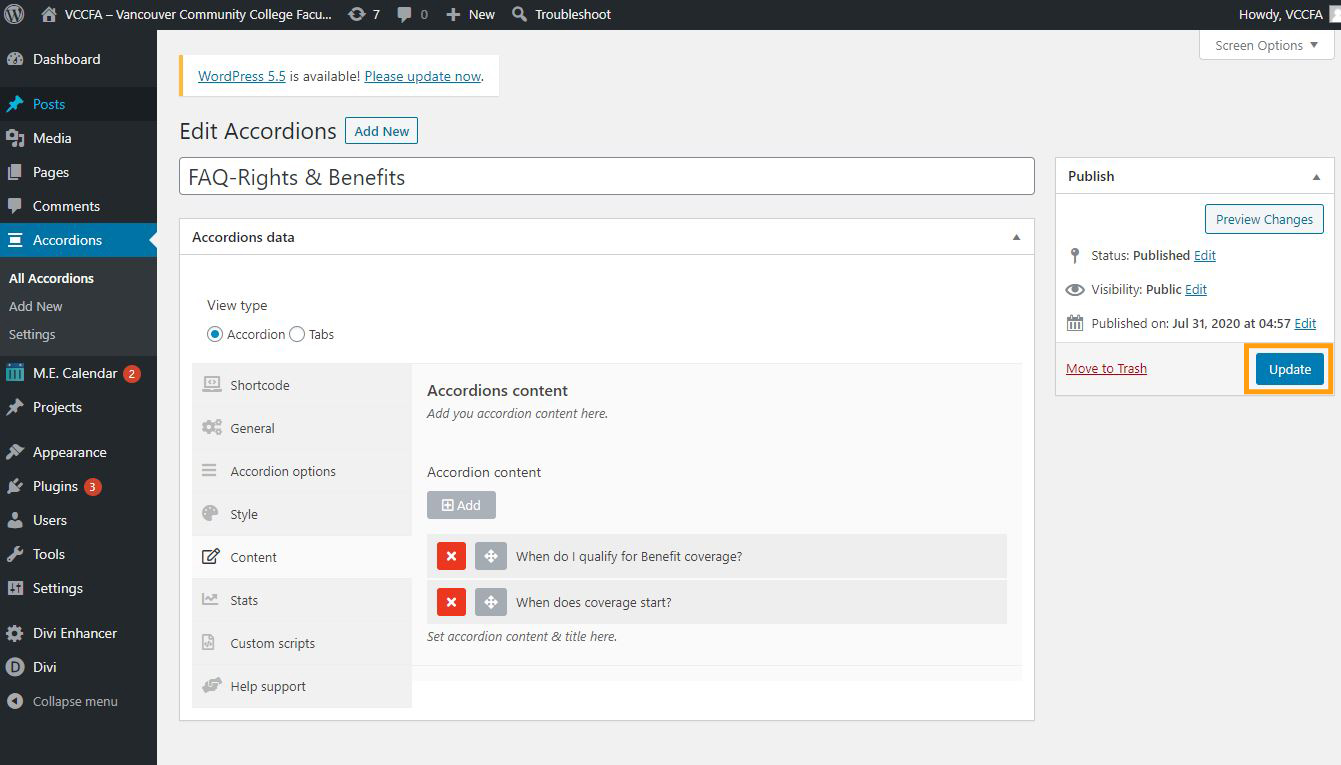
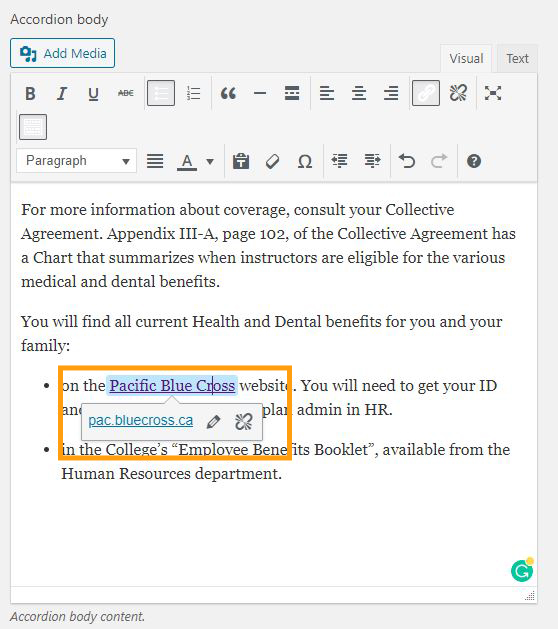
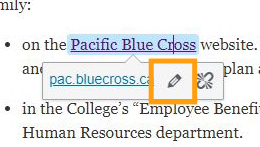
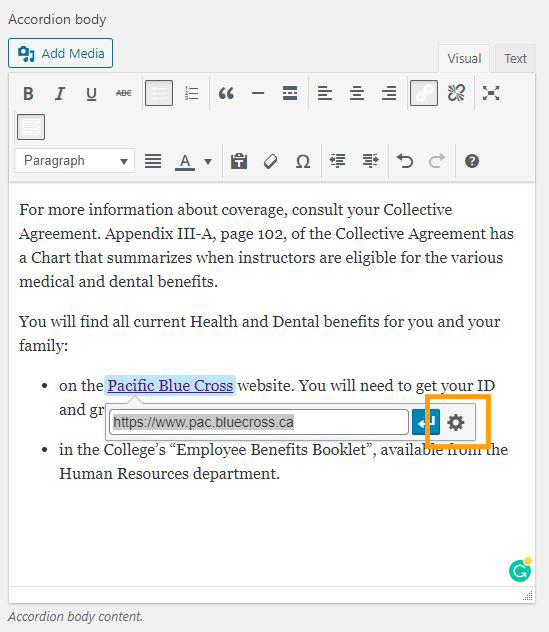
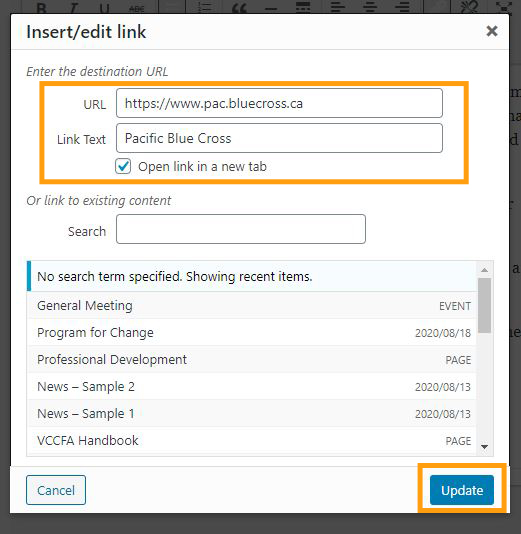
5.2.2. Edit a Page Link
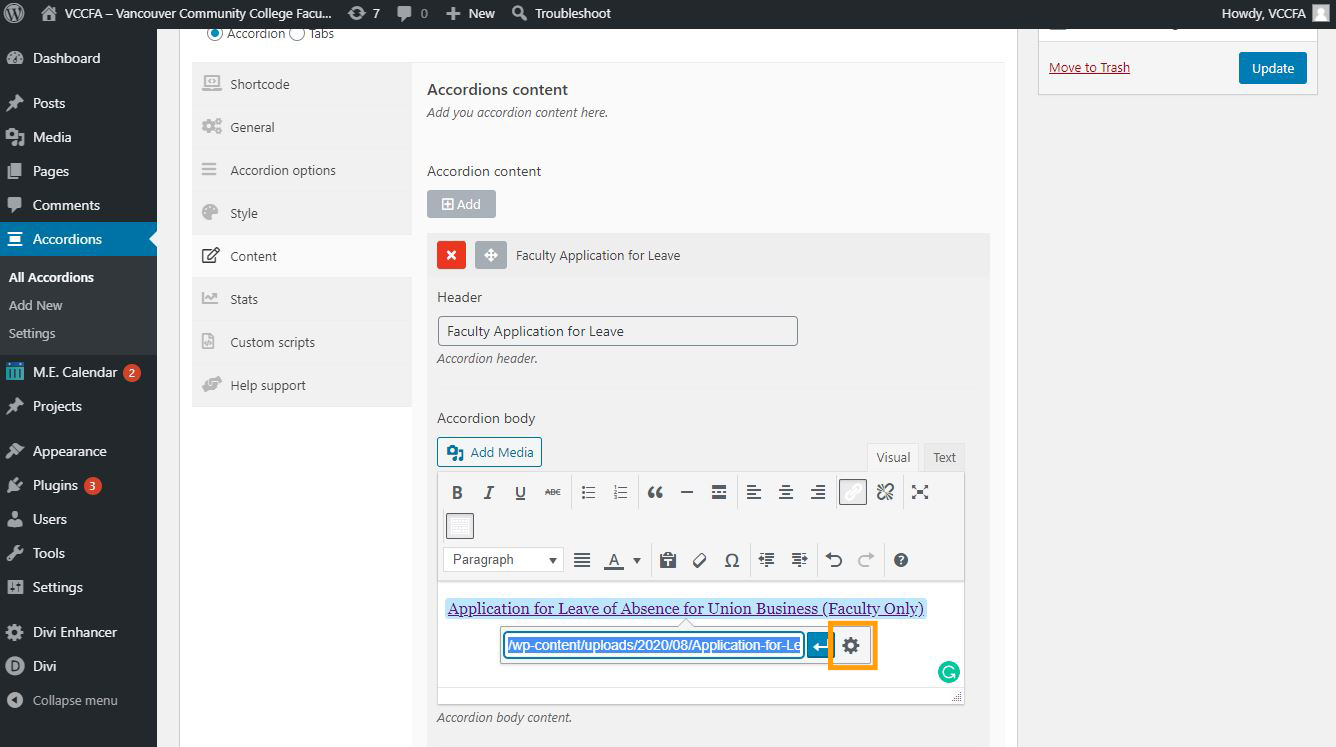
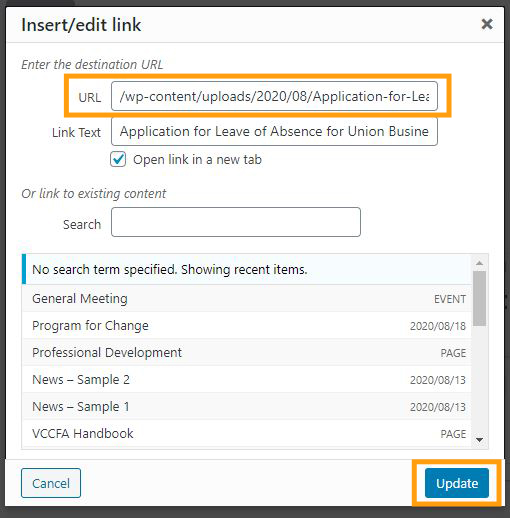
5.2.3. Edit a PDF Link
5.3. How to Add a New Accordion
5.3.1. Add a New Title Inside an Accordion
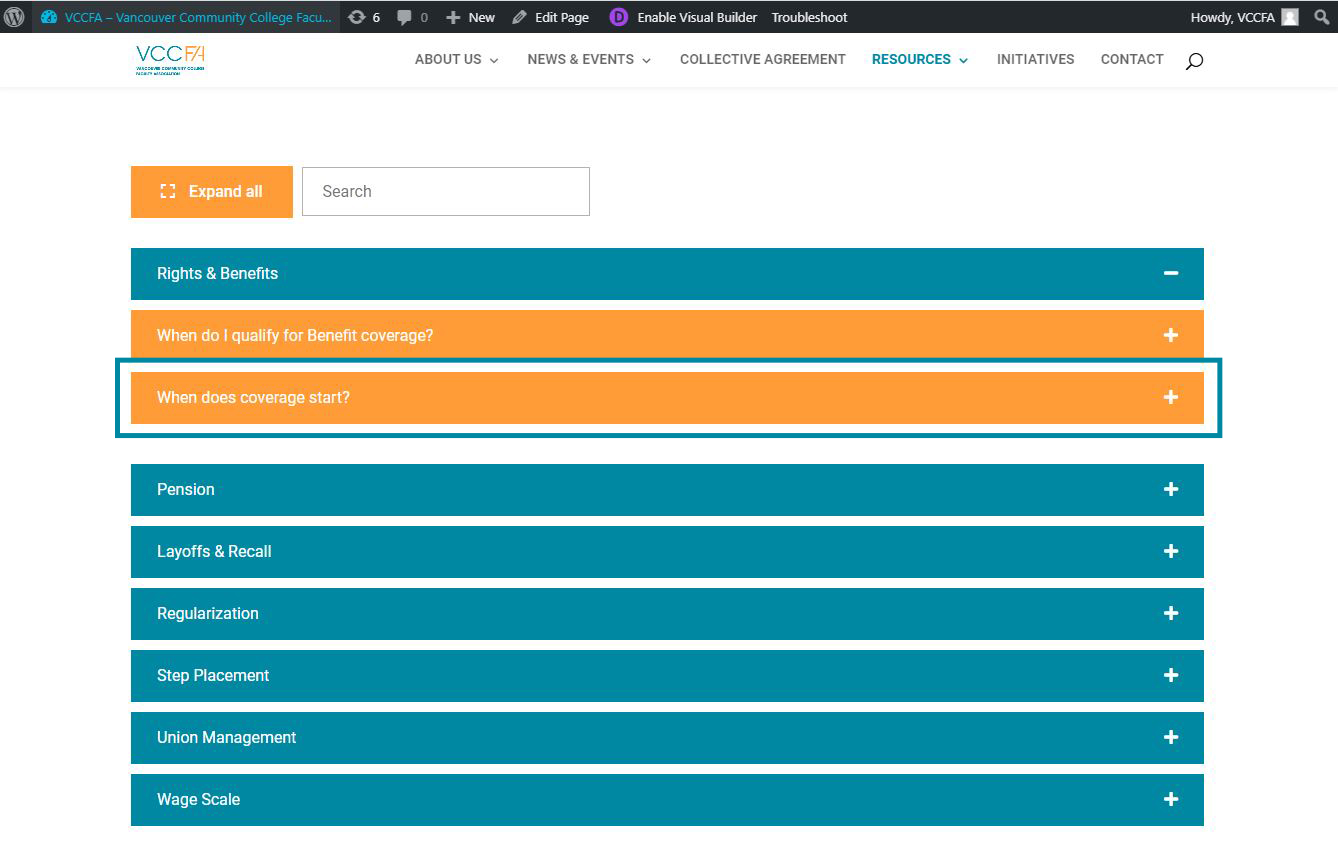
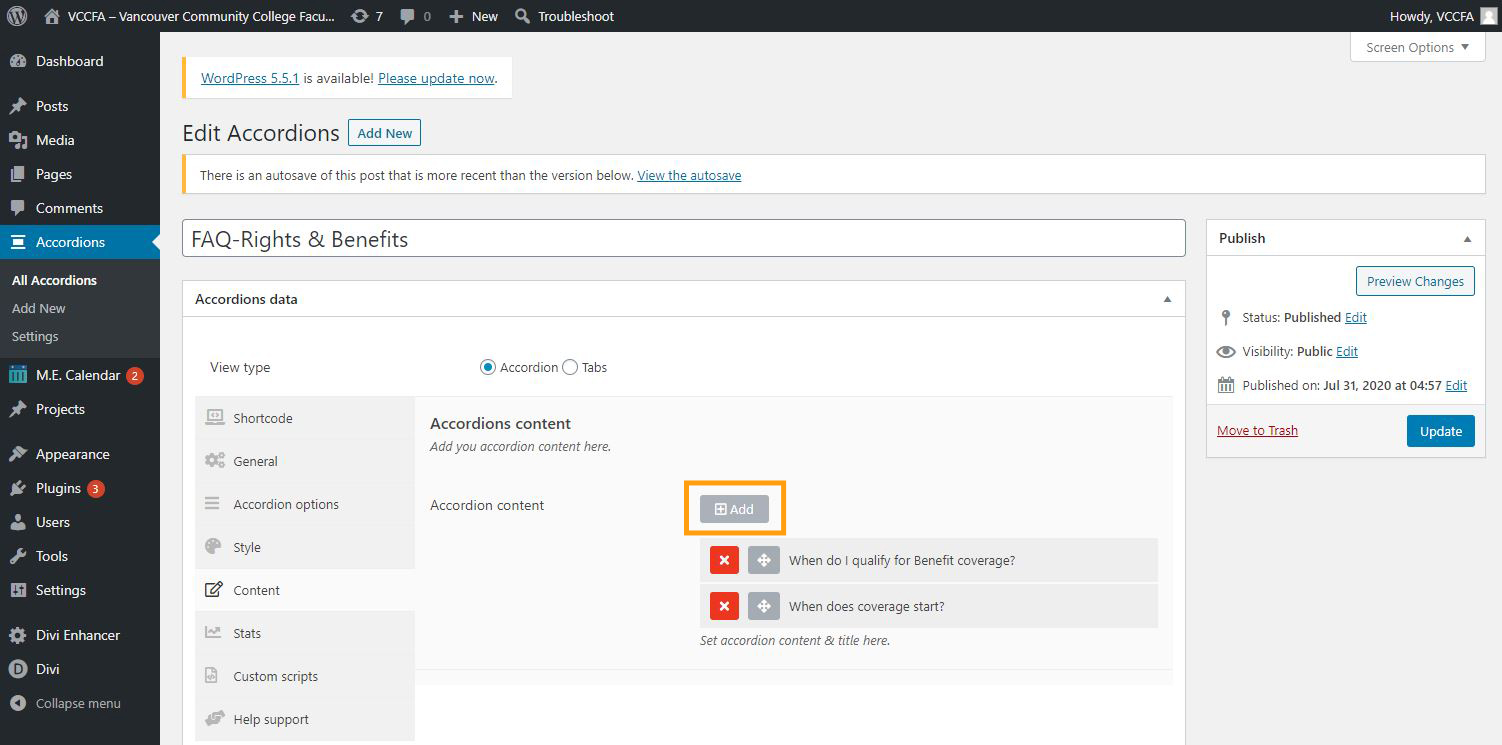
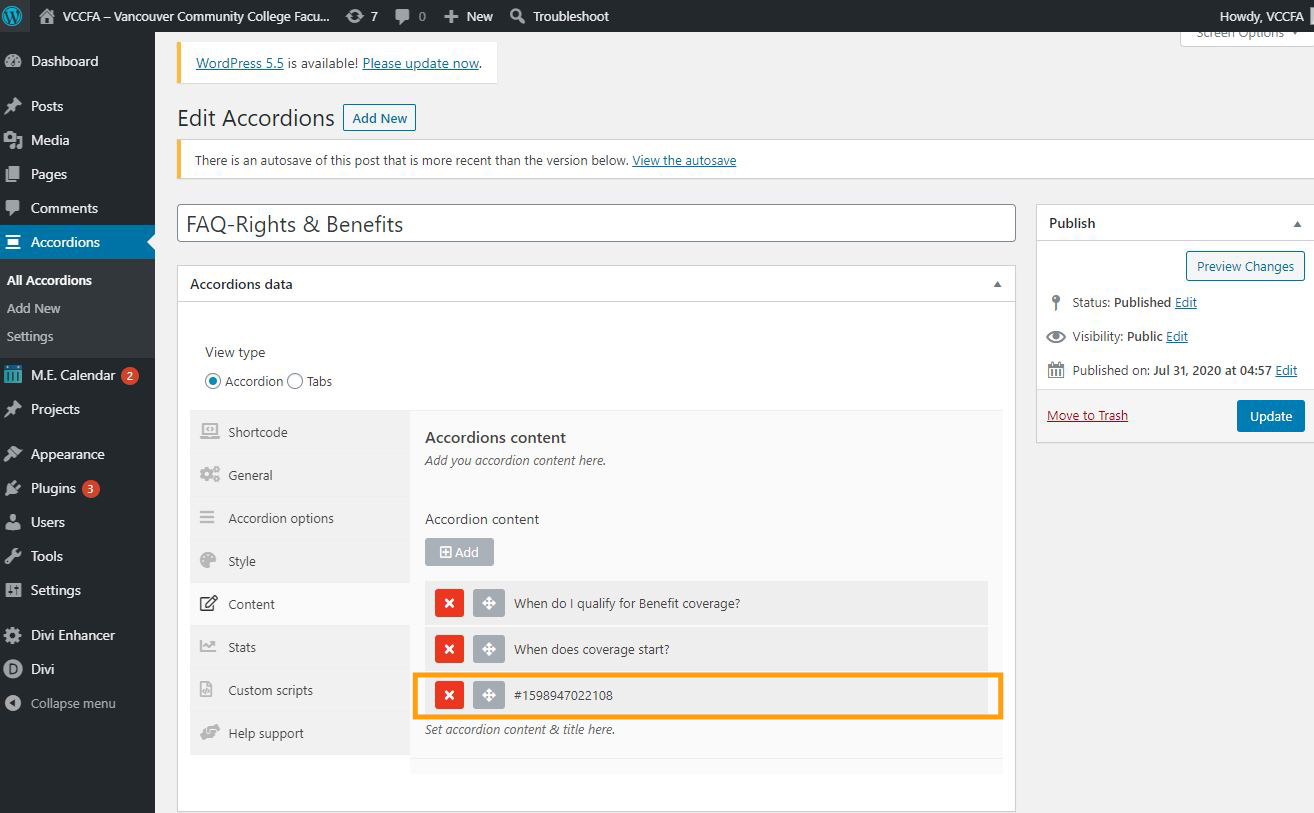
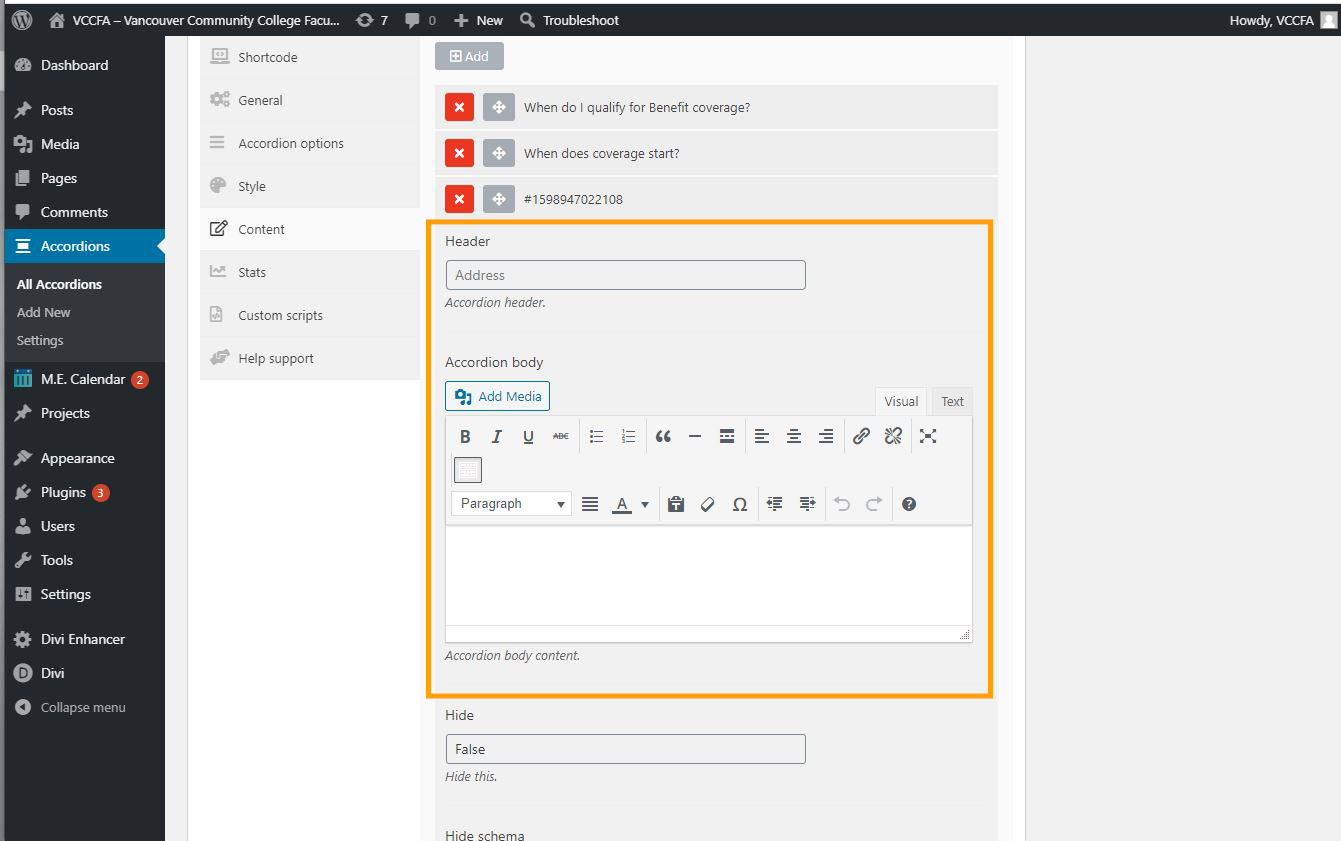
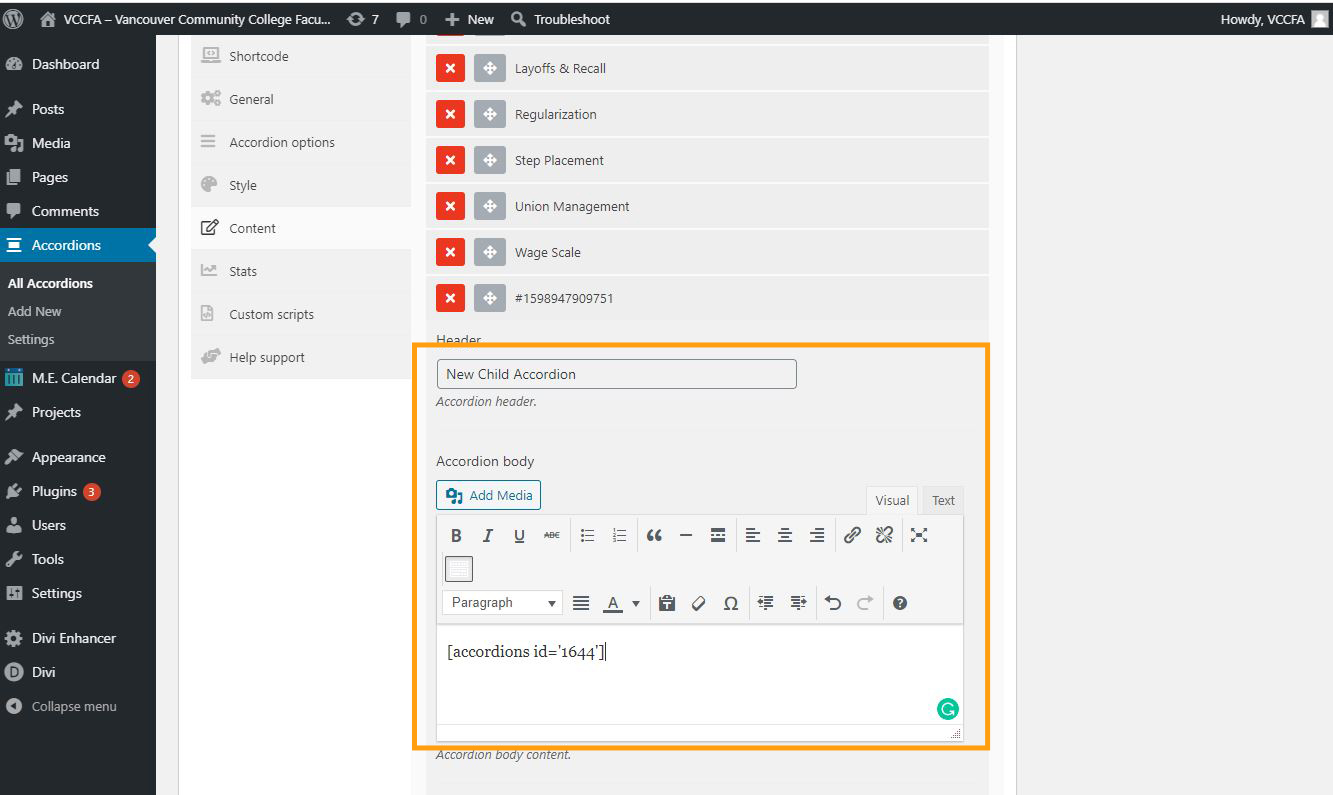
5.3.2. Add a Nested Accordion
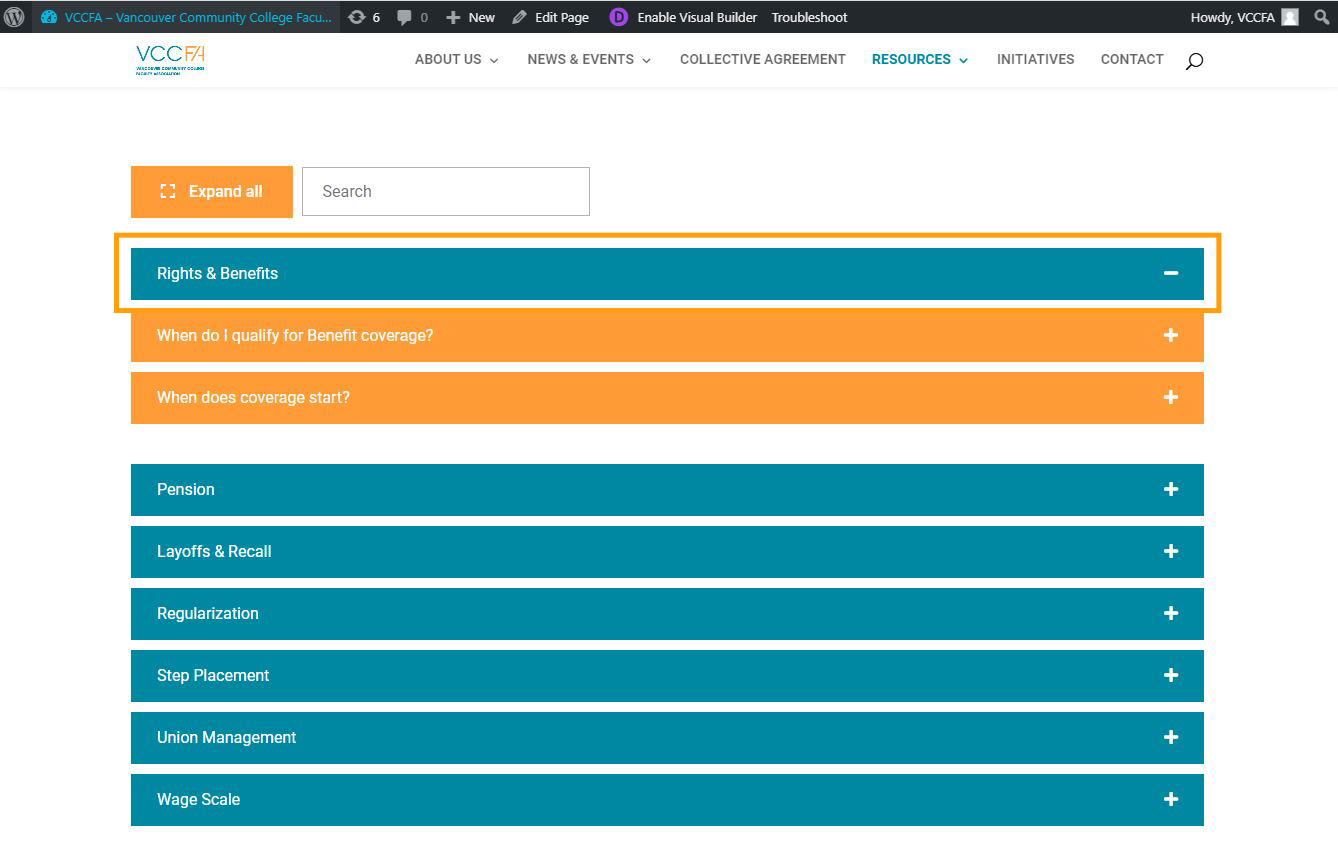
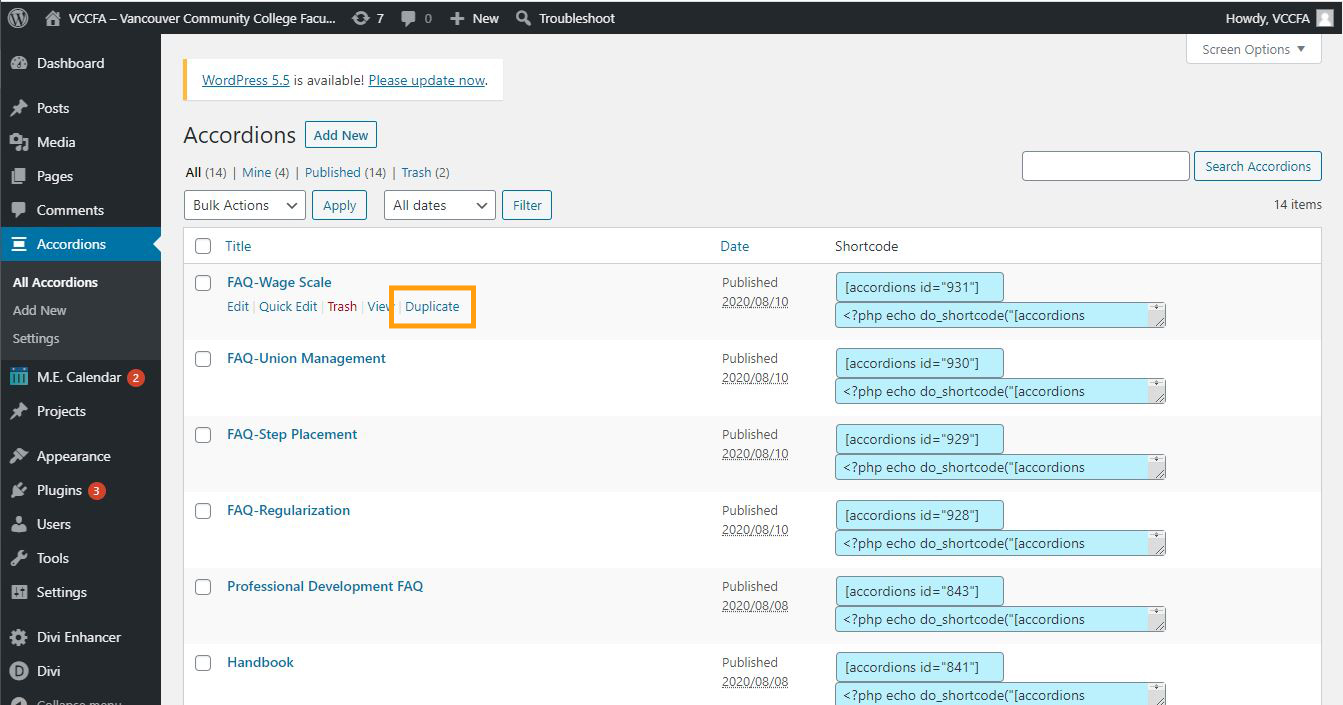
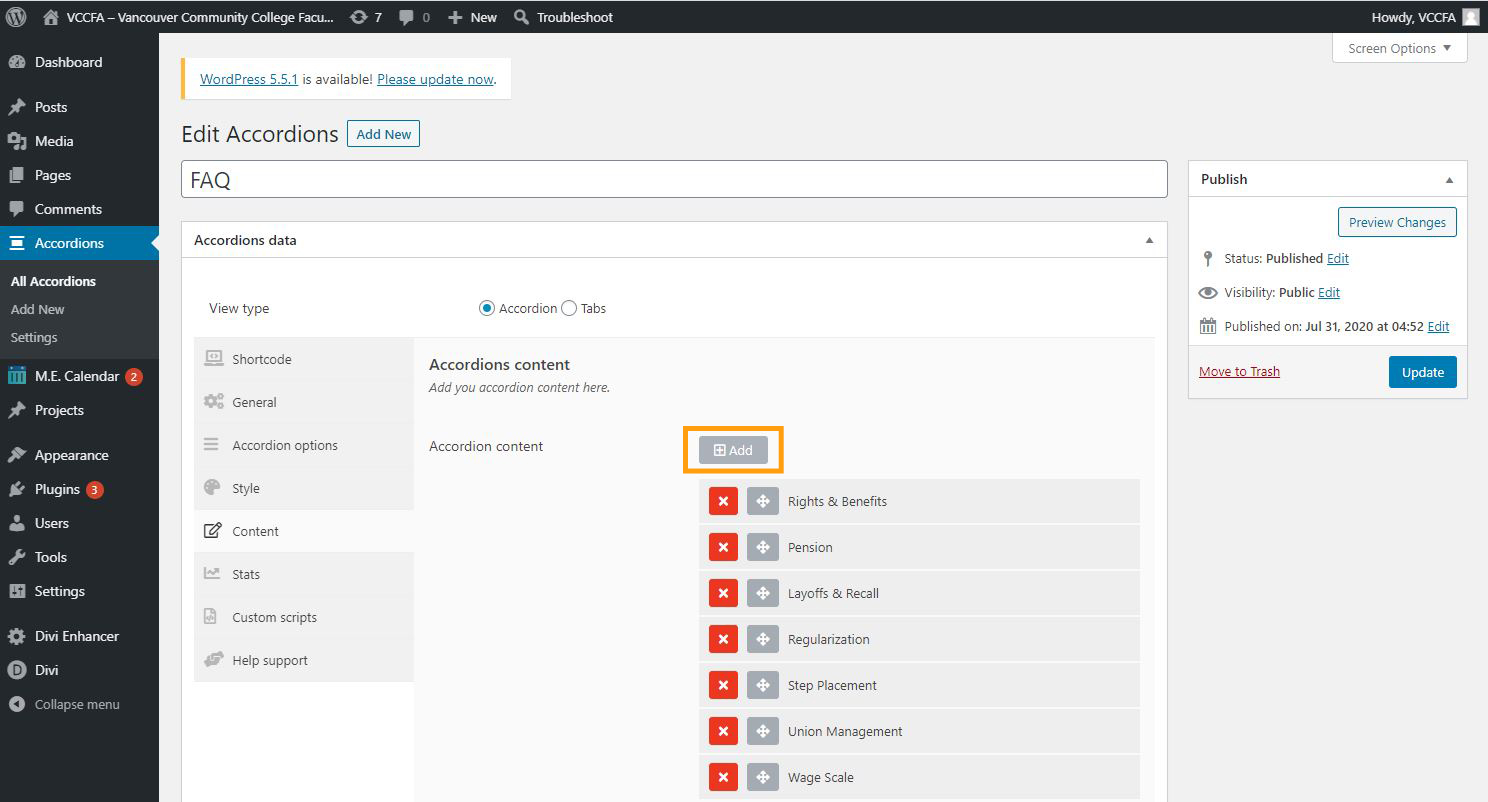
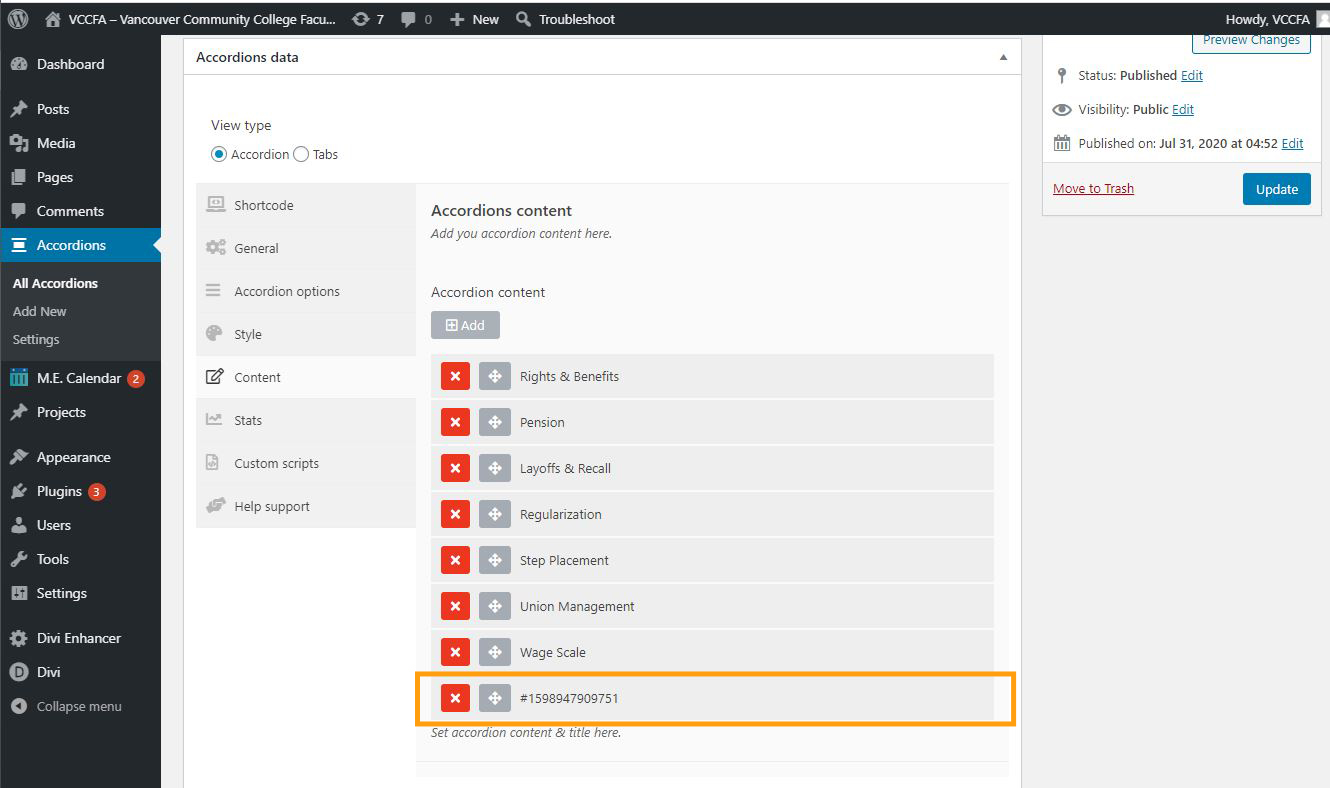
To create a new accordion, duplicate an existing accordion to take over the style such as colours, font size, icons, etc. Click the ‘Duplicate’ under the accordion title you want to duplicate. For example, if you would add a new FAQ category accordion, duplicate any existing one such as the ‘FAQ – Wage Scale’.
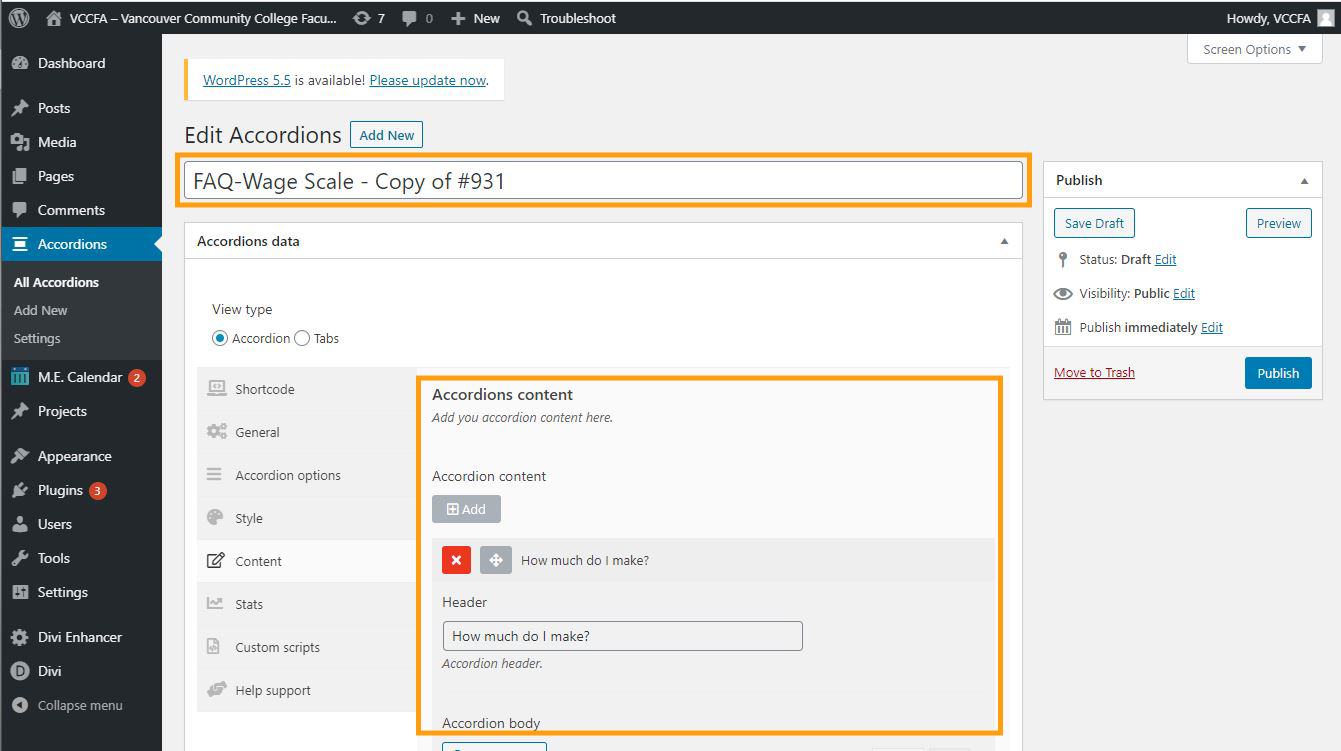
Open the copied accordion, and then edit the accordion title and content.
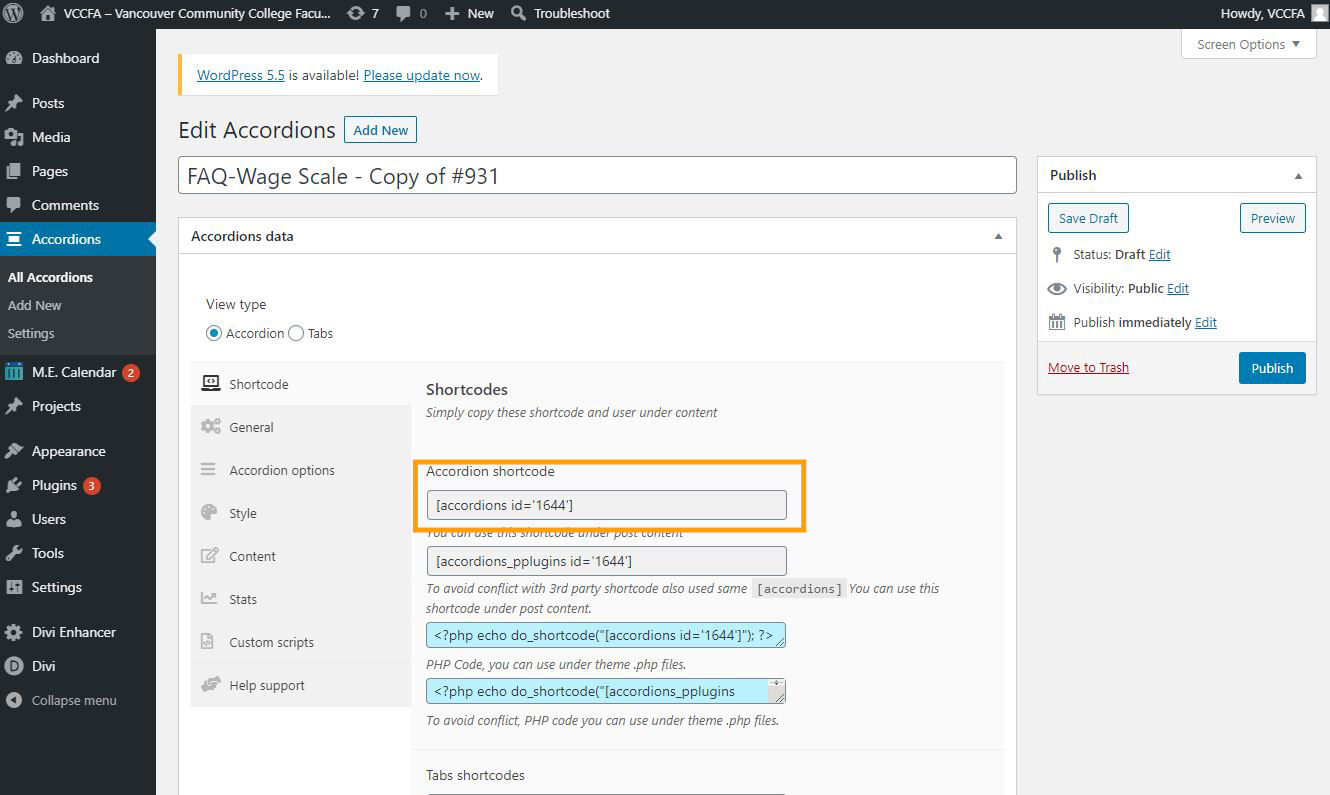
To add the new category accordion to the FAQ page, you need to use a shortcode. Click the ‘Shortcode’ menu in the sidebar and copy the ‘Accordion shortcode’.
6. How to Update Contact Information
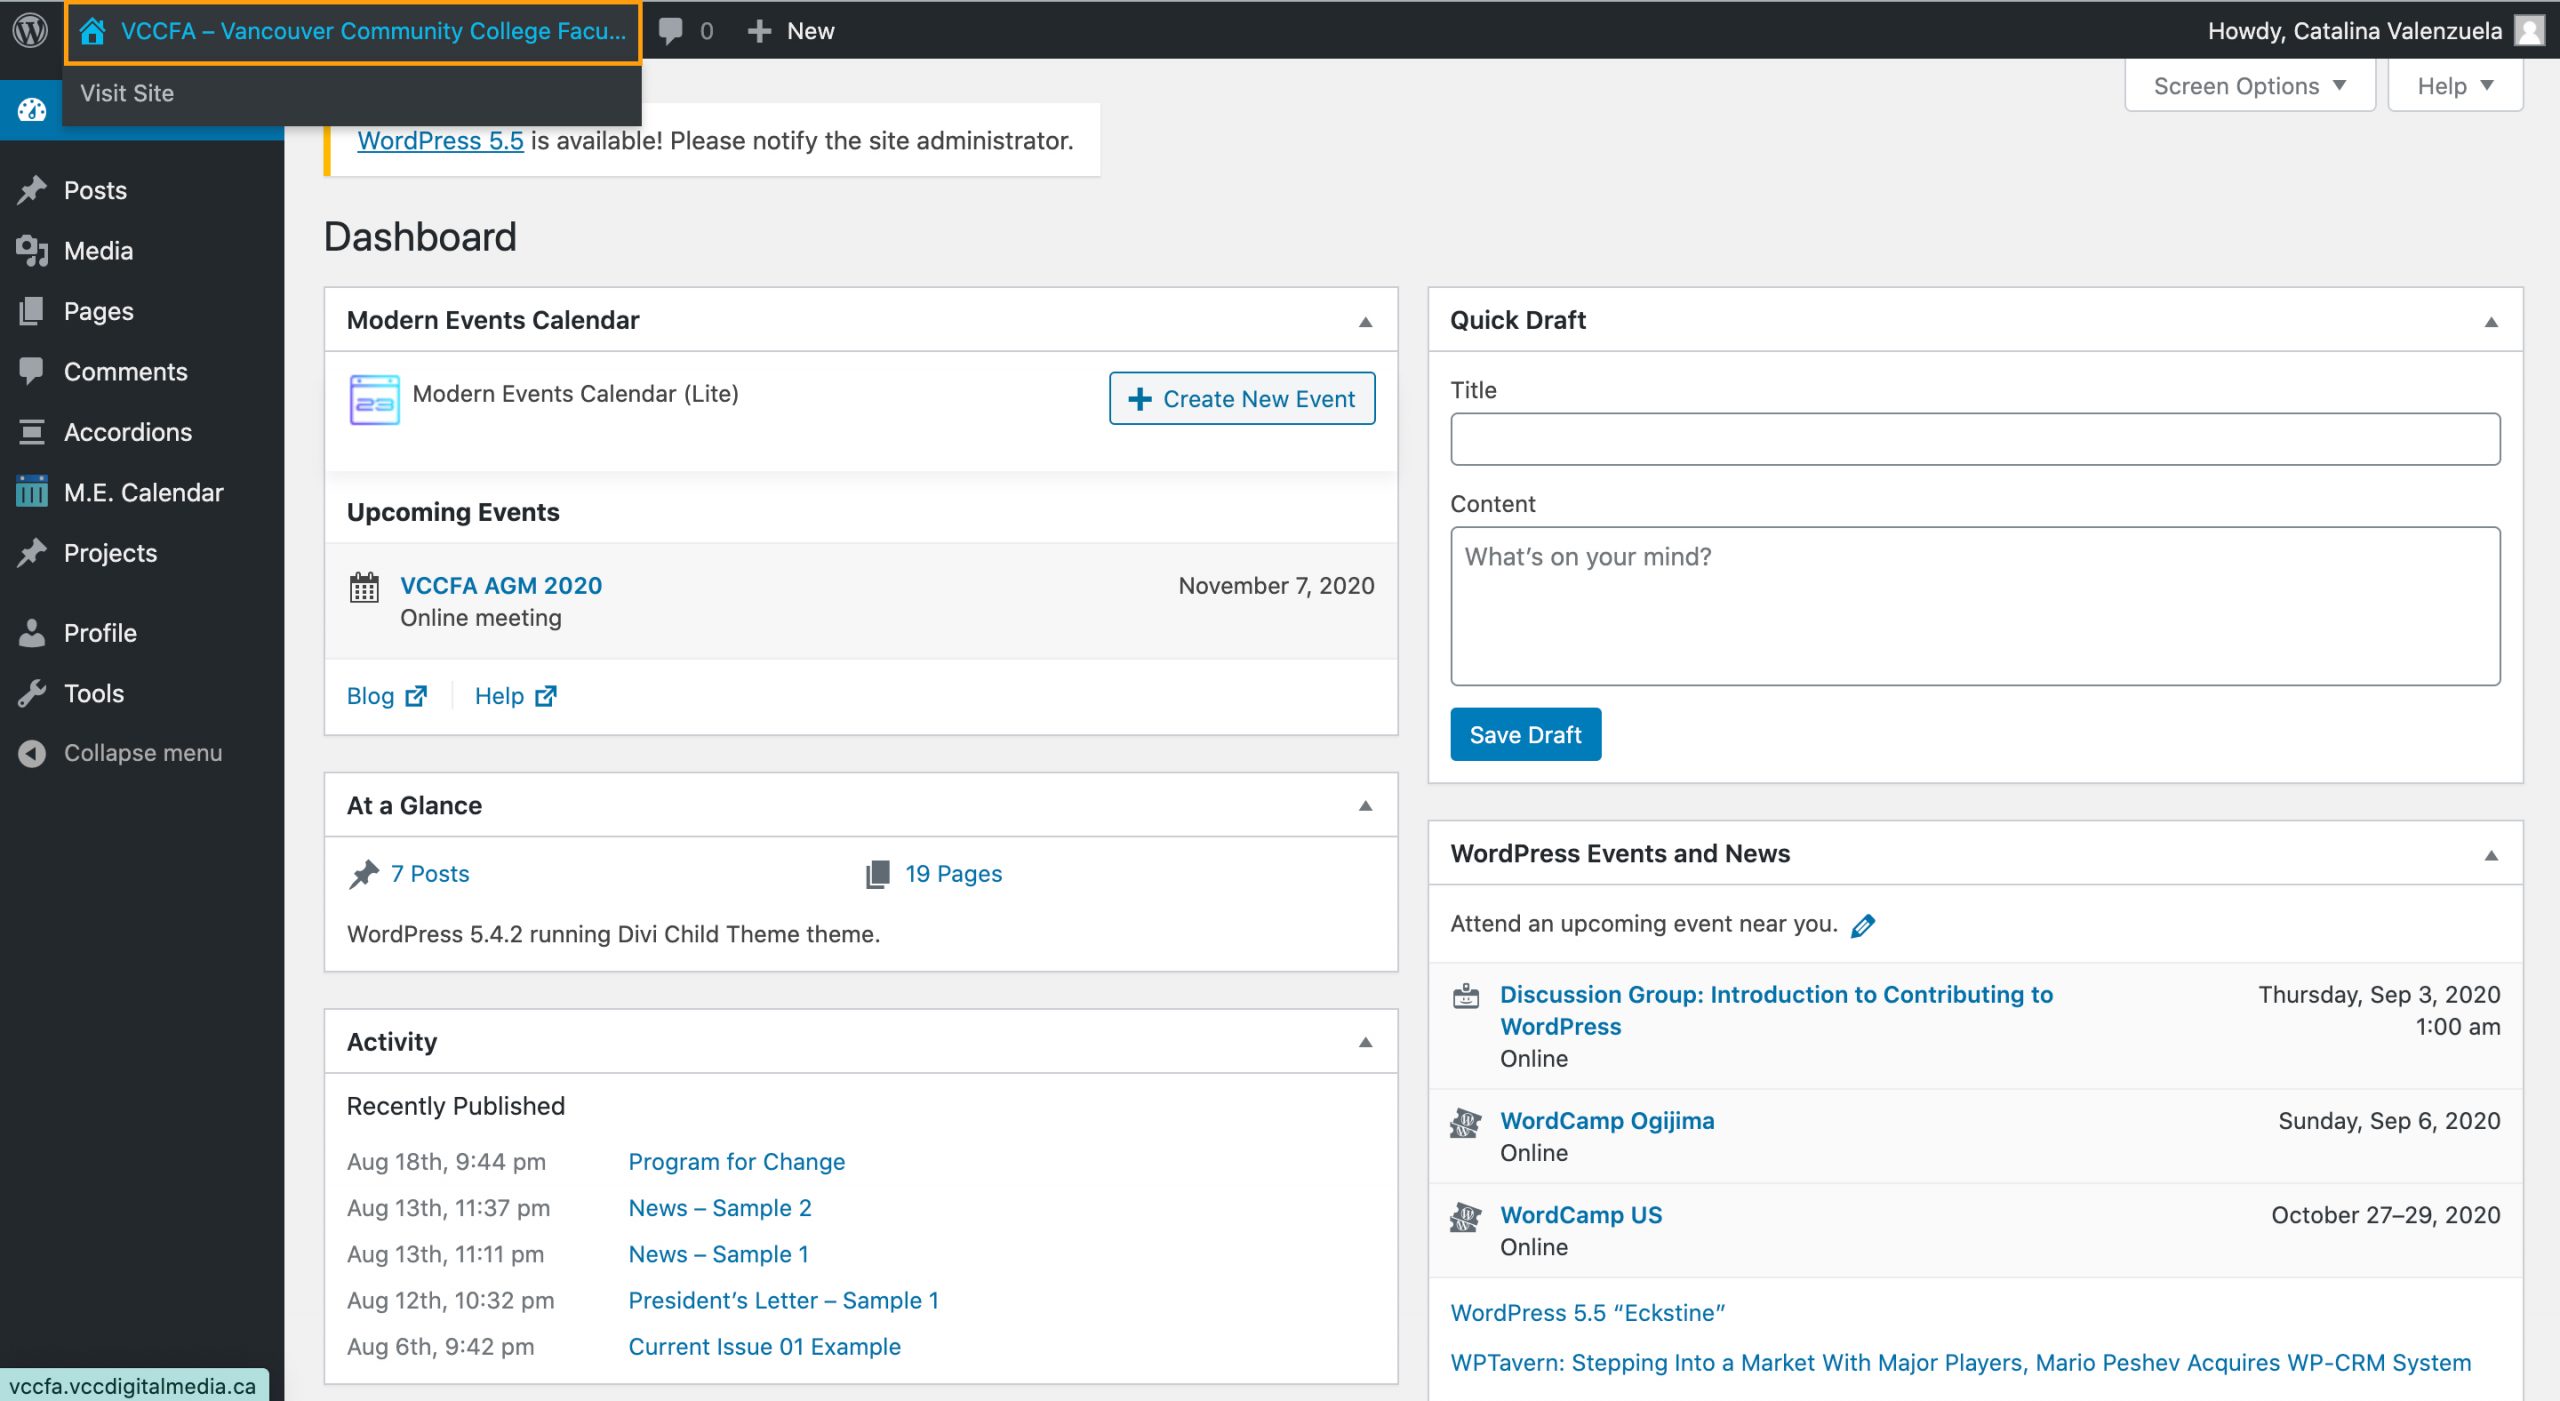
Click “Visit Site”

You will be directed to the site. From here, go to the page which you wish to update.

In this case, we’ll be updating the “Contact” page. Here, click the purple button up top that says “Enable Visual Builder”

This is where the magic happens. As you’ll notice, each section lives within another one. Identify where the text you wish to update is, and as you hover over, click the section that most closely contains it. In this case, the contact info I’m updating here lives in the grey area.

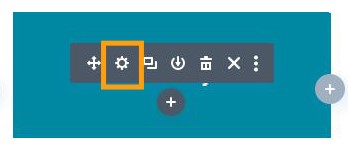
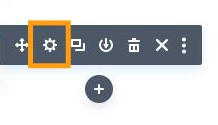
Click over the area you are updating and you will get a set of options. You want to click the gear icon that’s called “Module Settings”.

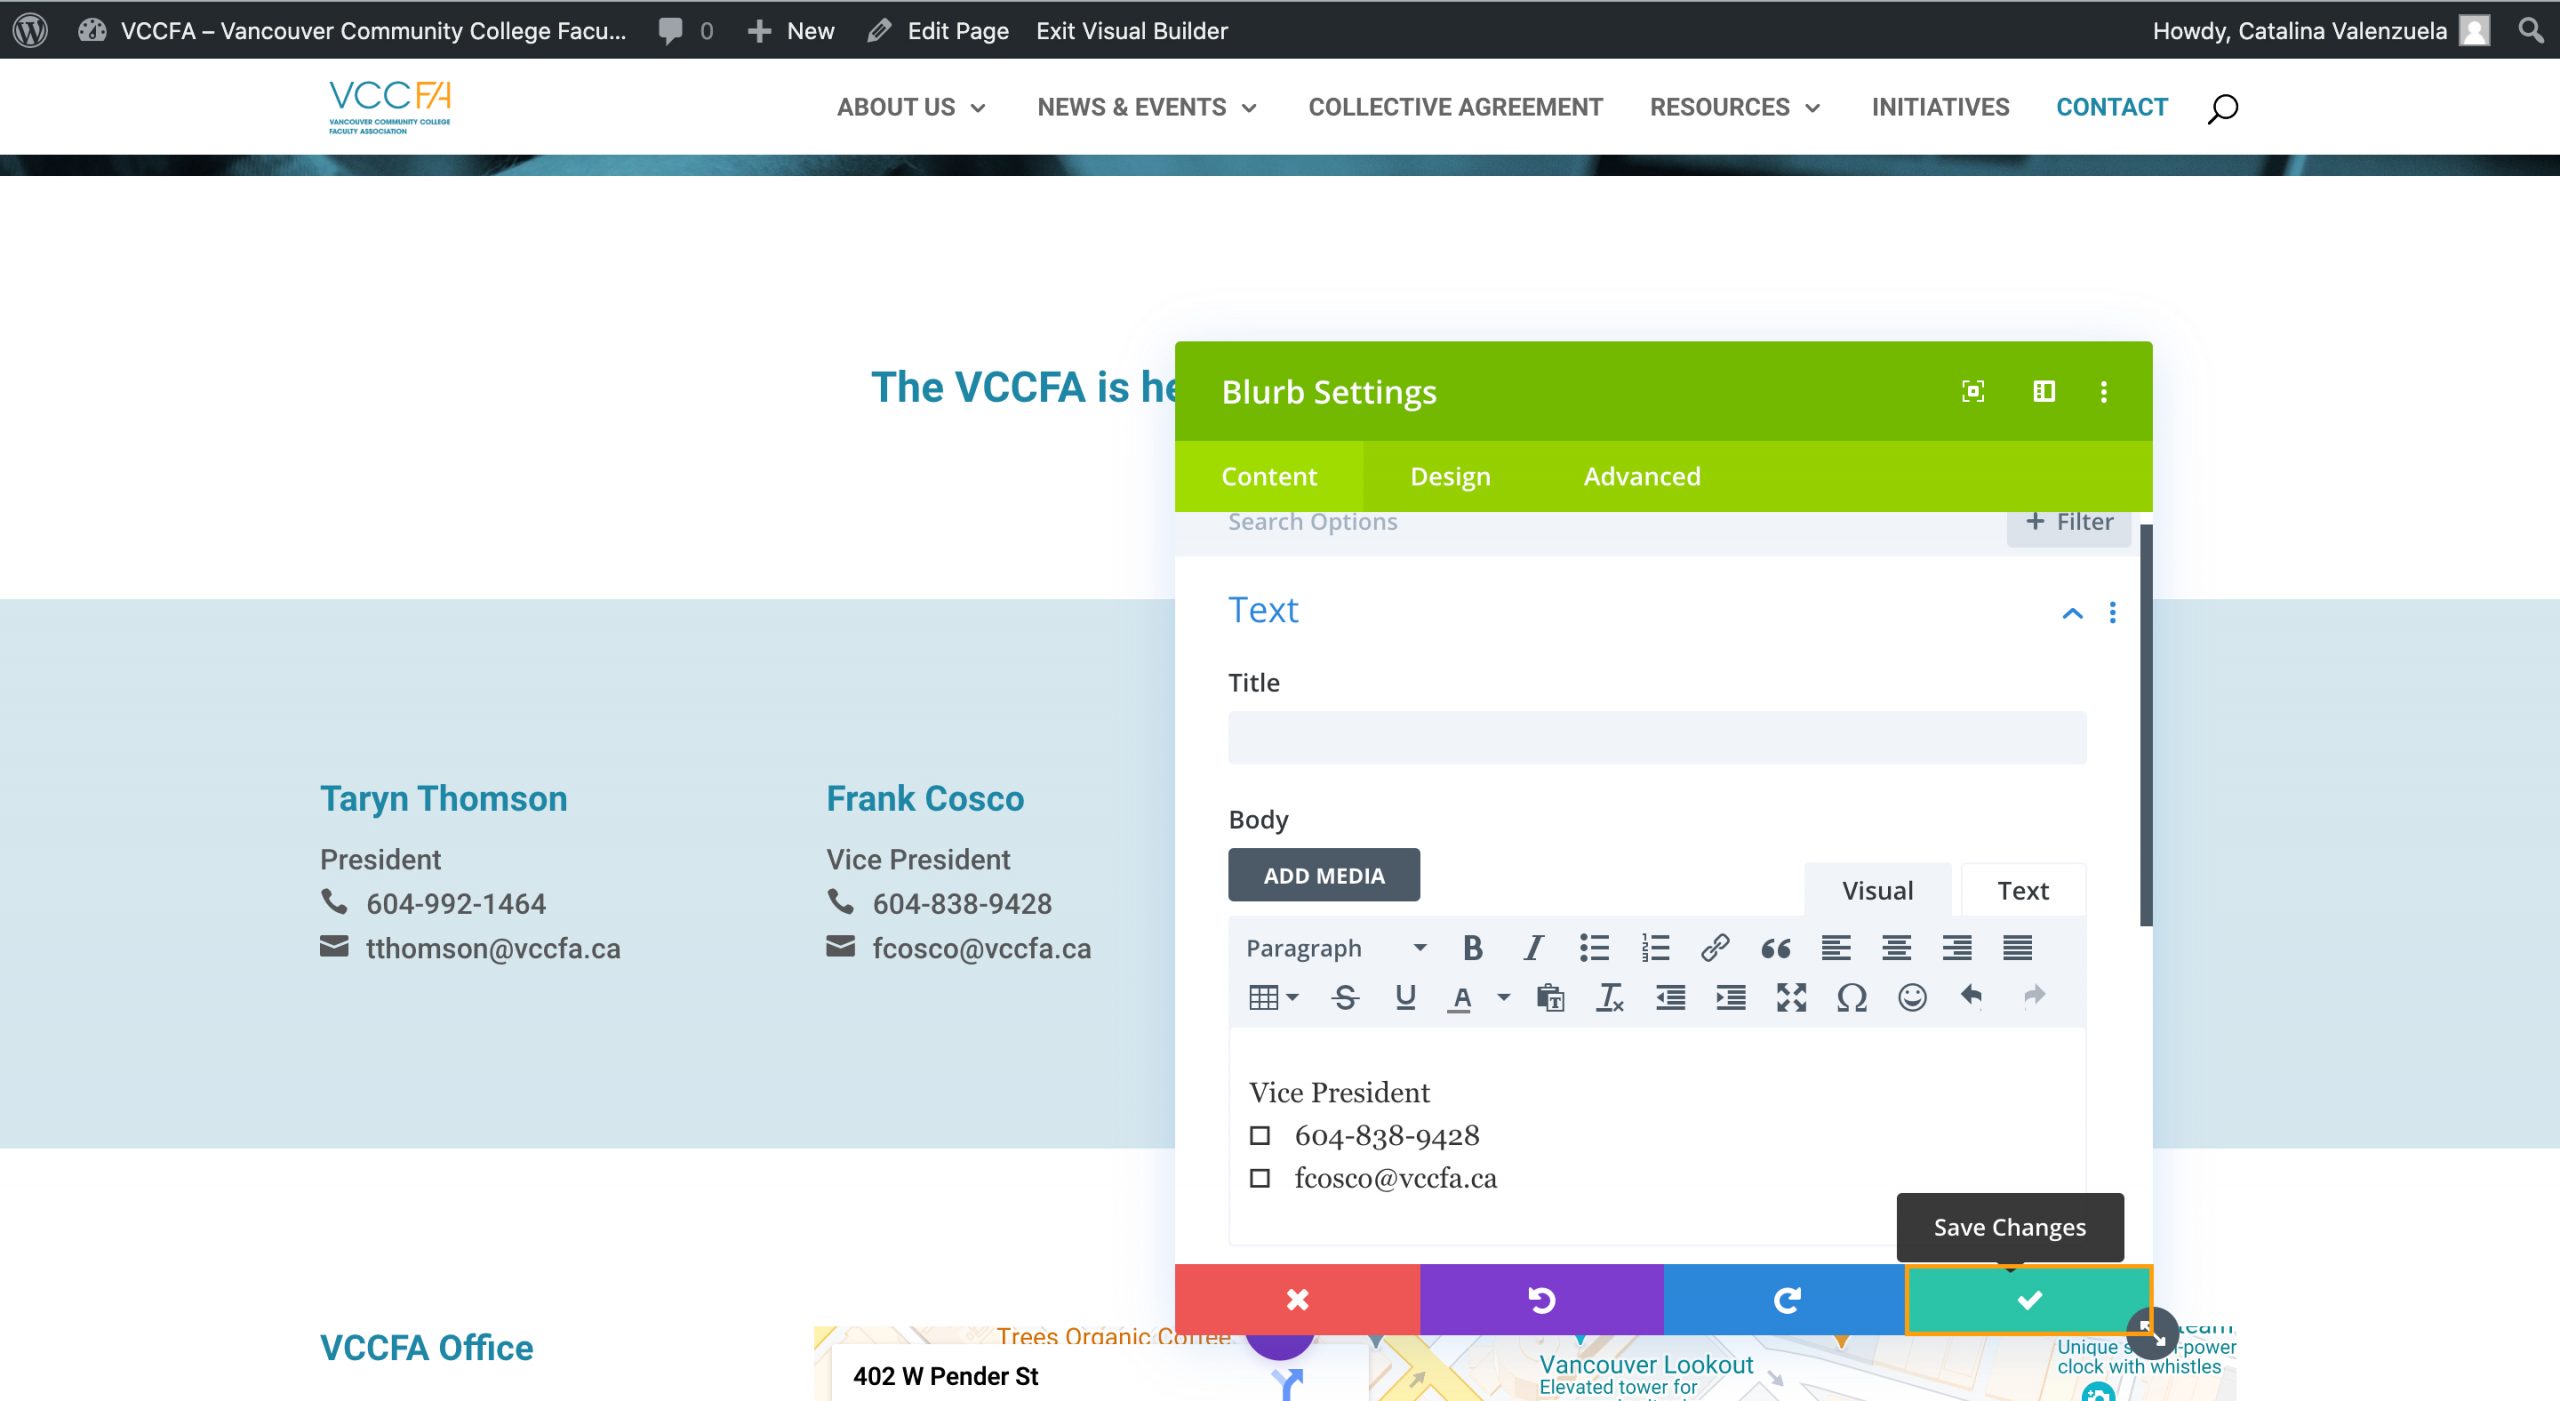
A window will pop up with the section’s styling. Don’t worry about all the options here, just change the text you need to change and click the check button.

Make sure to click the check button in order to save your changes.
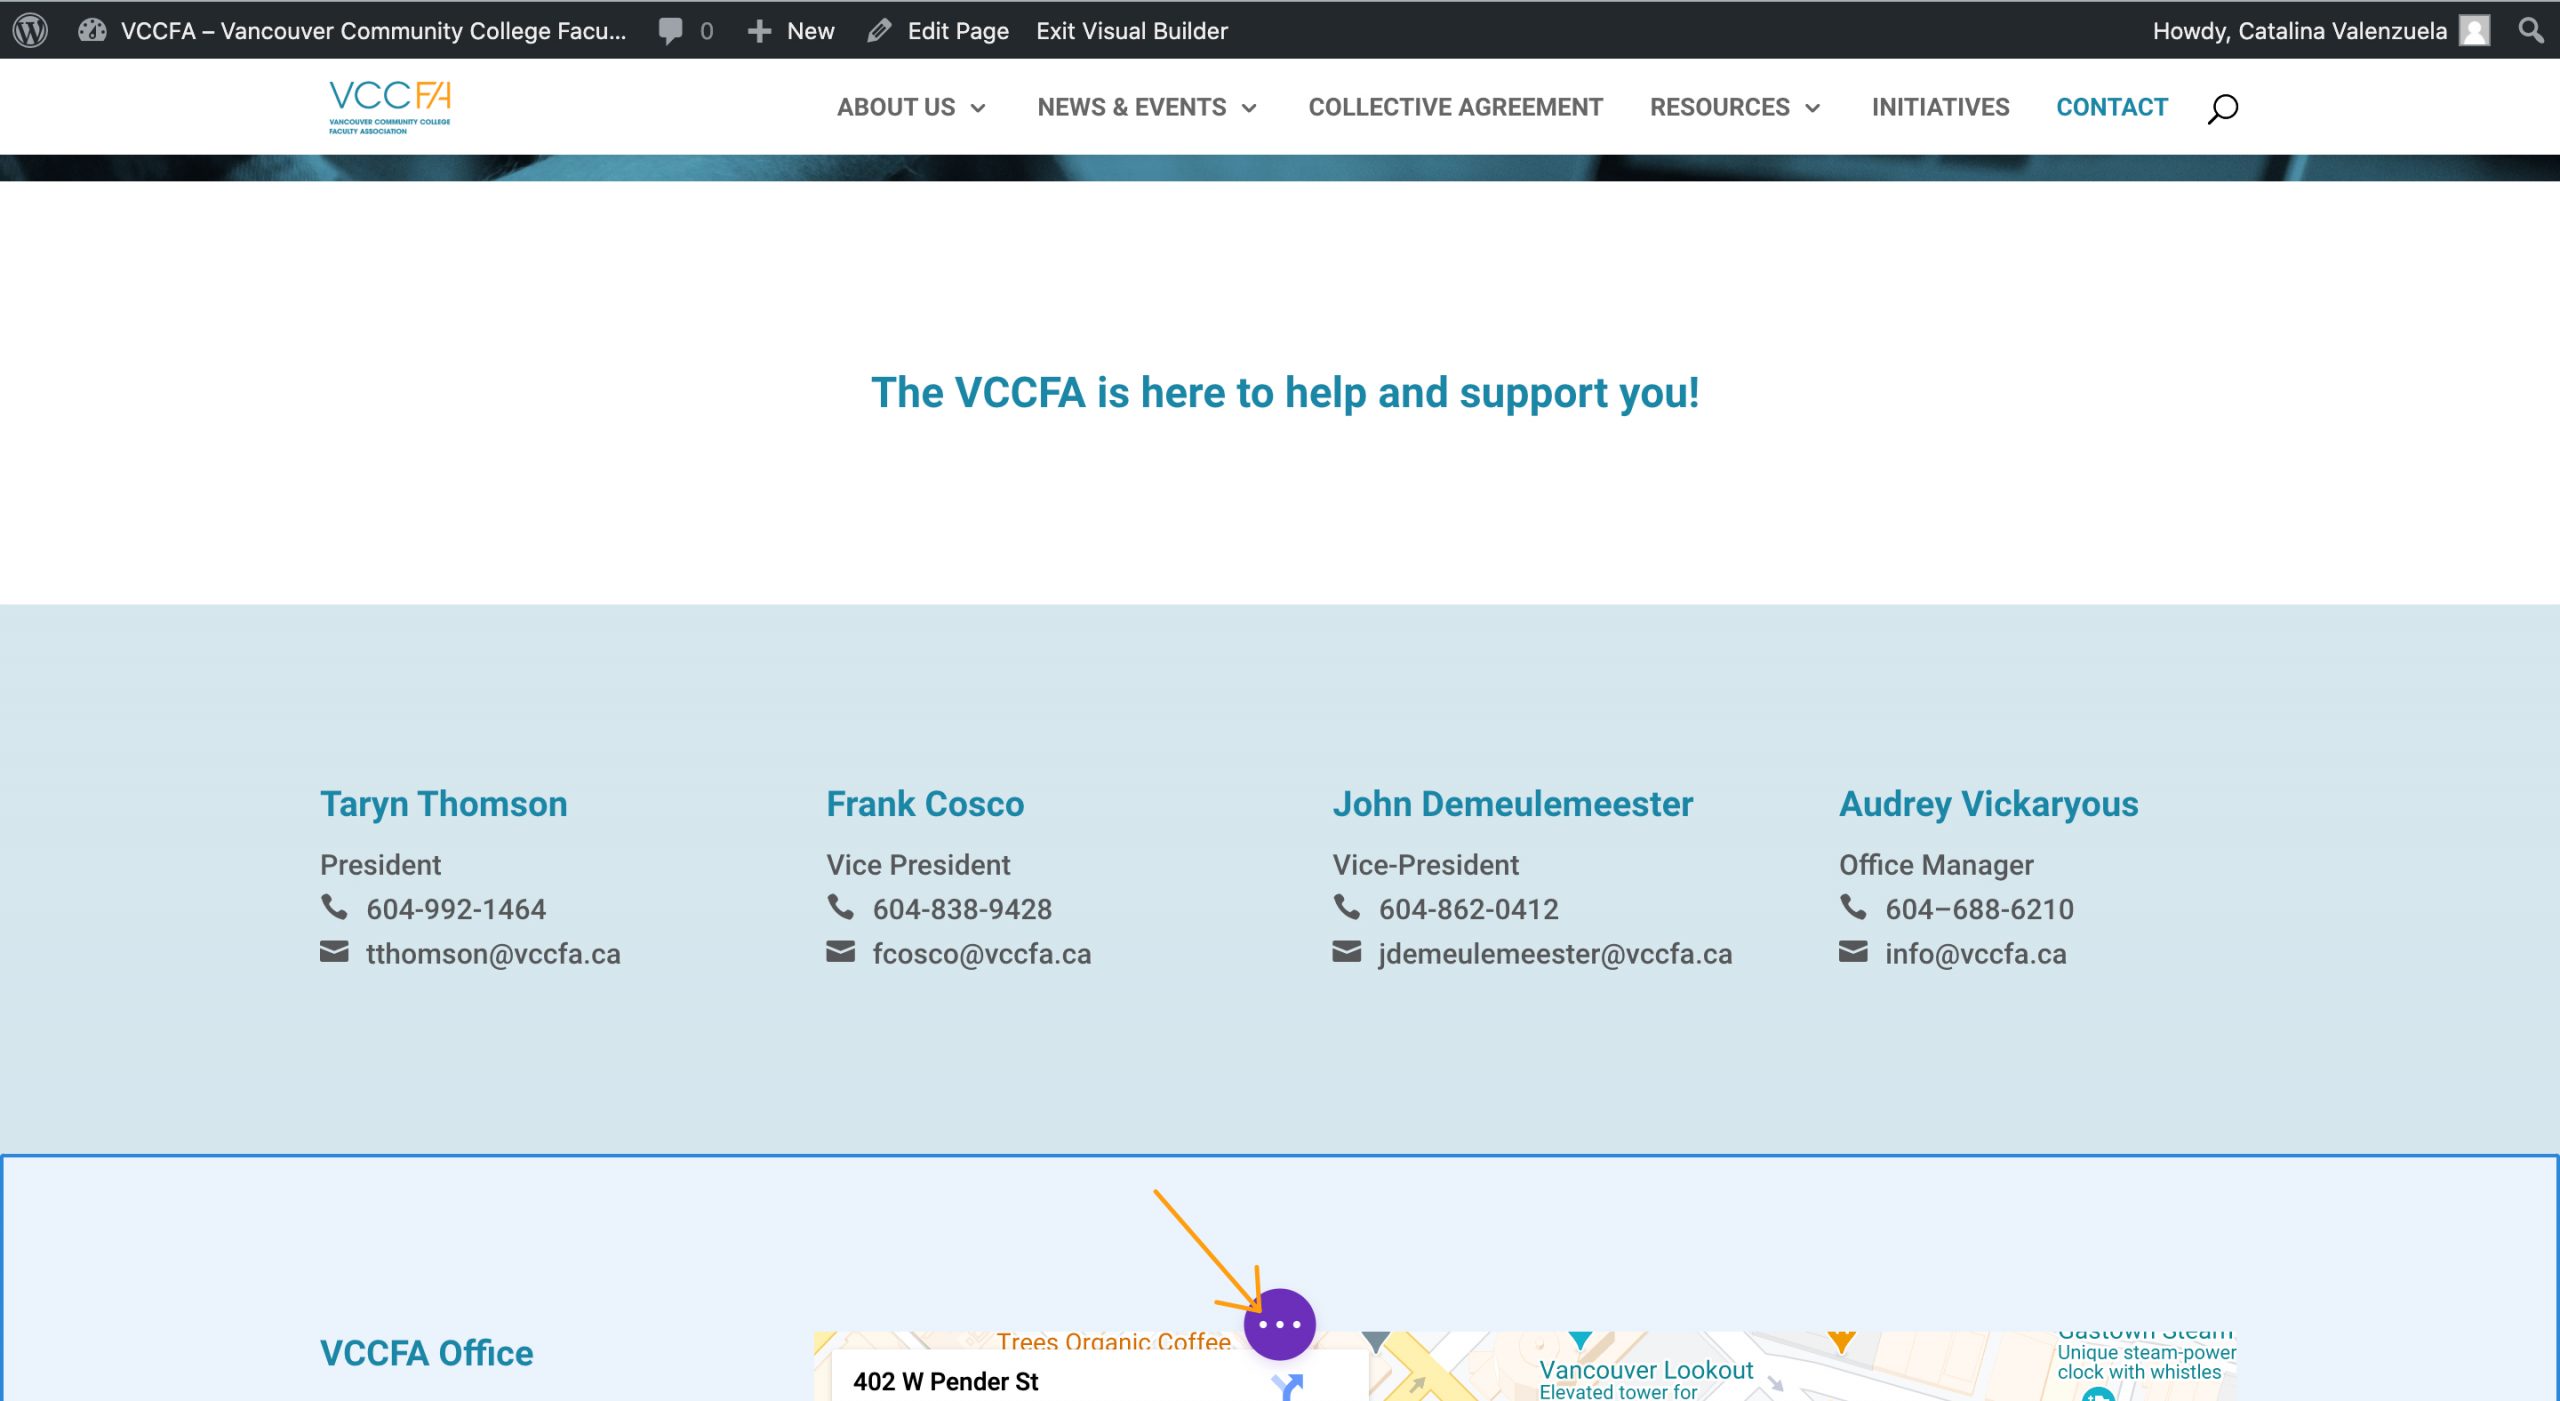
Now in order to finalize, go the purple circle with the three white dots at the bottom middle of the page.
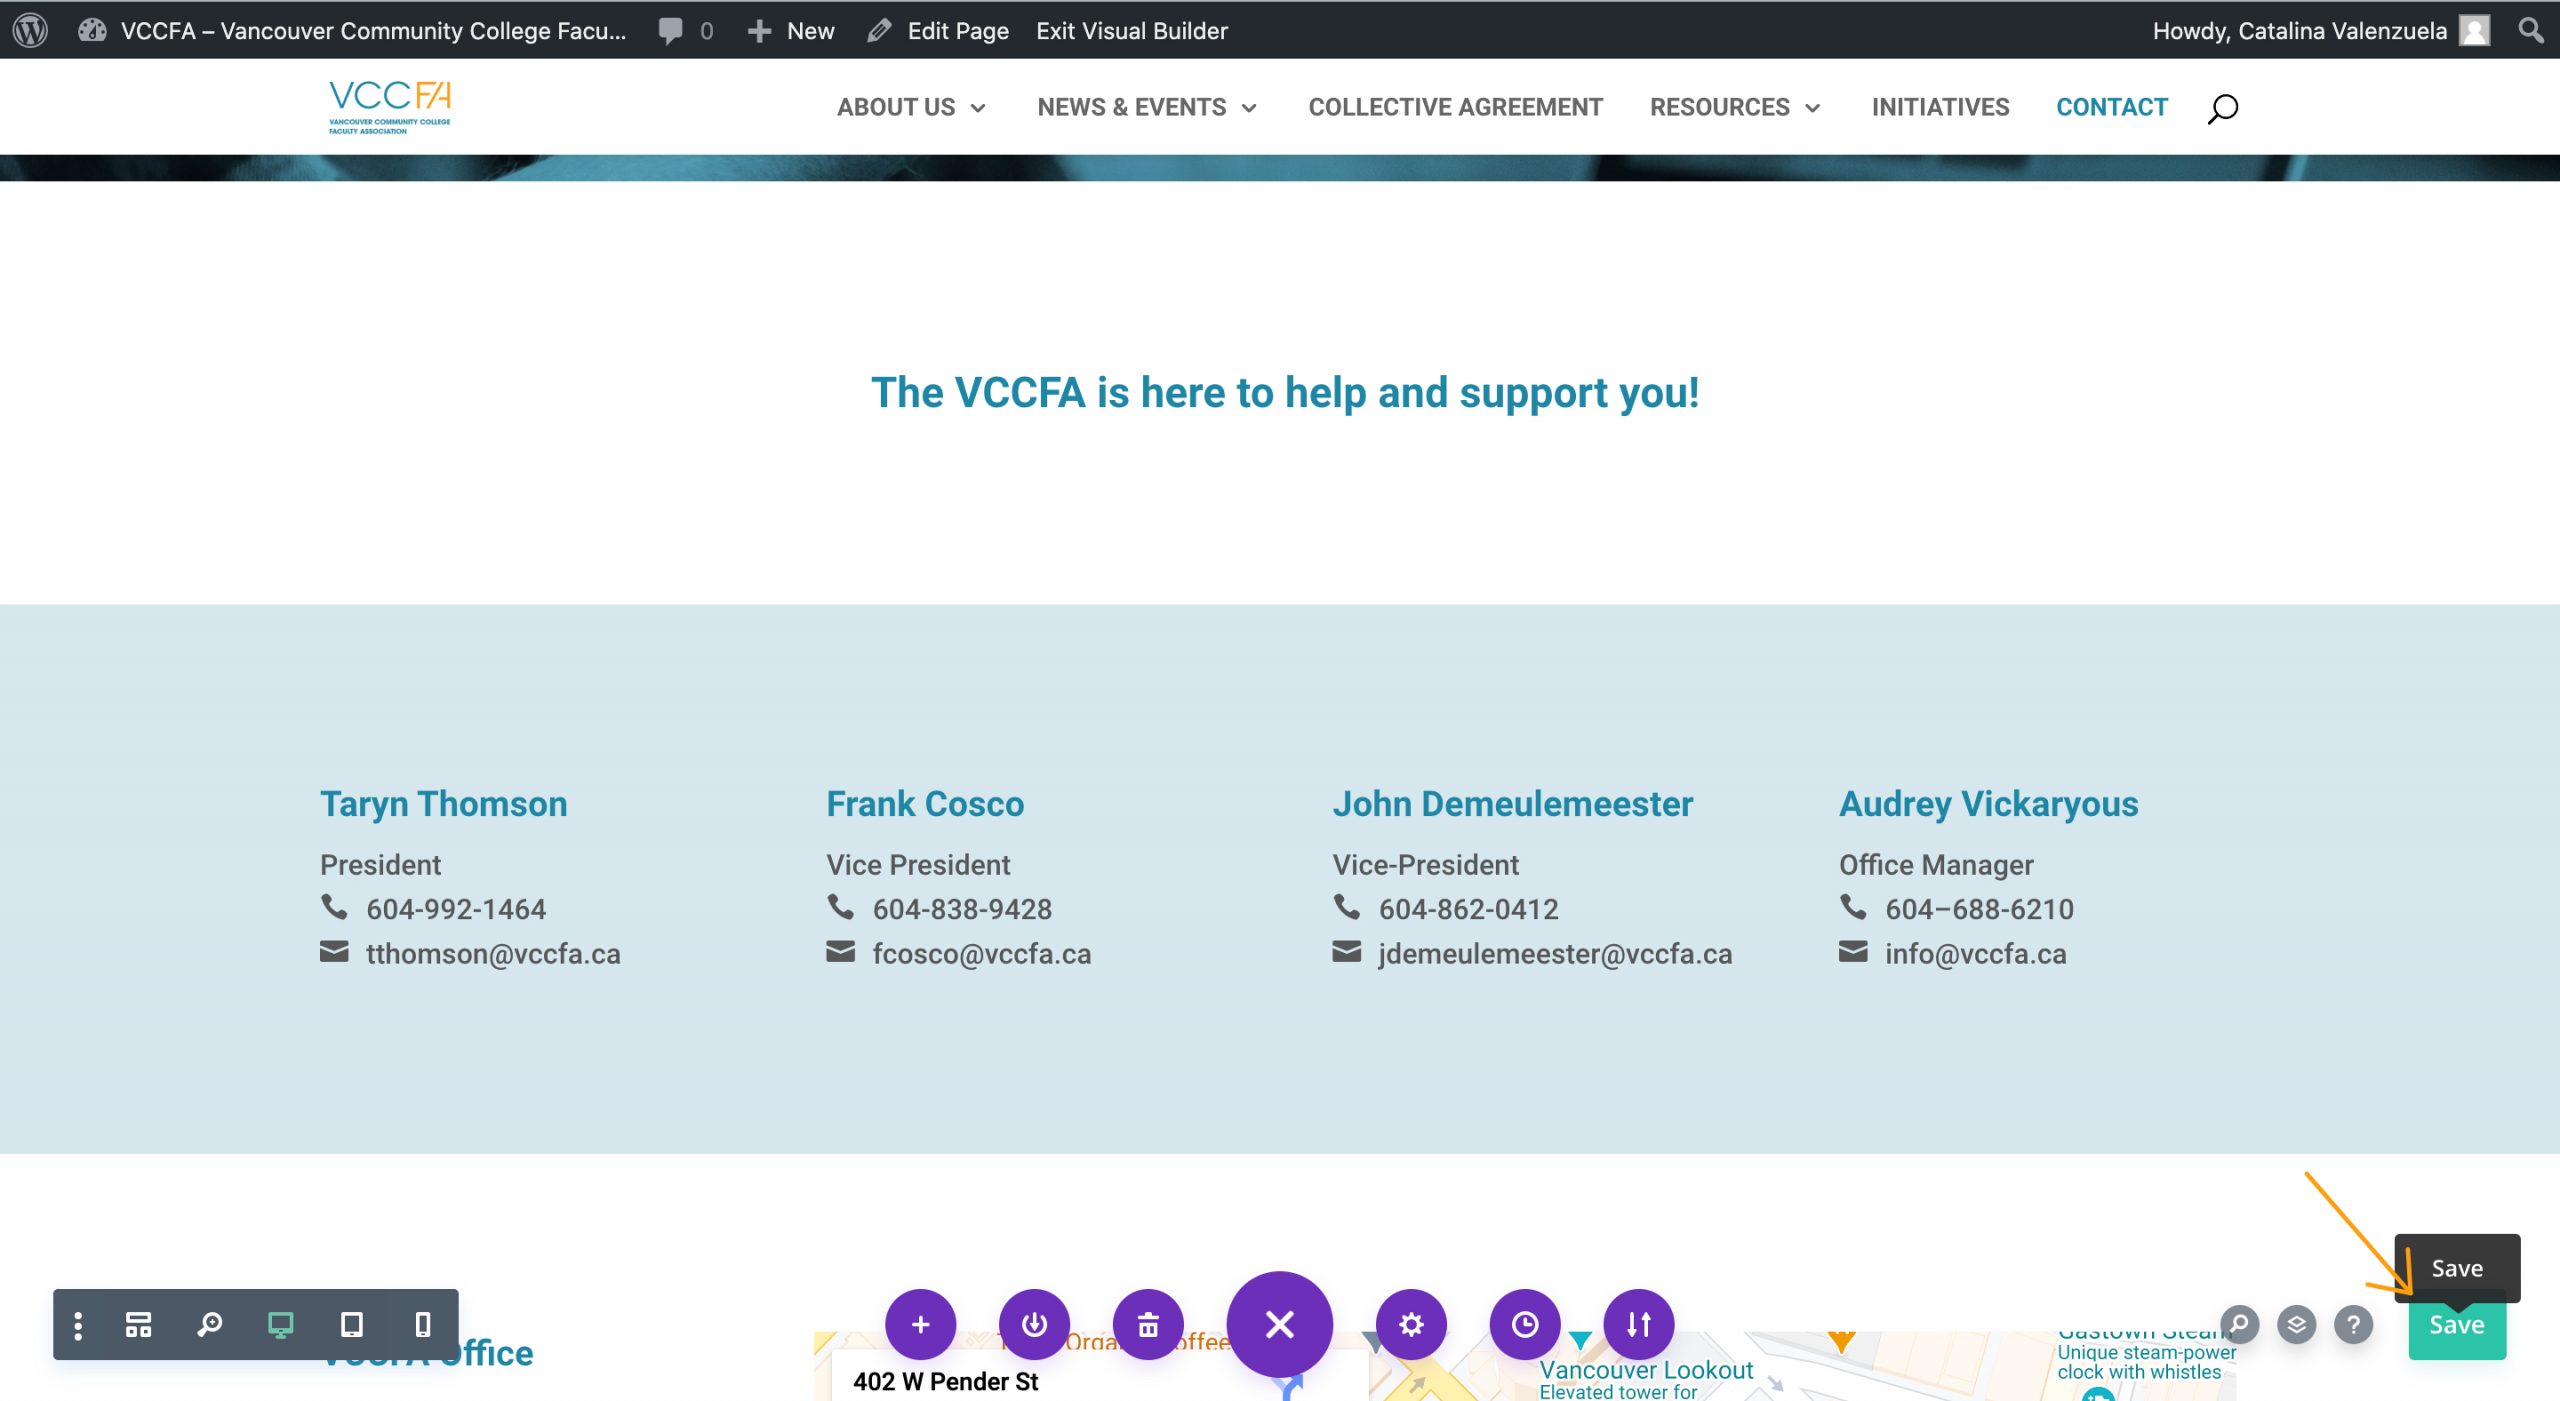
Click it. Now a “Save” button will appear at the bottom right corner. Click “Save”.
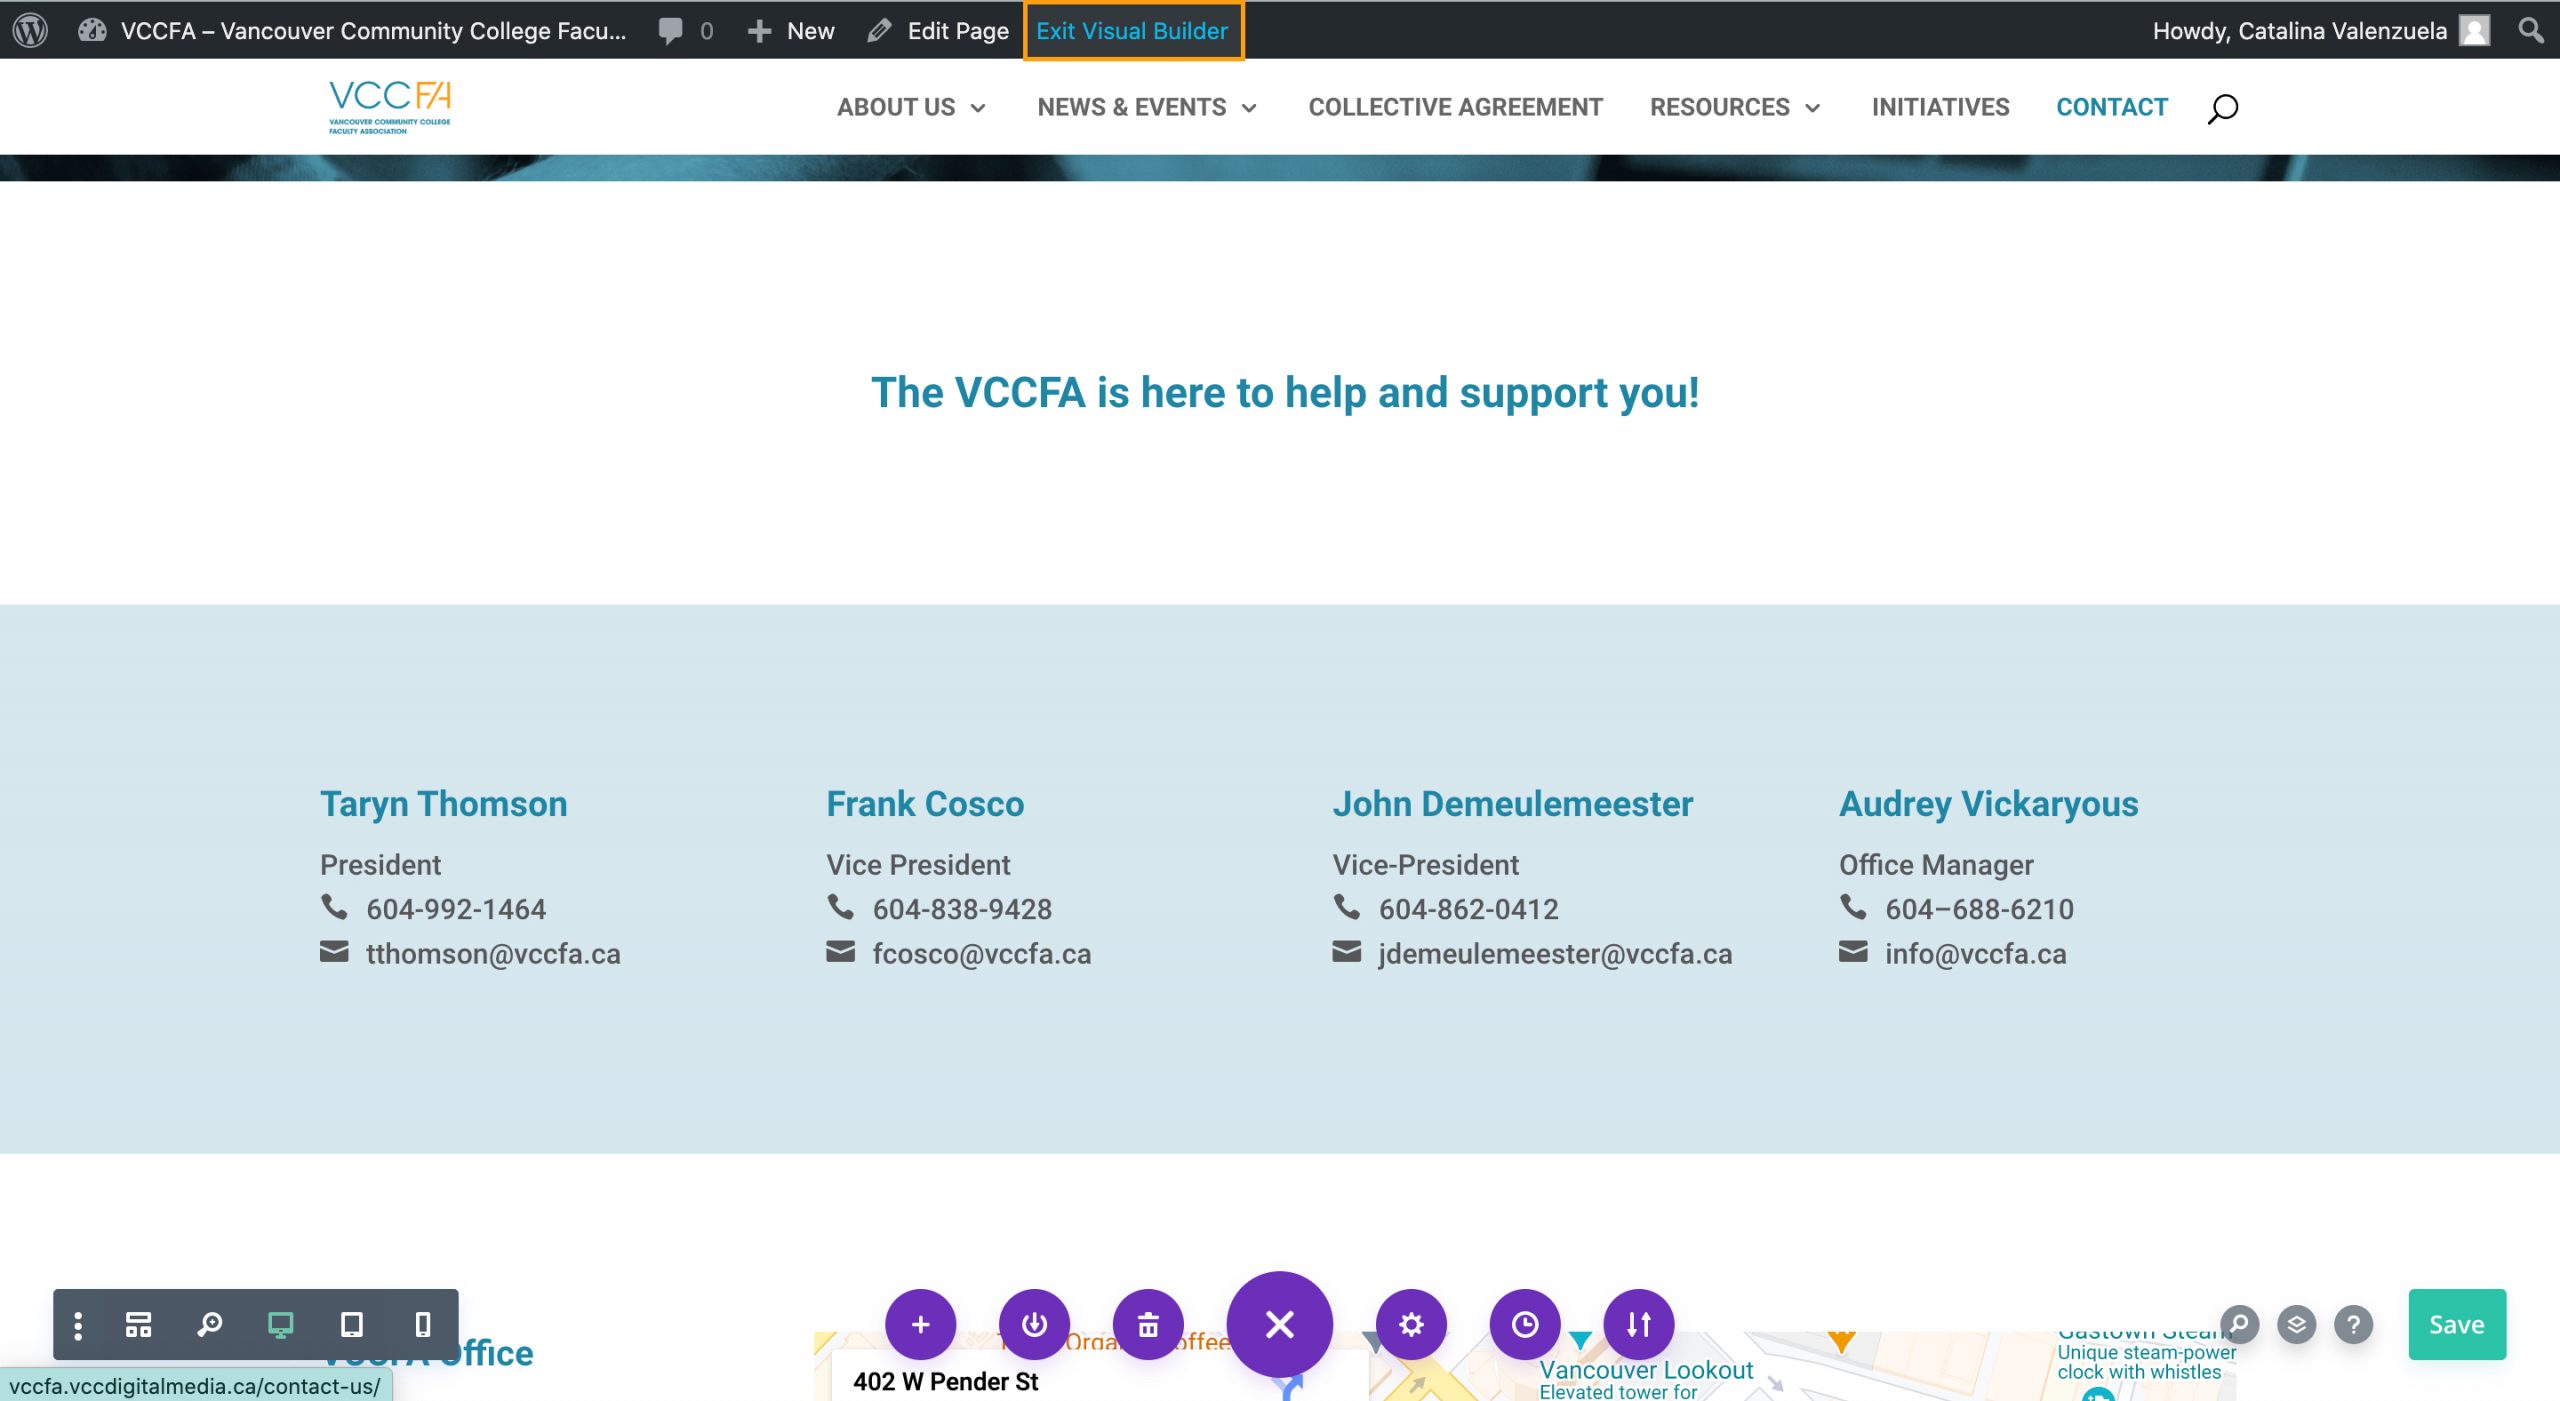
Now we are done and we can exit the visual builder. Go to the top of the page and click on “Exit Visual Builder”.
You did it!, now you can click the home button at the top left corner to go back to the dashboard.
7. How to Update Footer Contents
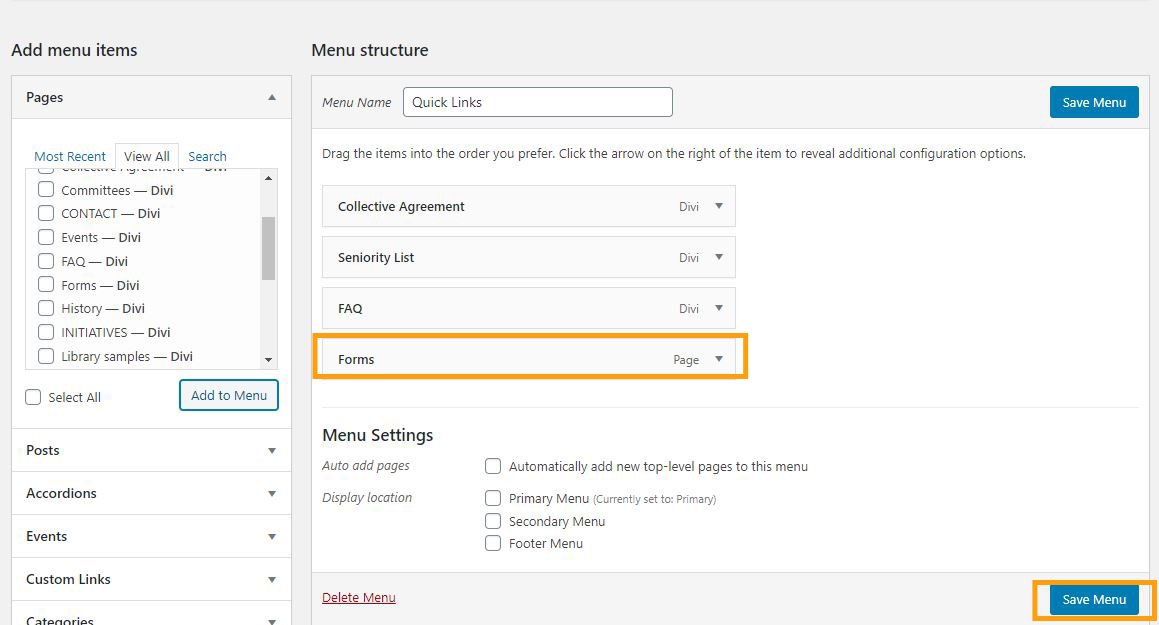
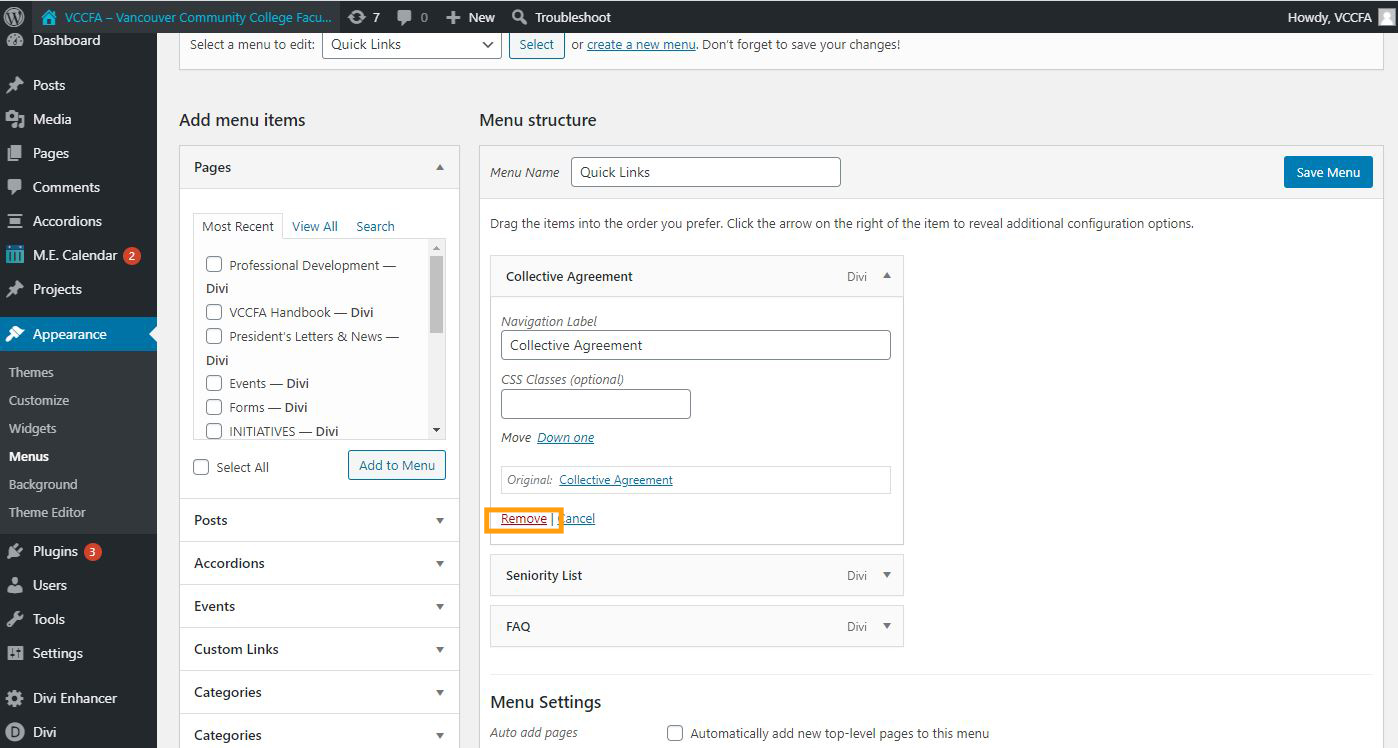
7.1. Edit Quick Links
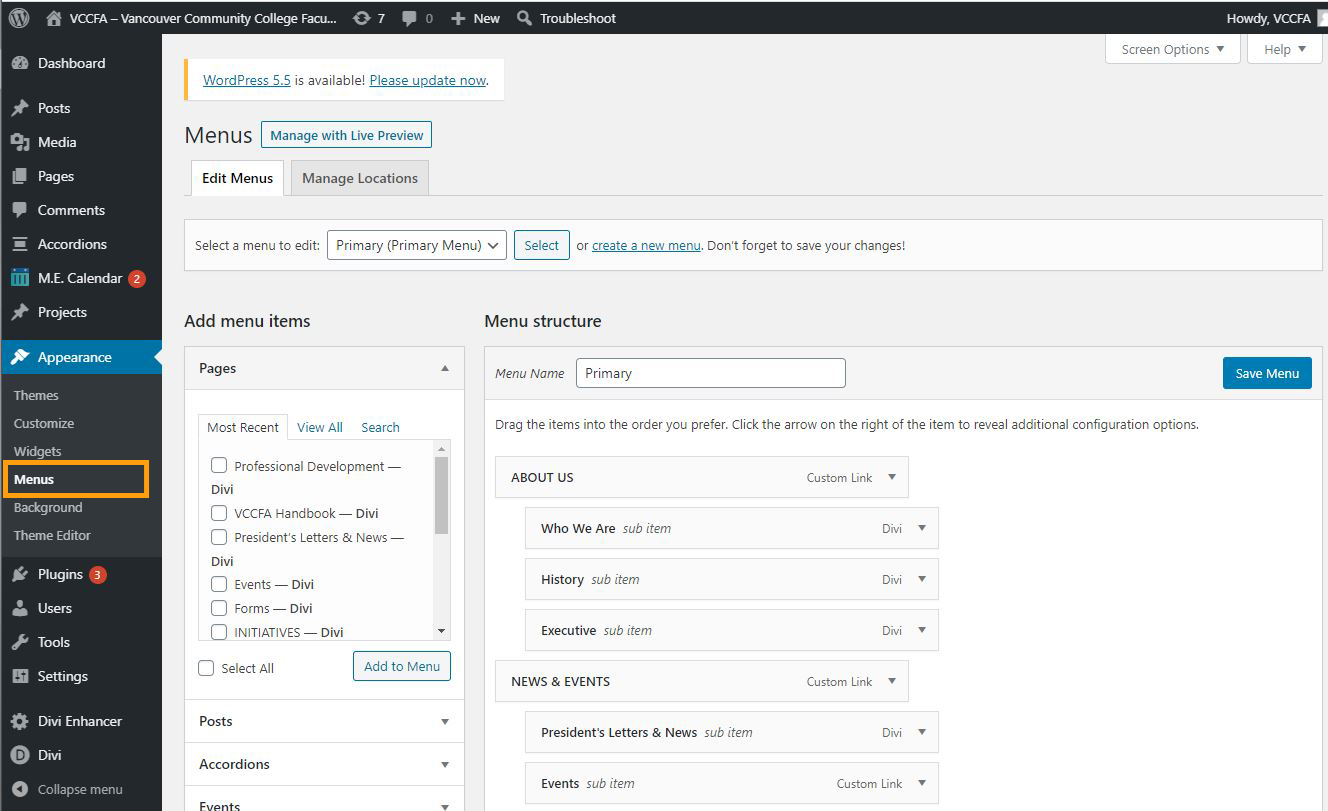
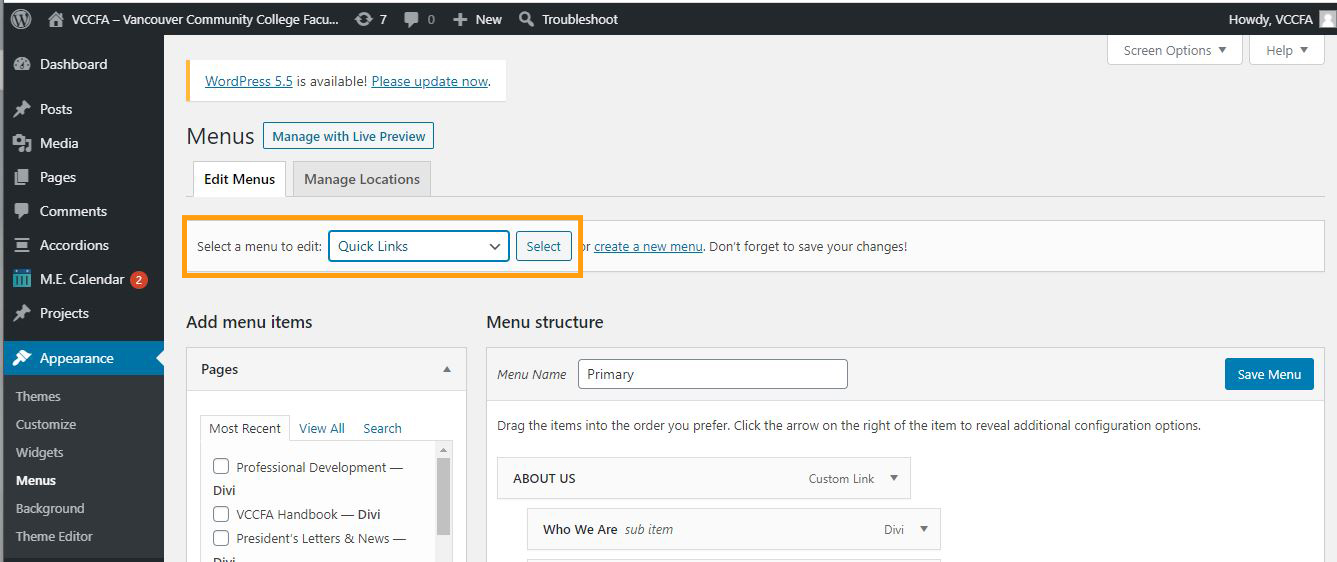
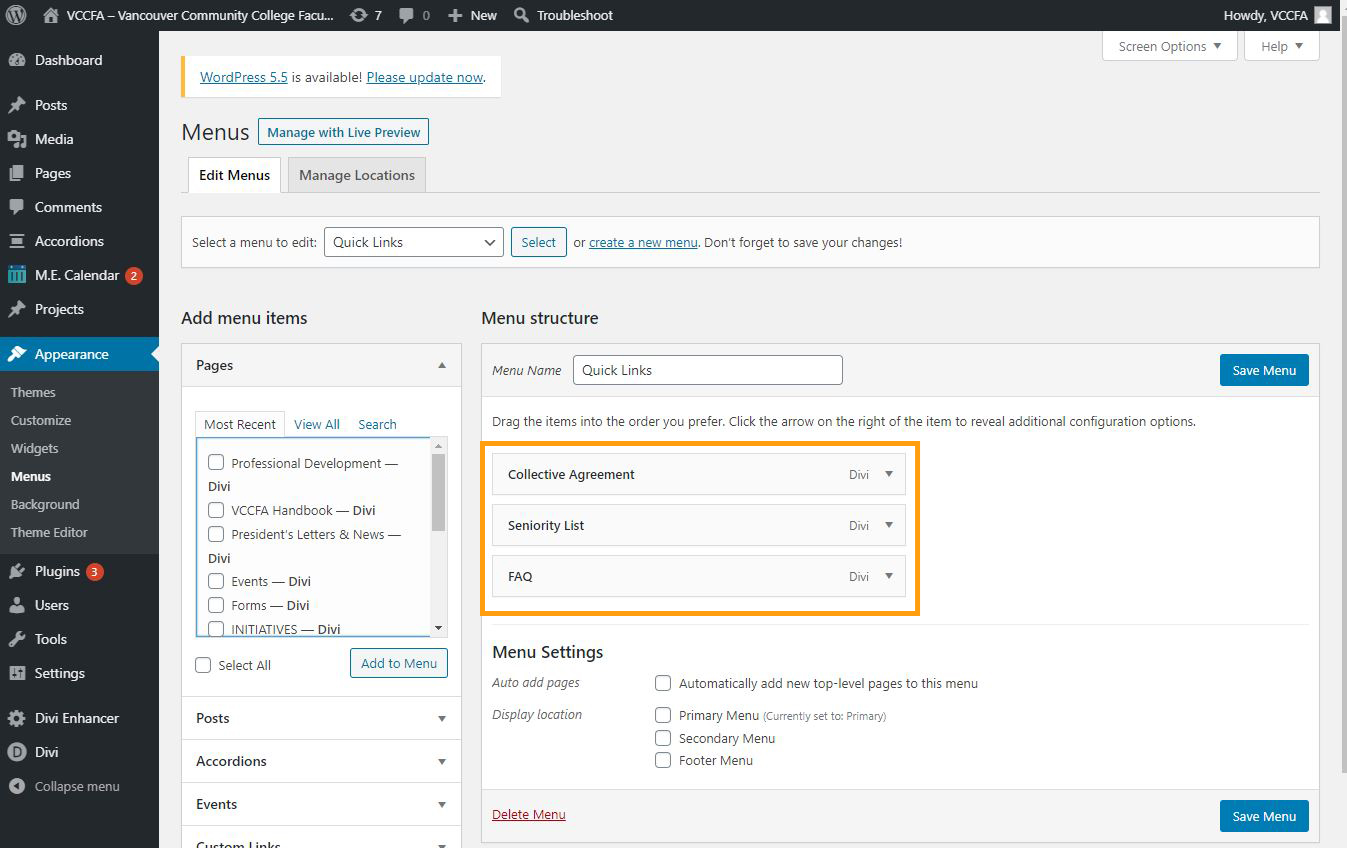
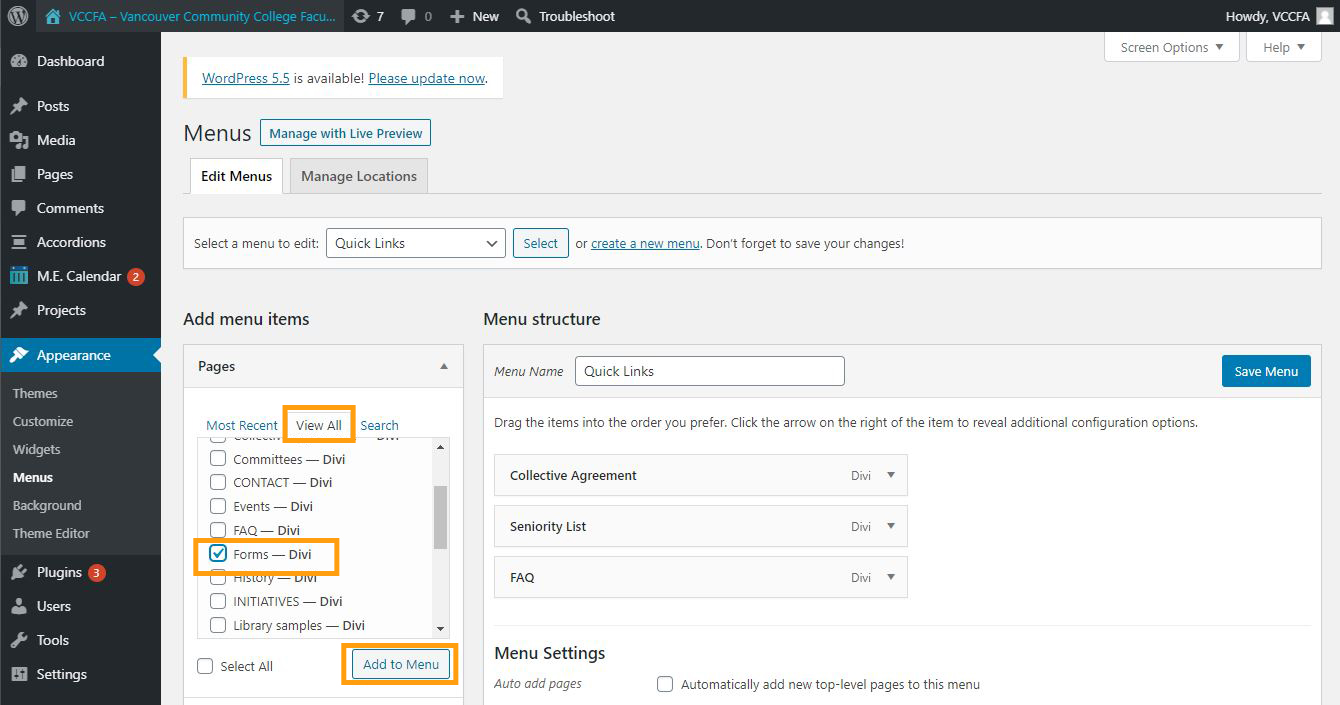
To edit the quick links, Go to ‘Appearance’ > ‘Menus’ menu, where you can manage the menus on the header and footer.
7.2. Edit Address
8. How to Restore a Page
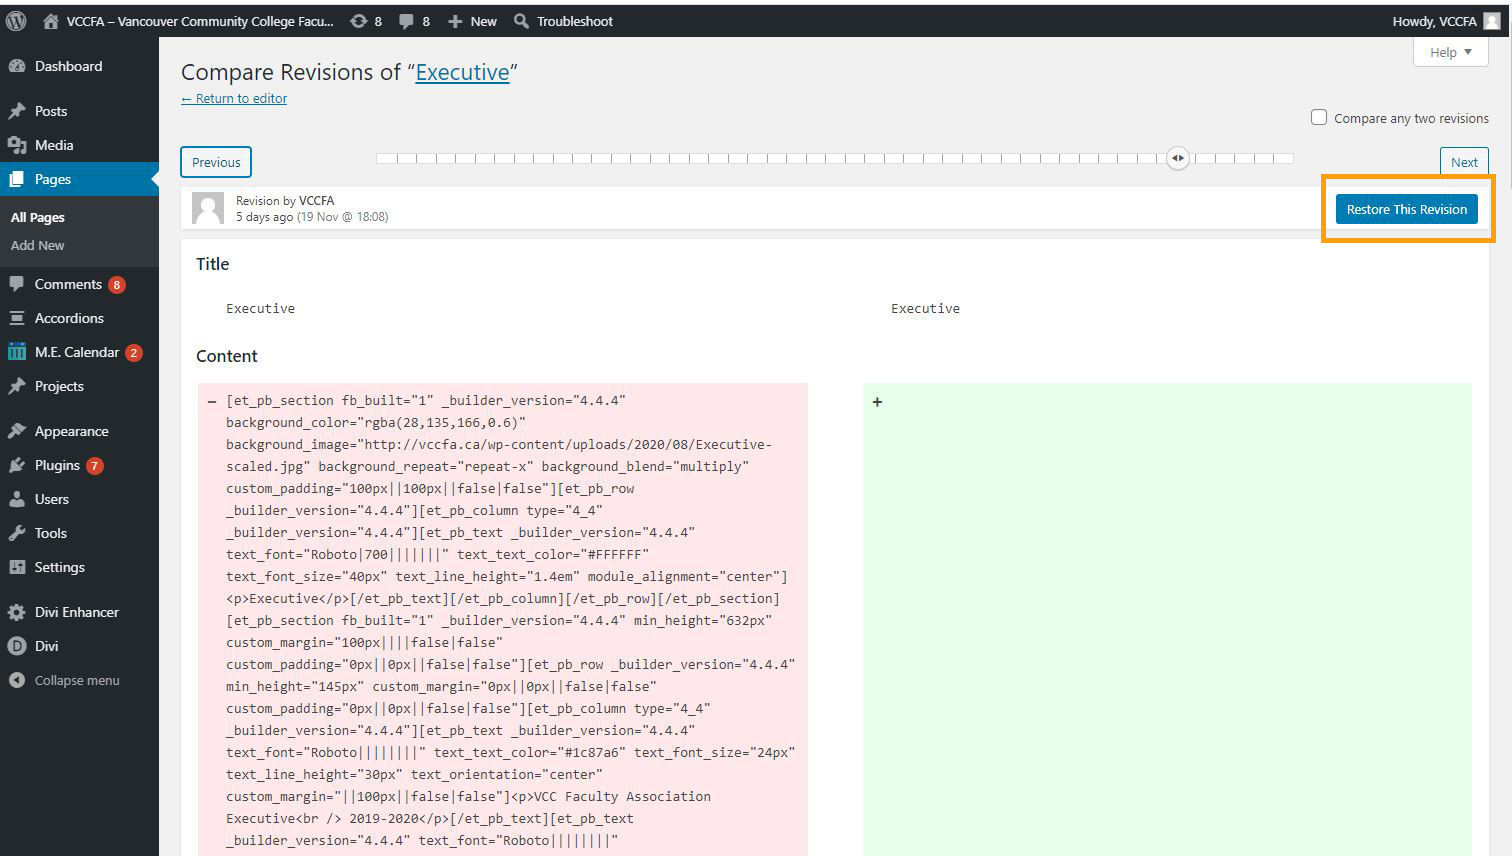
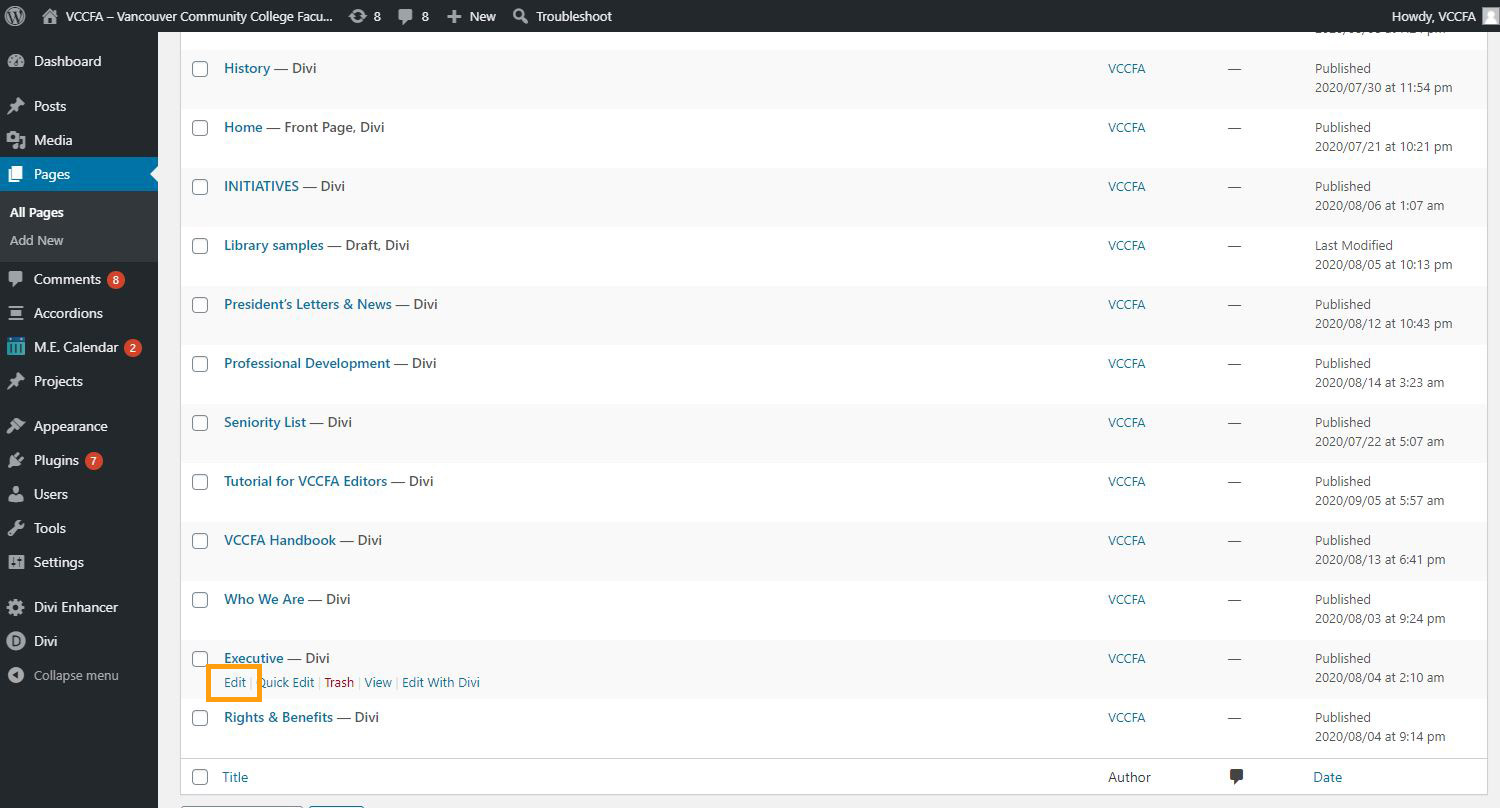
On the Page list, click the ‘Edit’ button on a page you would like to restore.
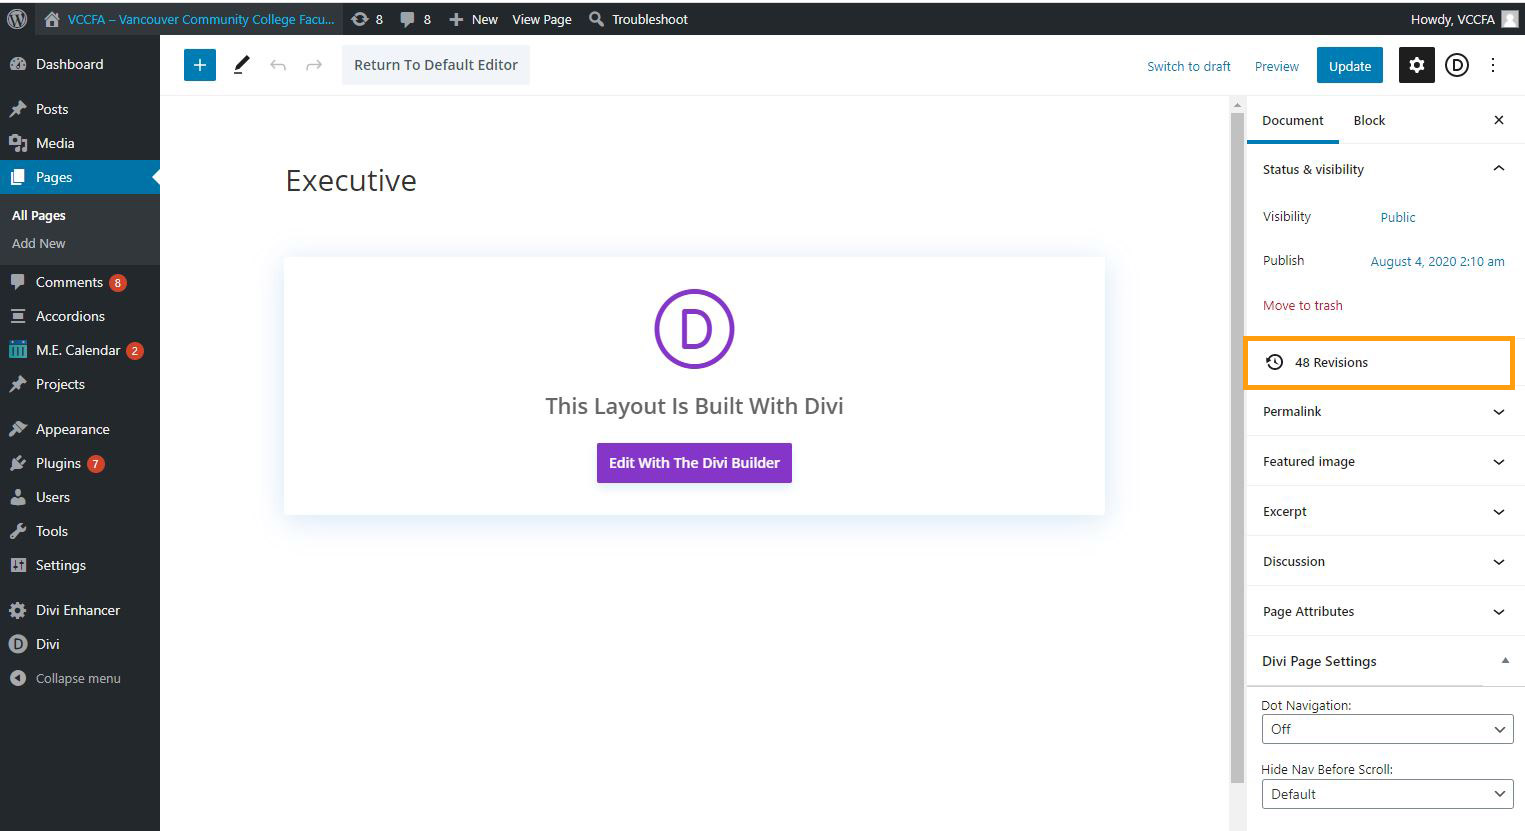
Click “Revisions” menu on the side menu.
You will see all revisions in the past. Click the ‘Previous’ button and go to the revision you would like to restore.
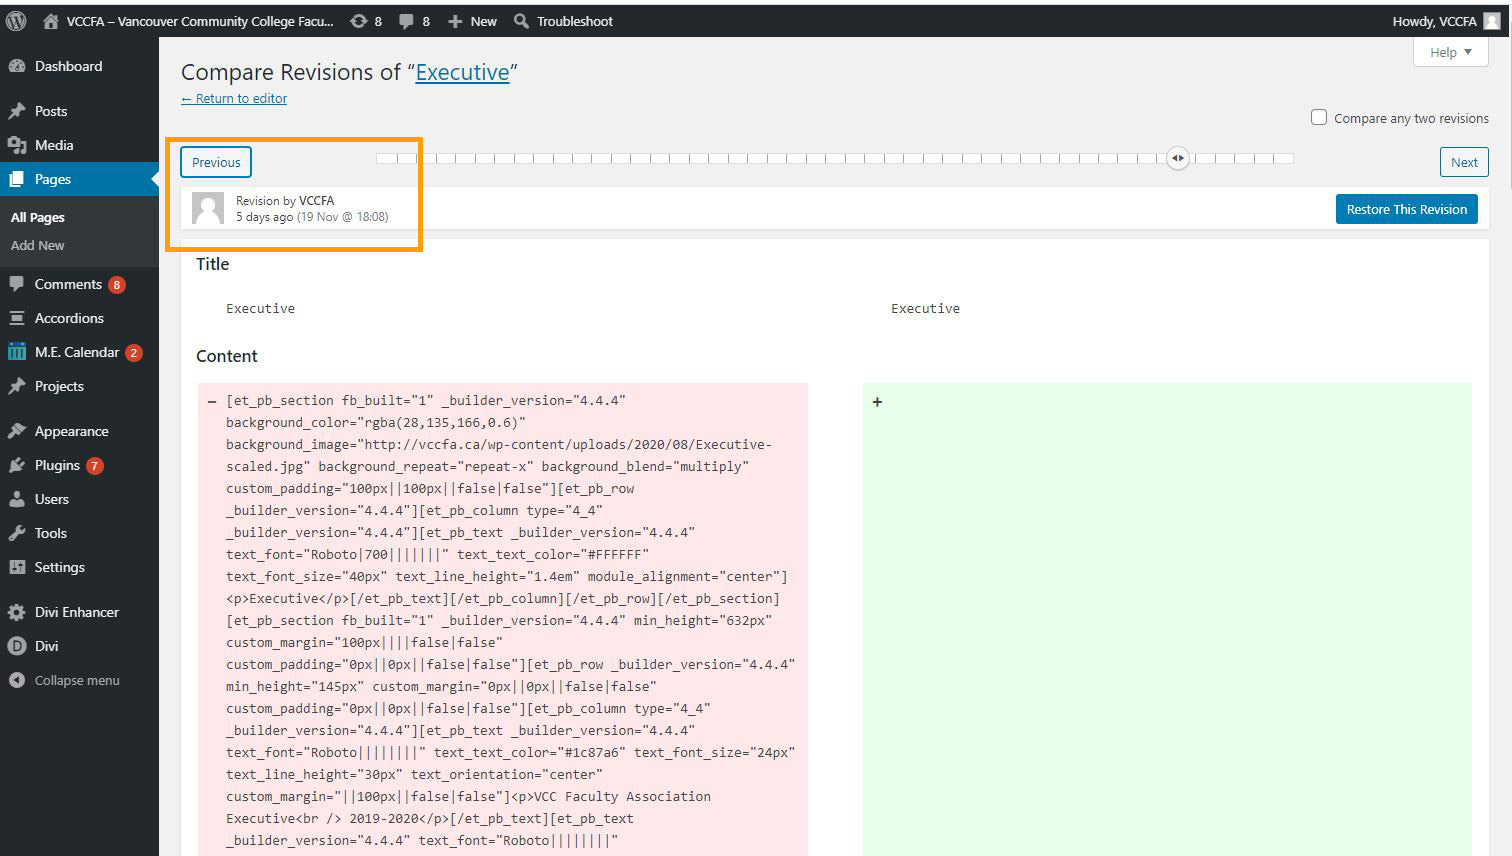
Click the ‘Restore This Revision’ to restore the page to update it.
